Inhaltsverzeichnis
In some scenarios, we may need to ask users for double confirmation when they click on the “finish” button of a business process flow (BPF) and only allow the process to finish after explicit confirmation.
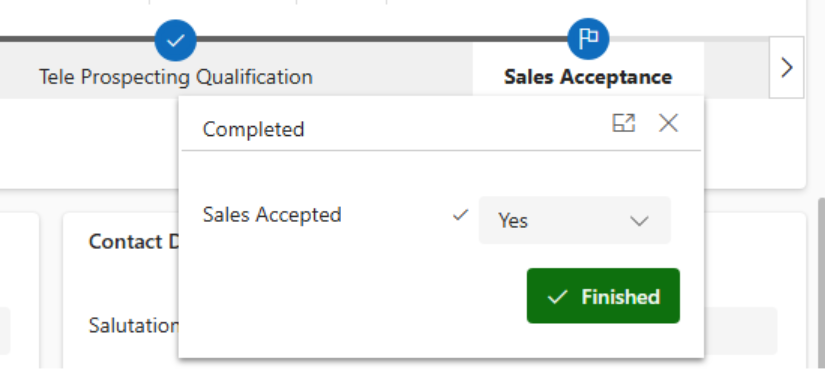
This blog will show how to use JavaScript code to customize Model-Driven Apps and show users a confirmation dialog before finishing BPFs (business process flow). It’s important to note that restrictions on forms built with JavaScript code are client-side validation, so it will only happen in the actual form that the code is added to.
Anwendungsfallbeschreibung
For this use case, we assume that we have a model-driven app for new suppliers that need to be created in the system and require approval from accounting and procurement teams. These two teams will approve or reject all suppliers and finally the master data analyst will come to the app and finish the business process flow to confirm they want to create the supplier in the system.
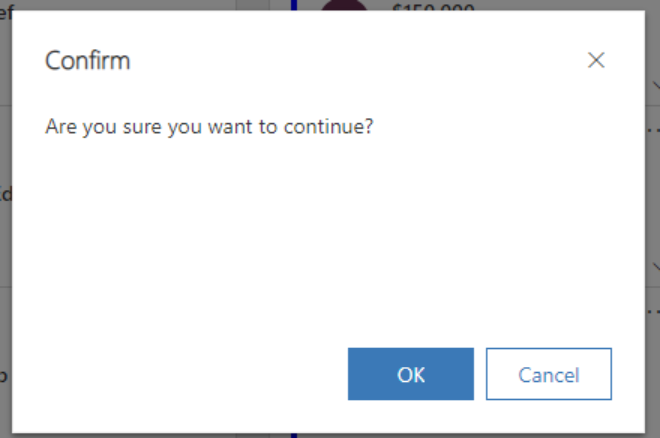
The confirmation dialog will show up to the master data users so they can confirm or cancel the creation in the system.
If they click on the confirm button: the business process flow will indeed finish.
If they click on the cancel button: nothing will happen.
Lösungsbeschreibung
To have the user explicitly confirm that they want to really finish the business process flow, we implement a client-side validation approach using JavaScrupt and the addOnPreProcessStatusChange event handler, which stops the BPF from moving forward to finishing the process.
To ensure the confirmation happens only once per record, we will create a dedicated flag field in the Dataverse table that is updated when the user confirms they want to continue.
Step 1. Pre-requisites
Before moving forward to writing any code, make sure you’ve completed the following:
- Create Dataverse Table
- Create a field to “approve” or “reject” the supplier. The name for our field will be “approval_status”
- Create business process flow (BPF), add the appropriate stages/steps and fields for each stage. In this case, we will add the
- Add a flag field that we will call “confirm_bpf”. This will be a type text field and we will set it to “Yes” when the user confirms. If the user hasn’t confirmed, the value will be null.
- Set up the Form on the table
- Create the Model-Driven App and add the table to it
Step 2. Write JavaScript Code
To add the confirmation dialog, the following code is needed:
					// Global flag used to avoid reopening the confirmation dialog

var saveFromConfirmDialog = false;


// Function to register the BPF pre-status-change handler

function hide_AX_AI_Complete_Fields(executionContext) {


    // Get the form context

    var formContext = executionContext.getFormContext();


    // Register handler that runs before the BPF status changes

    formContext.data.process.addOnPreProcessStatusChange(confirmOK);

}


// Function executed before the Business Process Flow status changes

function confirmOK(executionContext) {


    // Get the form context

    var formContext = executionContext.getFormContext();


    // Get current BPF status

    var status = formContext.data.process.getStatus();


    // Safely retrieve the confirmation field value

    var campoConfirmAttr = formContext.getAttribute("pgi_confirm_bpf");

    var campoConfirmValue = null;


    if (campoConfirmAttr) {

        campoConfirmValue = campoConfirmAttr.getValue();

    }


    // If the record has NOT been confirmed yet

    if (campoConfirmValue !== "Yes") {


        // Prevent the BPF from completing while confirmation is pending

        if (status !== "finished" && !saveFromConfirmDialog) {

            executionContext.getEventArgs().preventDefault();

        }


        // Retrieve the BPF header control

        var control = formContext.getControl("pgi_approval_status");

        var textControl = null;


        if (control) {

            var attribute = control.getAttribute();

            if (attribute) {

                textControl = attribute.getText();

            }

        }


        // Show confirmation dialog only if status is "Accept"

        // and confirmation dialog was not already accepted

        if (textControl === "Accept" && !saveFromConfirmDialog) {


            Xrm.Navigation.openConfirmDialog(

                {

                    title: "Confirm",

                    text: "Are you sure you want to create this supplier?",

                    confirmButtonLabel: "OK",

                    cancelButtonLabel: "Cancel"

                },

                {

                    height: 120,

                    width: 260

                }

            ).then(function (success) {


                // User clicked OK

                if (success.confirmed) {


                    // Set flag to avoid dialog reopening

                    saveFromConfirmDialog = true;


                    // Set confirmation field value

                    var campoConfirm = formContext.getAttribute("pgi_confirm_bpf ");

                    if (campoConfirm) {

                        campoConfirm.setValue("Yes");

                    }


                    // Manually finish the BPF

                    formContext.data.process.setStatus("finished");

                }


                // If cancelled, the BPF remains blocked

            });

        }

    }

}
Step 3. Uploading JavaScript code and setting up event handler
The next step is to upload the code to the Dataverse table. We’ve covered these steps in other blogs, you can review the step-by-step in this link: https://powergi.net/blog/restrict-saving-a-record-in-model-driven-apps/, or watch the video in the next section.
Step-by-step video walkthrough
Watch the video below by Graciela, where she shows the process of uploading JavaScript customizations to Dataverse forms that are used through model-driven apps.
This video shows a different use case that is uploaded to the form, but the same process of uploading custom code to Dataverse is the same.
How our Power Apps Development services can help
Requesting confirmation when finishing a business process flow in a model-driven app is just one of many examples of validations that can be implemented.
Depending on the requirement, data validations and restrictions can be achieved through client-side validations using JavaScript or through server-side controls such as Dataverse security roles, business units or business rules.
Kontaktieren Sie uns to learn how our Power Apps and Power Platform Beratungsleistungen can help you extend standard functionality in model-driven apps, we’ll be more than happy to have a conversation.