Table of Contents
When we create approval requests with the out-of-the-box action in Power Automate, our flow will usually wait for the approval to happen for next steps to keep running, and this can be an issue if something happens with an approver and we can’t get them to complete the request. So, sometimes it would come very handy to just force this request to just continue with the next steps.
This blog will show how to update all these tables properly to force completion of a request and how to have your flow stop waiting for this approval.
Dataverse background
All logs related to each approval request are stored in Dataverse. Some tables are involved in each request sent and approved (or rejected)
- Approvals: this table stores each request sent.
- Flow Approvals: this table stores each flow “approval connector” action that executes in our Power Automate workflow. For example, if you have both “Create approval” and a “Wait for an approval” actions, there will be two rows created in this table.
- Approval Responses: this table stores each response when approvers approve or reject a request.
For this use case we will work with a SharePoint table where we want each project created to be sent for approval.

Step 1. Add 2 columns in data table
We will need to add two additional columns to track which approval ID each record is related to, and which flow run ID this approval is happening.
These two columns can be both text type.

The column names we will use are:
- Approval ID
- Flow Run ID
Step 2. Add steps in the approval workflow to track ids
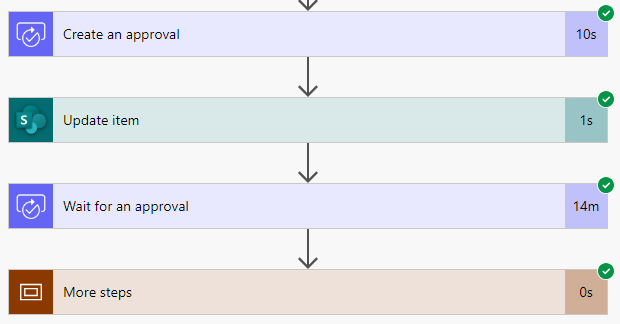
Let’s add an “Update item” step in Power Automate, right in between the “Create an approval” and then “Wait for an approval” actions.
In the “Approval ID” column, let’s store the Approval ID that comes from the “Create an approval action”.
In the “Flow Run ID” column, let’s use the following code:
workflow()?['run']['name']
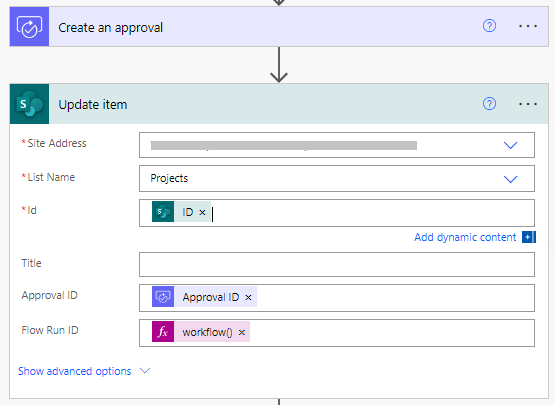
Once we do this, every time an approval request is created, both the flow ID and run ID will be added to each SharePoint record so we know all details related to each project we send for approval.
Step 3. Create a separate flow to force approvals
3.1 Update Approvals table
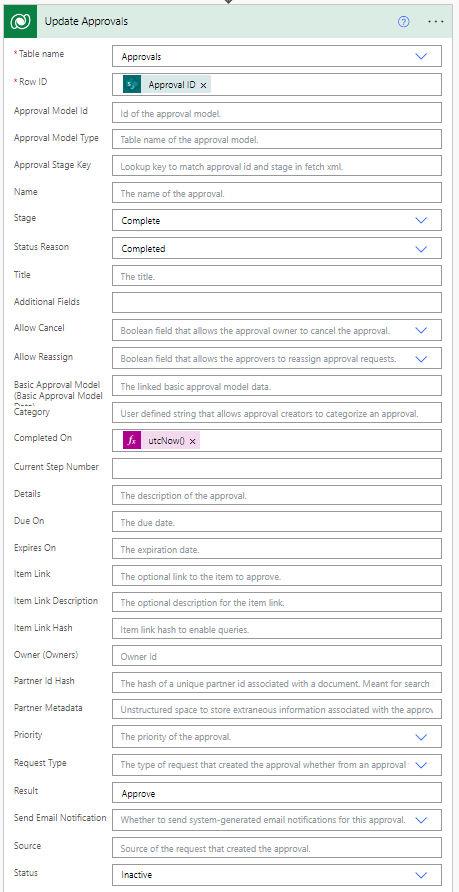
Let’s find the “Update a row” action from the Dataverse connector and rename it to “Update Approvals”.
We need to set up this card as follows:
- Row ID: Approval ID column we previously stored in SharePoint
- Stage: Complete
- Status Reason: Completed
- Completed On: current time
- Result: Approve
- Status: Inactive
3.2 Get Flow Approval record related to request
We need to find the record related to the current approval request that is waiting for the approval to happen.
We need to set up as follows:
- Find the “Get rows” action from the Dataverse connector
- Rename to “Get pending approval”
- Select “Flow Approval” table
- Set up the filter rows field with the following code:
msdyn_flow_flowapproval_flowrunsequenceid eq 'run-id-stored-in-data-table' and statuscode eq 192350001
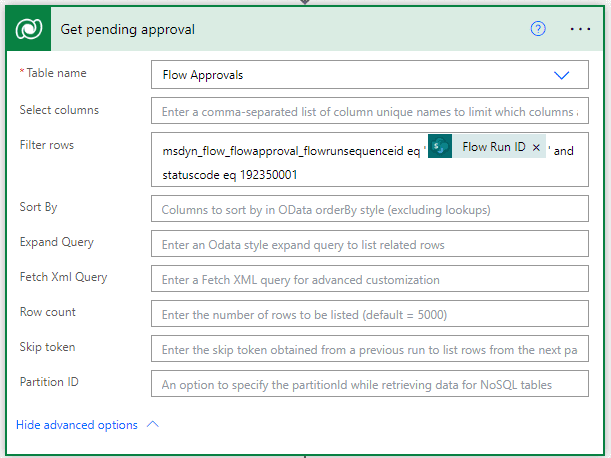
This will return one single row that we will use in steps # 3 and #5.
3.3 Update Flow Approval record
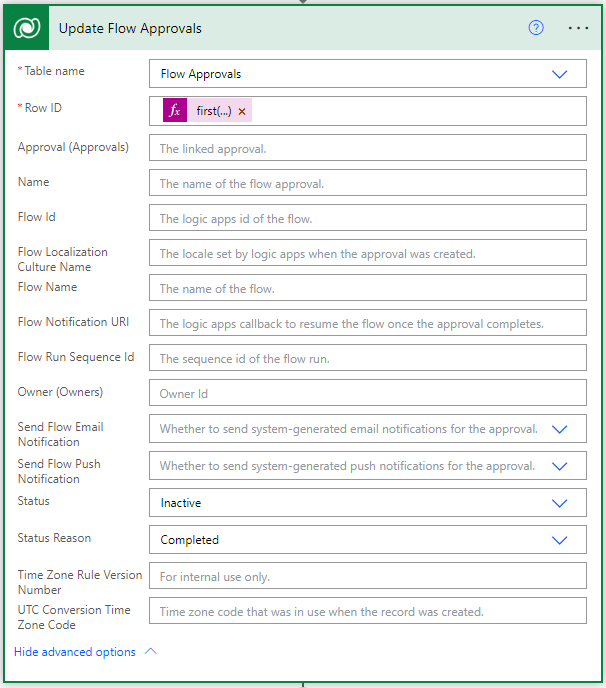
Let’s find the “Update a row” action from the Dataverse connector, rename it to “Update Flow Approvals”, and select the “Flow approvals” table.
We need to set up as follows:
- Row ID: flow approval id column from “Get pending approval” results.
@{first(outputs('Get_pending_approval')?['body/value'])?['msdyn_flow_flowapprovalid']}
- Status Reason: Completed
- Status: Inactive
3.4 Add Approval Response record
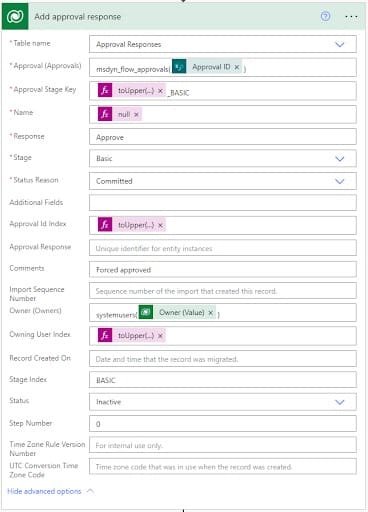
Let’s find the “Add a row” action from the Dataverse connector, rename it to “Add approval response”, and select the “Approval Responses” table.
We need to set up as follows:
- Approval (approvals): msdyn_flow_approvals(approval-id-from-data-table)
- Approval Stage Key: @{toUpper(approval-id-from-data-table)}_BASIC
- Name: null
- Response: Approve
- Stage: Basic
- Status Reason: Committed
- Approval Id Index: @{toUpper(approval-id-from-data-table)}
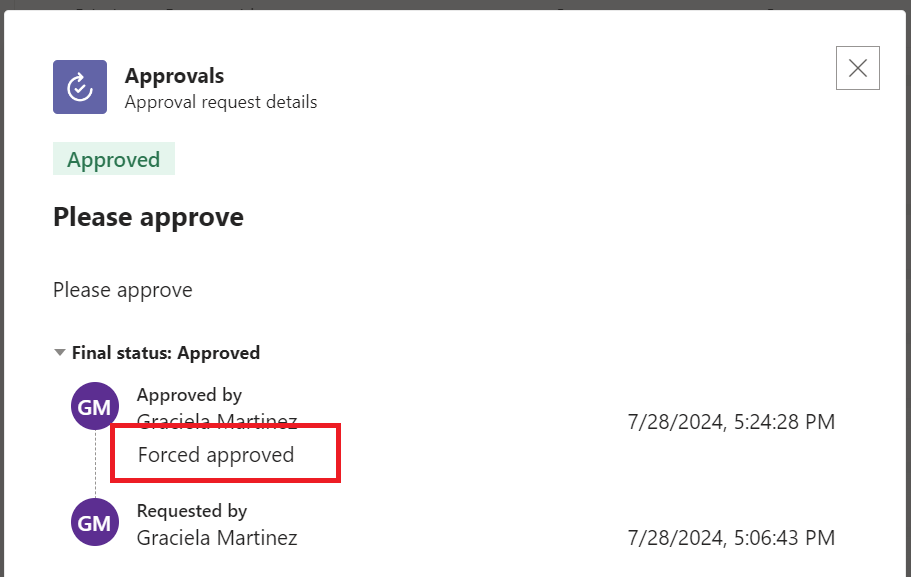
- Comments: Forced approved
- Owners (Owners): systemusers(@{outputs(‘Update_Approvals’)?[‘body/_ownerid_value’]}) – owner from the Approvals table (or if you want to use a generic user for forced completions, just find the user’s GUID in the System Users table in Dataverse)
- Stage Index: BASIC
- Status: Inactive
3.5 Force flow run to stop waiting
Let’s find the “HTTP request” action. And set it up as follows:
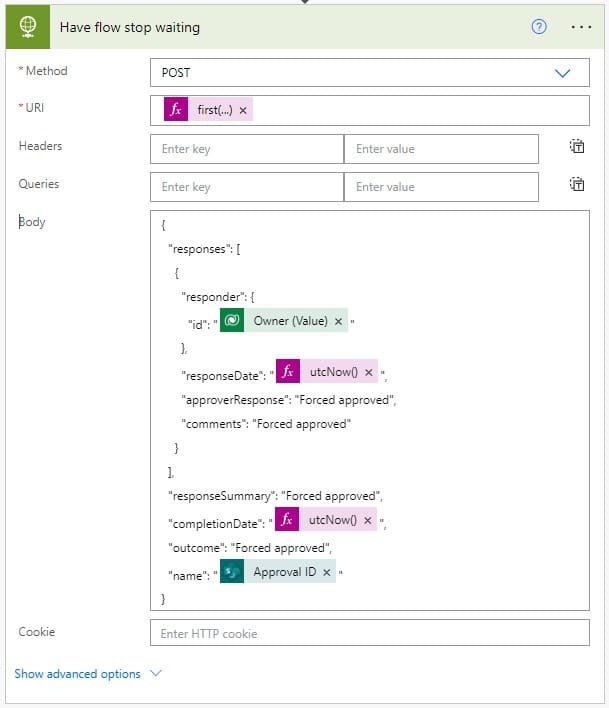
Method:
POST
URI:
{first(outputs('Get_pending_approval')?['body/value'])?['msdyn_flow_flowapproval_flownotificationuri']}
This Flow Approvals table contains a column that is linked to the flow run, we need to get the value from the “Flow Notification URI” column and use this as the URI for this HTTP request action. We obtained this value when getting rows from this table in the “Get pending approval” action.

					Body:

{
  "responses": [
	{
  	"responder": {
    	"id": "GUID from Users Table related to Owner"
  	},
  	"requestDate": "Timestamp 2024-07-28T23:24:28Z",
  	"responseDate": "Timestamp 2024-07-28T23:24:28Z",
  	"approverResponse": "Outcome Forced approved",
  	"comments": "Comments Forced approved"
	}
  ],
  "responseSummary": "Forced approved",
  "completionDate": "Timestamp 2024-07-28T23:24:28Z",
  "outcome": "Forced approved",
  "name": "Approval ID"
}

This is the code used for the screenshot shown above:
					{
  "responses": [
	{
  	"responder": {
    	"id": "@{outputs('Update_Approvals')?['body/_ownerid_value']}"
  	},
  	"responseDate": "@{utcNow()}",
  	"approverResponse": "Forced approved",
  	"comments": "Forced approved"
	}
  ],
  "responseSummary": "Forced approved",
  "completionDate": "@{utcNow()}",
  "outcome": "Forced approved",
  "name": "@{outputs('Get_item')?['body/ApprovalID']}"
}
Step 4. Test automation
Let’s start with starting a new approval request and then triggering the flow that forces approvals.

Once the force approval workflow runs, the flow run that is waiting for the approval to happen should stop waiting and continue with the following steps:
And when you check the approval requests from the approval modules in Teams or Power Automate, this should show as complete with the “Forced approved” outcome: