Business Process flows (BPF) in Power Platform are an amazing tool to guide end-users on the stages they should follow to complete a process, but sometimes it may become difficult to track which records in Dataverse are in which stage of the process and see all these records in a single view, for example.
To allow better tracking of records and their current stage, we can create a status column of type choice that gets updated every time the activate stage in the business process is updated. For this, we need to create a business rule that will perform these updates automatically as the process goes through the different BPF stages.
For our use case we will work with coffee machines requisition process and we want to track when each machine is requested, received or delivered. This approach can be particularly useful for organizations leveraging Microsoft PowerApps consulting services to enhance their automation and workflow capabilities.
Just before jumping into it, big thanks to Ben den Blanken for publishing this blog where the use of business rules and business process flows is explained – which we used as basis for our blog.
Table of Contents
Step 1. Create a status column in Dataverse.
First, let’s go to our Dataverse table and create a choice column. This is the column we will update every time a new stage in the Business Process Flow is reached.
Column options:
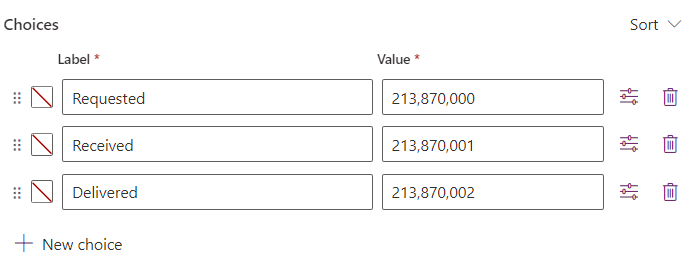
Default Status: Requested – when a new record is created, the value for this column will always be “Requested”
Step 2: Create your Business Process Flow
For our use case, we will only have 3 stages:
- Machine Requested
- Sent by supplier
- Delivered to employee

For our use case, we will only have 3 stages:
- Machine Requested
- Comments
- Machine Status (users do not need to fill this one out, this is just to show them the current status)
- Sent by supplier
- Comments
- Purchase Order Number
- Machine Status (users do not need to fill this one out, this is just to show them the current status)
- Delivered to employee
- Comments

Step 3. Create Business Rule(s)
Go to your Dataverse table and create a business rule.

Once in the Business rules editor, change Scope to “All Forms”

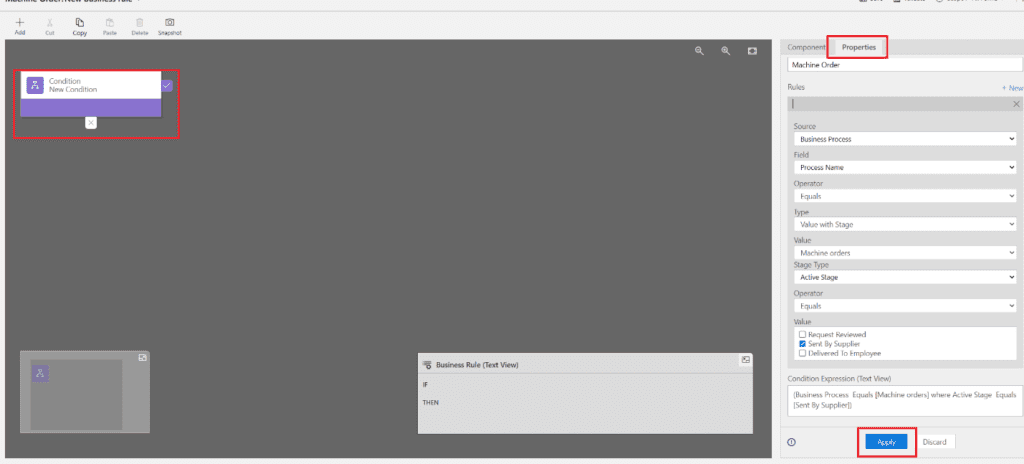
Then, select the condition in the canvas, and go to the Properties tab.
Select the following:
- Source: Business Process
- Field: Process Name
- Operator: Equals
- Type: Value with Stage
- Value: {your BPF name}
- Stage type: Active Stage
- Operator: Equals
- Value: {select the stage you want to perform the update for}
Finally, hit on apply.
Then, click on “Add” and “Add Set field value”. Add this on the “true” side of the condition (right next to it).
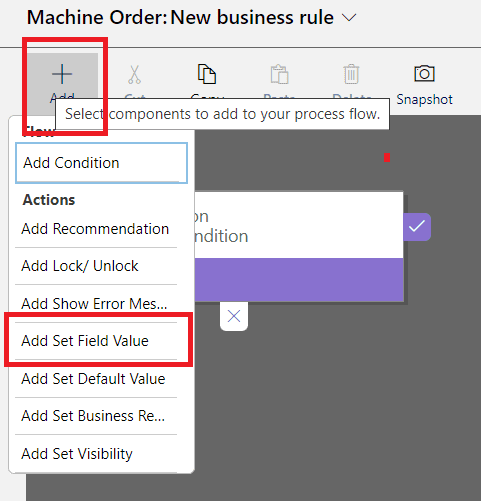
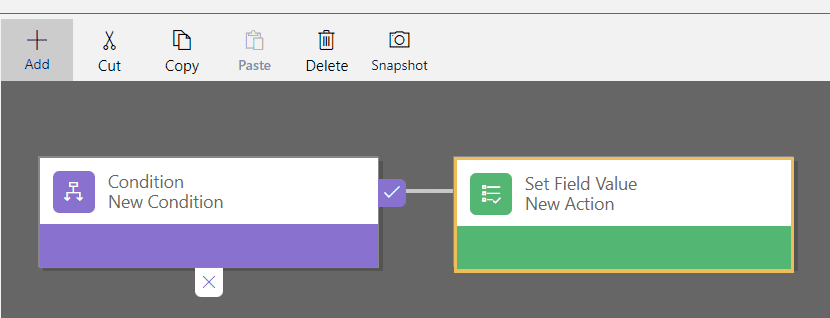
Click on the “Set field value” element.
Select the following:
- Field Value: {Choice status Column name}
- Value: {The status you want to show when the selected stage is active}

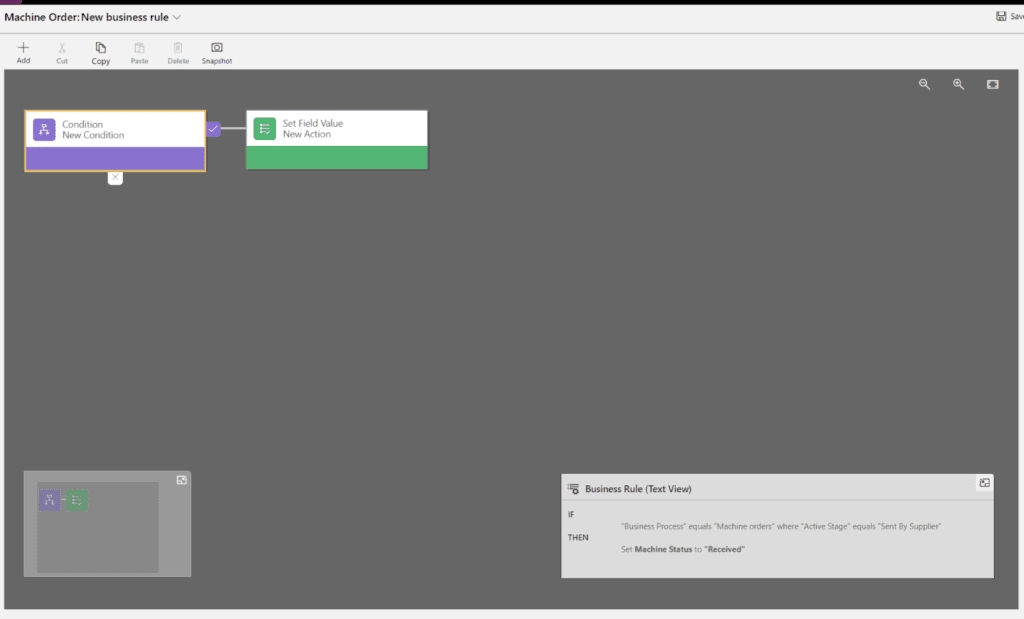
This is how your business rule should look:
Click on Validate and then Save.
Finally, Activate your business rule.
Create as many business rules as status to automatically update in your table. For this use case, I created 2 business rules because I wanted status to change to “Received” when stage 2 was active, and “Delivered” when the BPF finishes. Set up for all Business rule is exactly the same, just make sure to select the right stage with the right status.
Step 4. Test your Business Process Flow
Now you can go to your Model-driven app and test the different stages of the business process flow with Power GI and see how the status of each record changes automatically as the record moves forward in the different stages.
Below I created a view with the status column to have a single and simple glimpse a quick view of the current status for all the requests:


