A couple of weeks back, we posted this article on how to extract the content of a .eml file using Power Automate, but we recently discovered that there are some instances where the approach we explain in the previous blog will not work.
The first approach we presented relies on the Power Automate Outlook trigger to properly recognize that there is an actual attachment present in the email, but for some reason, there are some types of attached emails that will not be recognized at all, so the “Attachments” value will be totally empty if we use Power Automate’s out-of-the-box actions and triggers.
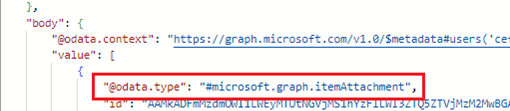
Just to add a bit more context, this happens because some .eml attachments will be recognized by Outlook as an “itemAttachment” object instead of an actual “fileAttachment” object.
So today, we bring you a new way you can implement in case you want to extract the content of an email attached to the emails in your inbox.
Table of Contents
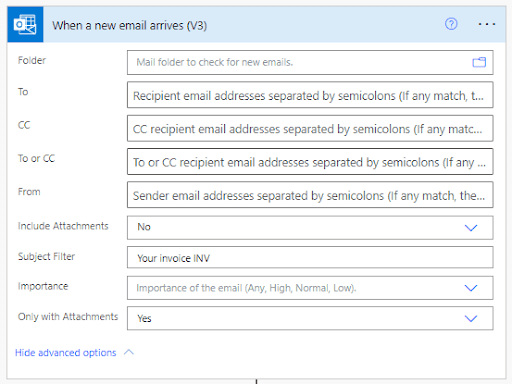
Step 1. Add the trigger
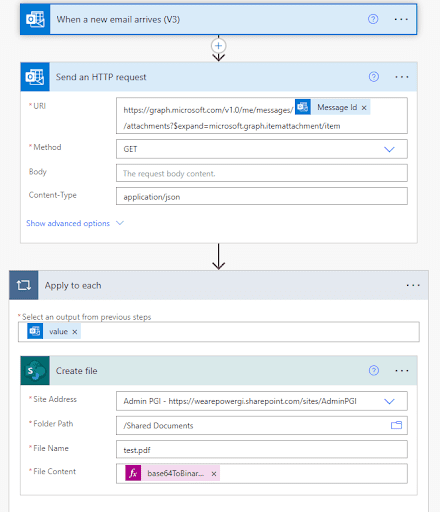
Let’s use the regular “When a new email arrives (v3)” trigger. It doesn’t matter if you select “Include attachments” as yes or no, because Power Automate won’t recognize them anyway.
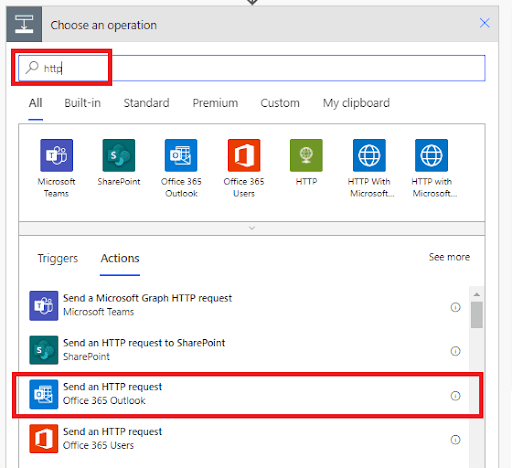
Step 2. Search for “Send an HTTP request”
Add a new step and search for “HTTP” in the search bar until you find the “Send an HTTP request” action for the Office 365 Outlook connector.
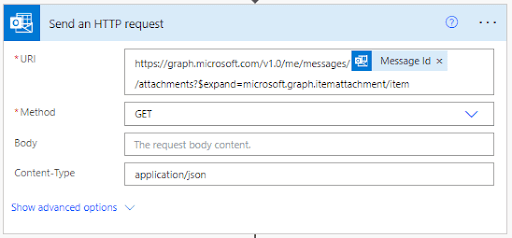
Step 3. Set up HTTP request URI
Once you select this action, you will be prompted with 4 fields.
In the URI field, write the following:
https://graph.microsoft.com/v1.0/me/messages/{message-id-from-trigger}/attachments?$expand=microsoft.graph.itemattachment/item
It should look like this:
?$expand=microsoft.graph.itemattachment/item
Step 4. Run the flow to see the outputs of the HTTP request
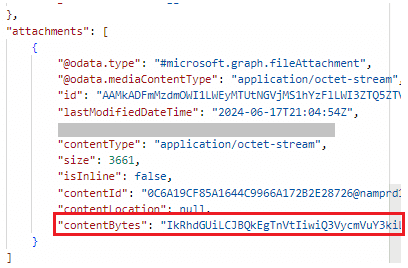
When running the HTTP request using the URI presented above, the Outlook connector will return a lot of data about the .eml file, but if you scroll until the very end of the JSON payload, you will see the content of the file in the “contentBytes” attribute of the first element of “attachments” array:
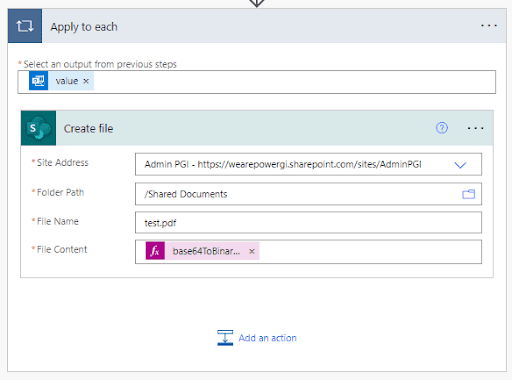
Step 5. Get file content and save to SharePoint
Now that we know that the file we’re looking for is in the first element of the attachments array, let’s add an “Apply to each” action:
Write the following code in the output to loop:
@{body('Send_an_HTTP_request')?['value']}

Next, let’s add a SharePoint action to create our file in a SharePoint site.
Let’s extract the first element of the array using the “first” function:
first(items('Apply_to_each')?['item']?['attachments'])
Then, let’s extract the contentBytes:
first(items('Apply_to_each')?['item']?['attachments'])?['contentBytes']
Finally, let’s use the base64ToBinary function to convert the content from the Graph API into the binary format SharePoint expects. This is how the final formula should look:
base64ToBinary(first(items('Apply_to_each')?['item']?['attachments'])?['contentBytes'])
The Apply to each and Create file actions should look as follows:
Step 6. Let’s test the automation!
We’re ready to test our workflow and see magic happen! Just send an email with an .eml attachment and wait for the automation to run.
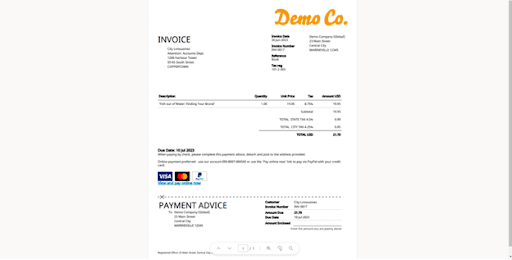
Invoice successfully saved into SharePoint:
And you’re all set! You can use this solution with Power Automate to extract documents attached in .eml files, which are at the same time attached to another email!
Got questions? Contact us here or at contact@powergi.net