
Quite recently we were working with the Accounts Payable team to automatically grab invoices received from suppliers and save them in a SharePoint site, we were using the regular “For each attachment”, “Attachment content” and then “Create file” actions in Power Automate for most vendors, until we found one vendor who did not attached their PDF files straight in the email, but inside another email – i.e., nested attachments.
In today’s digital age, nesting automation within business processes can significantly enhance efficiency. If you’re seeking ways to streamline operations with nested email attachments, leveraging Power Automate is essential. For those needing expert guidance, our Microsoft Power Platform consulting services provide tailored solutions to optimize document processing workflows, making complex tasks manageable.
The email looked as below:

The automation must access the PDF file that’s inside the .eml file that is at the same time attached to the automated email the supplier sends. In this blog, we will show you how to achieve this using Power Automate! This approach is particularly useful for businesses seeking Microsoft Power Platform consulting solutions to streamline document processing workflows.
Table of Contents
Step 1. Set up your trigger
Look for the “When a new email arrives (V3)” trigger for the “Office 365 Outlook” connector.
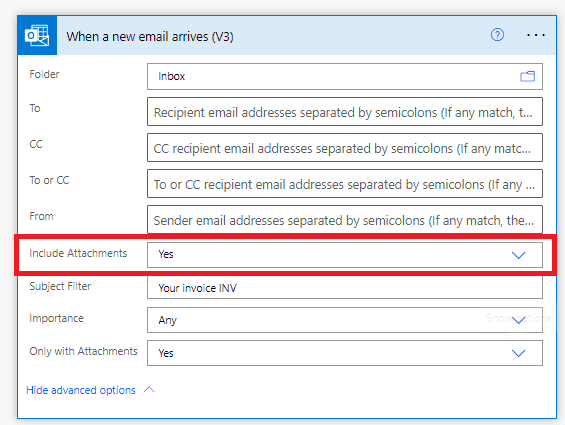
Make sure to select “Yes” in the “Include attachments” field
Step 2. Search for “Send an HTTP request”
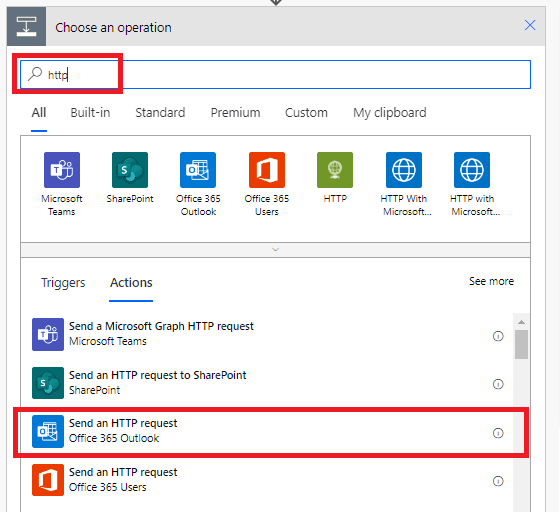
Add a new step and search for “HTTP” in the search bar until you find the “Send an HTTP request” action for the Office 365 Outlook connector
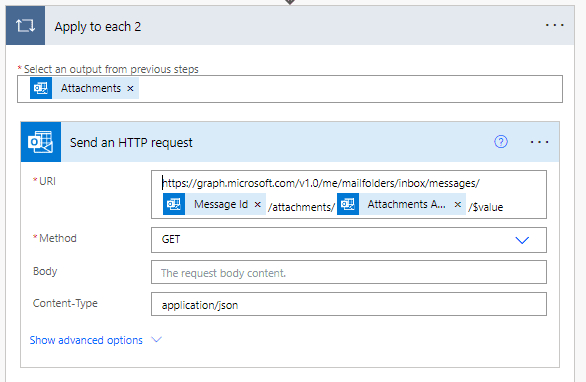
Step 3. Set up HTTP request URI
Once you select this action, you will be prompted with 4 fields.
In the URI field, write the following:
https://graph.microsoft.com/v1.0/me/mailfolders/inbox/messages/{message-id-from-trigger}/attachments/{attachment-id-from-trigger}/$value
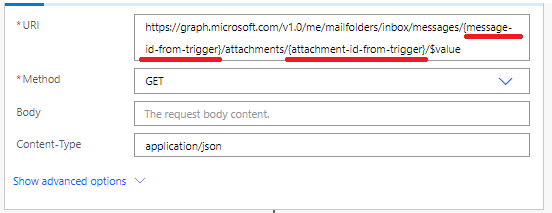
{message-id-from-trigger} -> select Message Id from dynamic content.
{attachment-id-from-trigger} -> select Attachments Attachment Id from dynamic content. Once you select this, your HTTP request action will be wrapped around an “Apply to each action”.
This is how this should look:
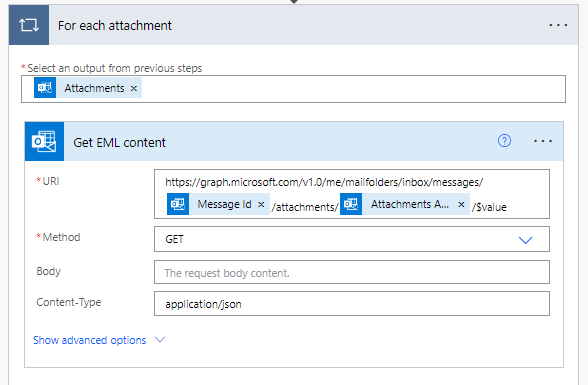
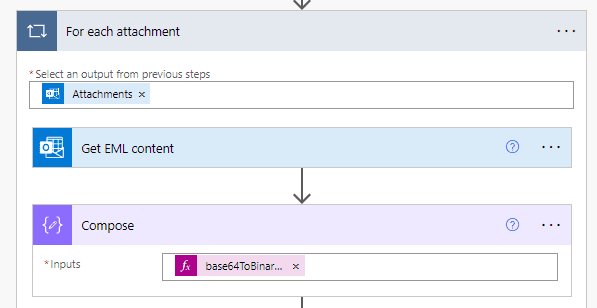
Step 4. Rename steps
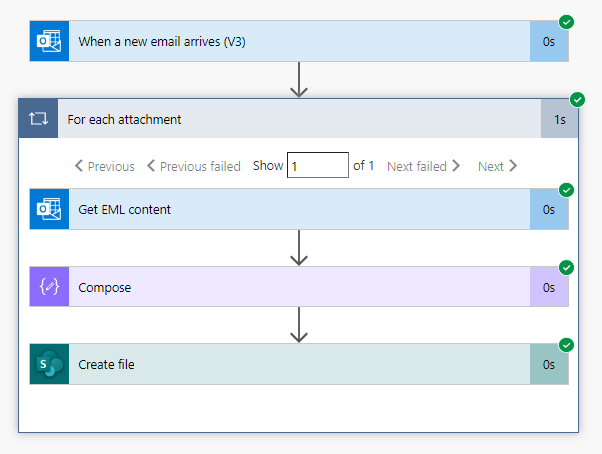
It’s best practice to rename your Power Automate actions, so we will rename the “Send and HTTP request” action to “Get EML content” and the “Apply to each” to “For each attachment”,
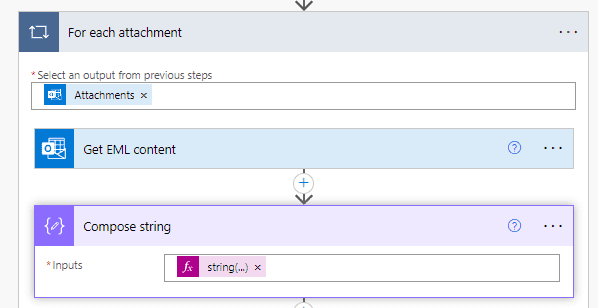
Step 5. Add a Compose action
Right after the “Get EML content” action, add a Componse action and write the next formula:
@{string(outputs('Get_EML_content')?['body'])}
This is how your workflow should look so far:
Step 6. Run your flow to see the outputs of the Compose action
Send an email with the .eml attachment to test the workflow so far, this will help us understand the next steps.
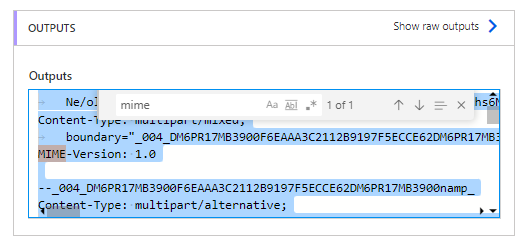
Once the automation runs, inspect the results of the Compose action. You will notice this text contains all the content of the .eml attachment: body content and PDF attachment.
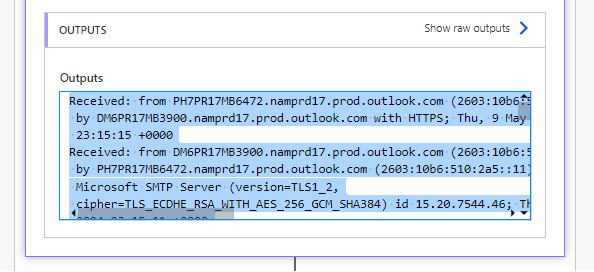
You’ll see the PDF content right after the text “MIME-Version” (you can perform a search to find this specific text)
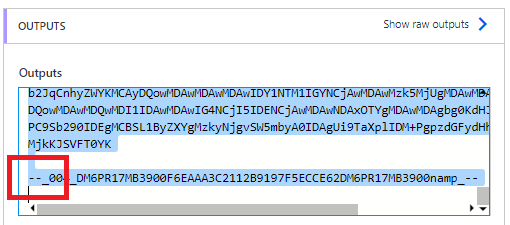
Right below the “MIME-version” text, we will find the content of the PDF file we’re interested in, right between the word “base64” and the characters “–_”.
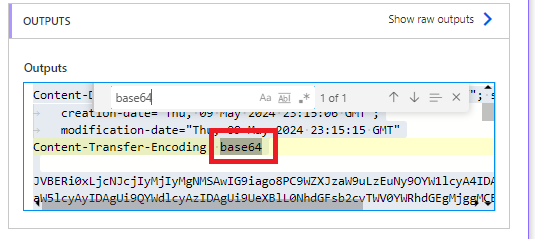
This PDF content is in base 64 format and contains some characters we need to get rid of. So, we need to apply some formulas to extract the text we’re interested in.
Step 7. Write a PowerFx formula
last(split(string(body('Get_EML_content')),'MIME-Version:'))
replace(…,decodeUriComponent('%0D%0A'),'')
last(split(…,'base64'))
first(split(…,'base64')),'--_'))
first(split(…,'base64')),'--_'))
@{base64ToBinary(first(split(last(split(replace(string(last(split(string(body('Get_EML_content')),'MIME-Version:'))),decodeUriComponent('%0D%0A'),''),'base64')),'--_')))}
Insert this formula in a Compose action. Your workflow should look as follows:
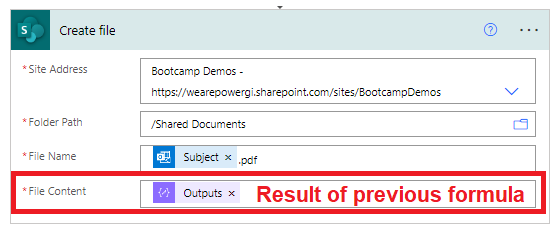
Step 8. Add the “Create file” action
Right after the Compose action, add a SharePoint “Create file” action.
- Select SharePoint site
- Select/Indicate folder
- File name: Assign a filename (in our case it will be the same as email subject)
- File content, select the result of the Compose action
Step 9. Test your workflow
We’re ready to test our workflow and see magic happen! Just send an email with an .eml attachment and wait for the automation to run.
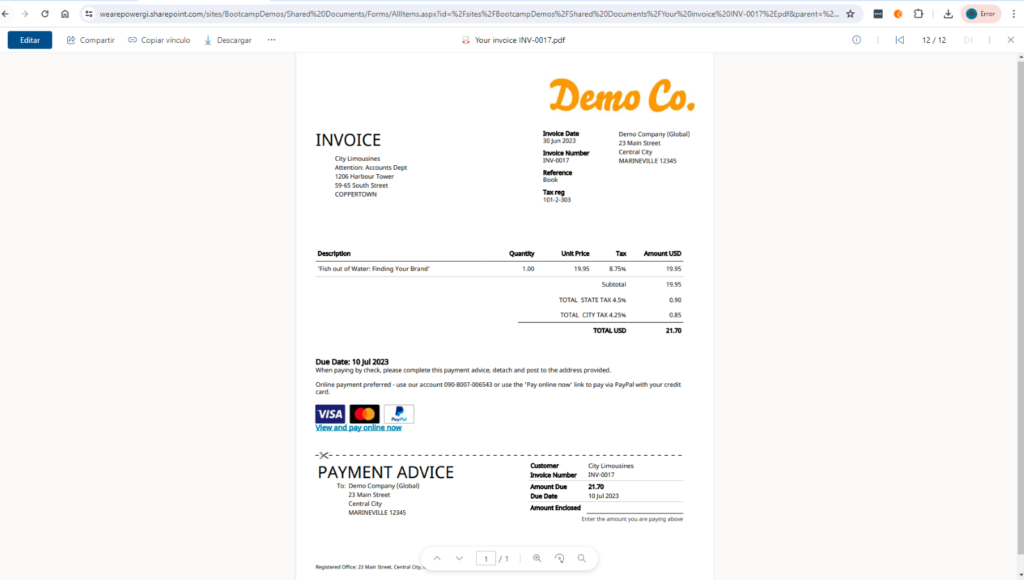
Invoice successfully saved into SharePoint:
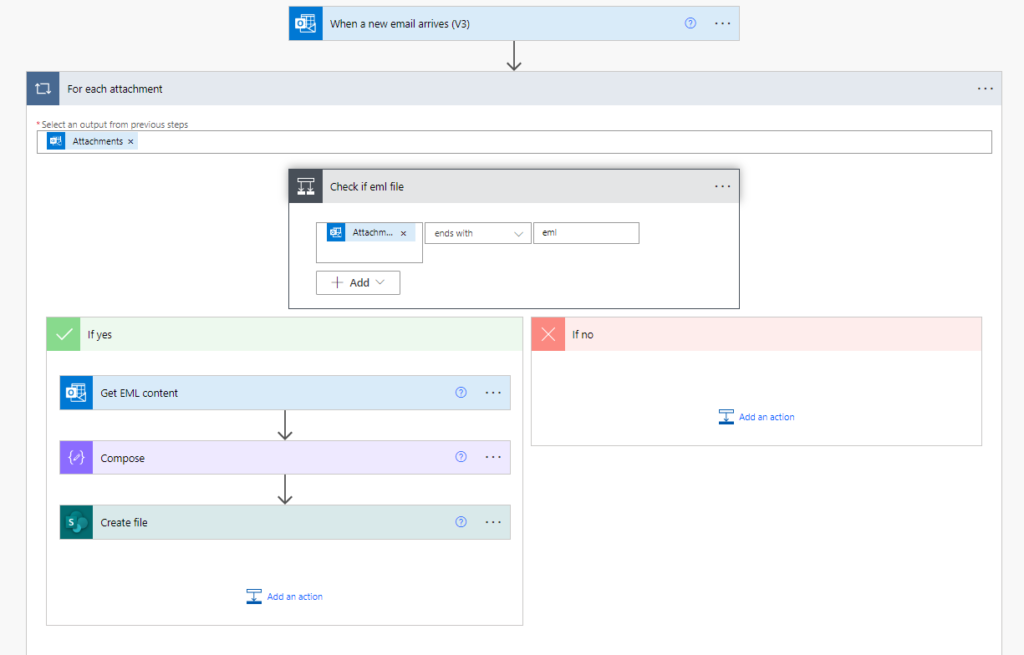
Step 10. Optional: add a conditional to process .eml files
In case you might receive other emails that are not nested .eml files, it might be a good idea to add a conditional and check if the attachment has the .eml extension we’re interested in.
And you’re all set! You can use this solution with Power Automate to extract documents attached in .eml files, which are at the same time attached to another email!
Got questions? Contact us here or at contact@powergi.net
