
Unfortunately, Dataverse Business rules do not work on Power Pages sites, so if you need to dynamically show or hide controls based on another’s control value, you will need to add some custom JavaScript to your site.
But don’t you worry! It’s much more simple than it sounds.
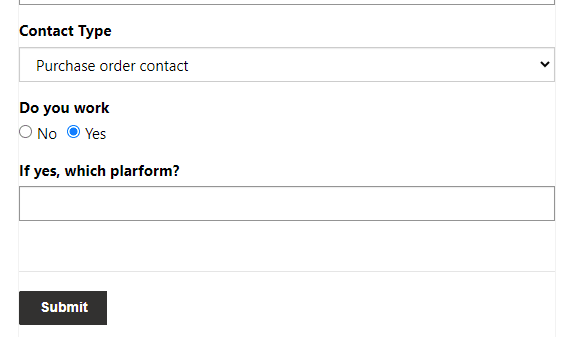
For this use case we want to show and hide some controls based on the following 2 types of selected values:
- Based on a dropdown value
- Based on a Yes/No radio button
Many organizations combine Power Pages with broader business application consulting services, ensuring their forms and workflows align seamlessly with enterprise goals.
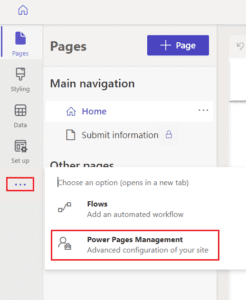
Step 1. Open the Power Pages Management app
Let’s just open your Power Pages site and then open the Management app from it.
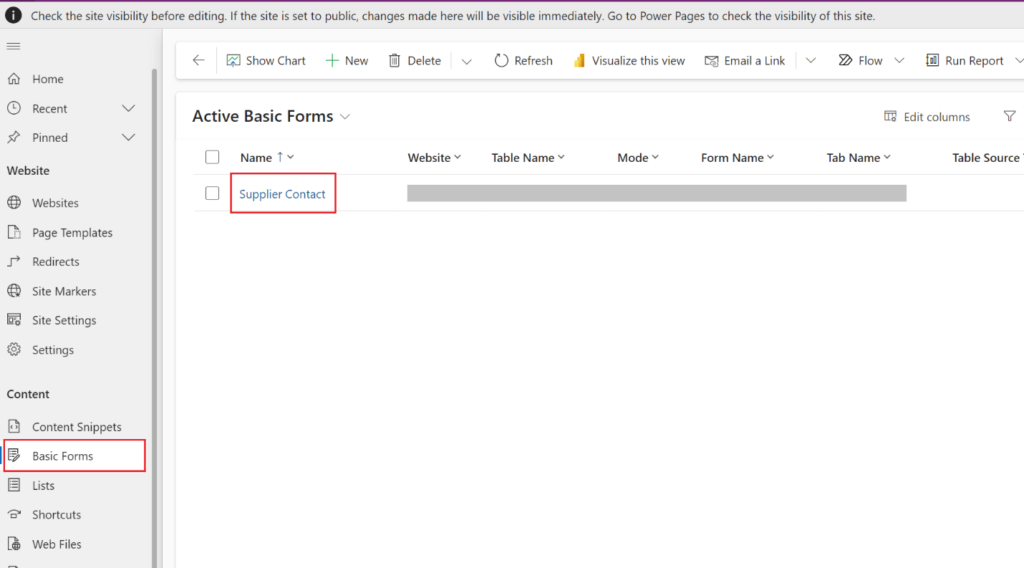
Step 2. Find your form
Go to the “Basic Forms” tile and then open the form you’re looking to update with the rules.
Step 3. Find the JavaScript box
Go to the Additional Settings tab, scroll down to the bottom and locate the “Custom JavaScript” text box.
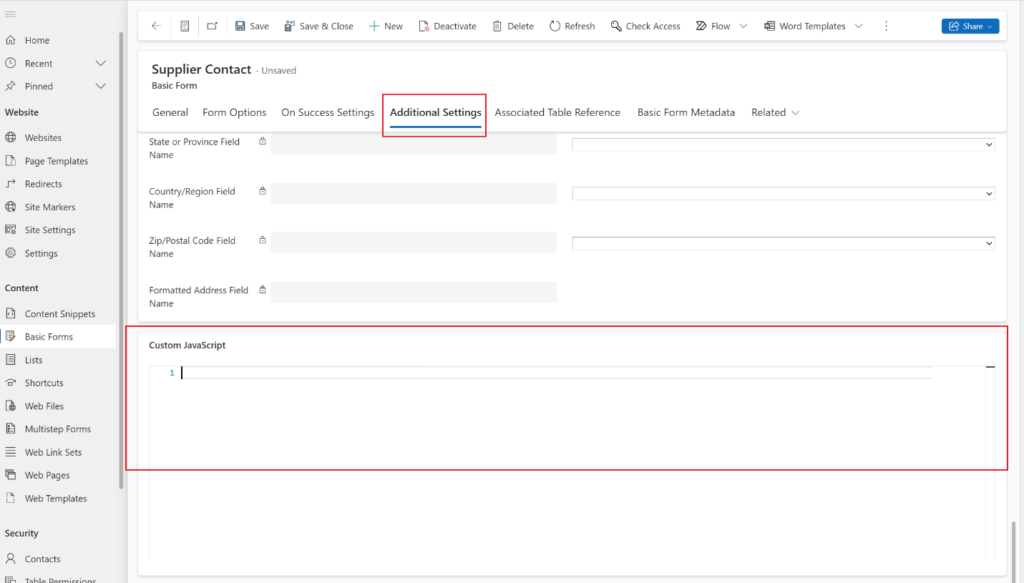
This JavaScript code will be added to your website and it will be considered by the browser when it renders the page.
If you’re implementing complex automation or integrations, working with a Microsoft Power Platform consulting service can help streamline the process efficiently.
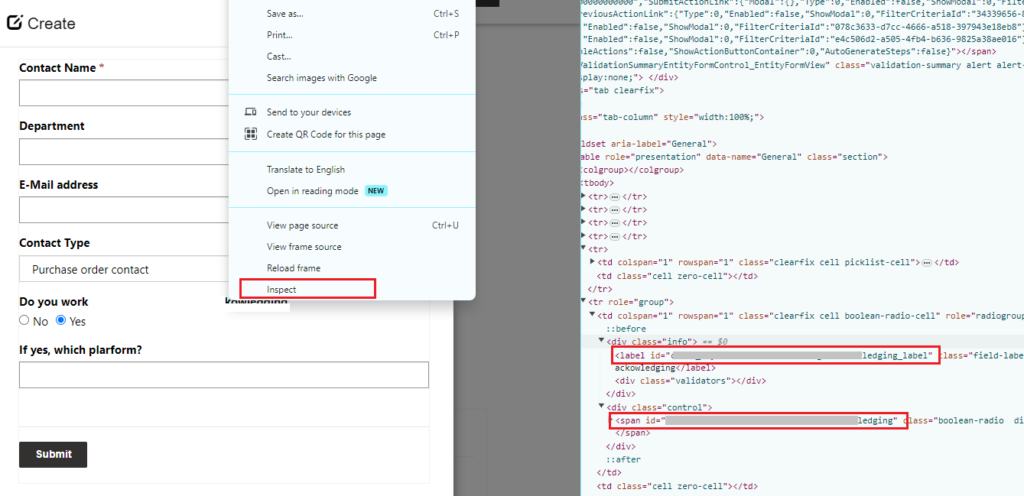
Step 4. Get fields html IDs
Open your site and locate the fields you want to dynamically show or hide. Right click on the webpage, and then click on “inspect”.
This will open a panel on the right side of the screen where you will find the html IDs that belong to both the label and the controls you are interested in, just grab all these IDs and take note of them somewhere else.
Step 5. Write your JavaScript code
For our website, we need our code to do the following:
- Hide the Yes/No radio button and the Platform question by default.
- If user selects “Purchase Order contact”:
- Show Yes/No question.
- If the user selects “Yes”, show the next text field.
To achieve this, we need the following code:
JavaScript code for automatically hiding controls when the form loads.
					$(document).ready(function () {
	//this hides the controls when the form loads
	$("#cr49b_ yesnowork _label").hide();
	$("#cr49b_yesnowork").hide();
	$("#cr49b_platform_label").hide();
	$("#cr49b_platform").hide();

	//this indicates which function should run when the dropdown and the radio button change values
	$('#cr49b_contacttype').on("change", onChangeEvent);
	$('#cr49b_platform').on("change", onChangeEventEDI);
});
Code for Contact Type dropdown
					function onChangeEvent() {
	//get selected value
	var varChange = $('#cr49b_contacttype').val();
	//if user selects "Purchase order contact" option (this ID comes from Dataverse choice column ID)
	if (varChange == 984690001) {
    	$("#cr49b_ yesnowork _label").show();
    	$("#cr49b_yesnowork").show();
	}
	else {
    	$("#cr49b_yesnowork_label").hide();
    	$("#cr49b_yesnowork").hide();
    	$("#cr49b_platform_label").hide();
    	$("#cr49b_platform").hide();
    }
}
Code for Yes/No radio button
					function onChangeEventEDI() {
	//get selected value
	var selected =  $("input[type='radio'][id='cr49b_yesnowork_1']:checked");
	//if Yes is selected
	if (selected.length > 0) {
    	$("#cr49b_ platform_label").show();
    	$("#cr49b_ platform").show();
	}
 	//if No is selected
	else {
    	$("#cr49b_platform_label").hide();
    	$("#cr49b_platform").hide();
	}

}
Step 6. Add your code
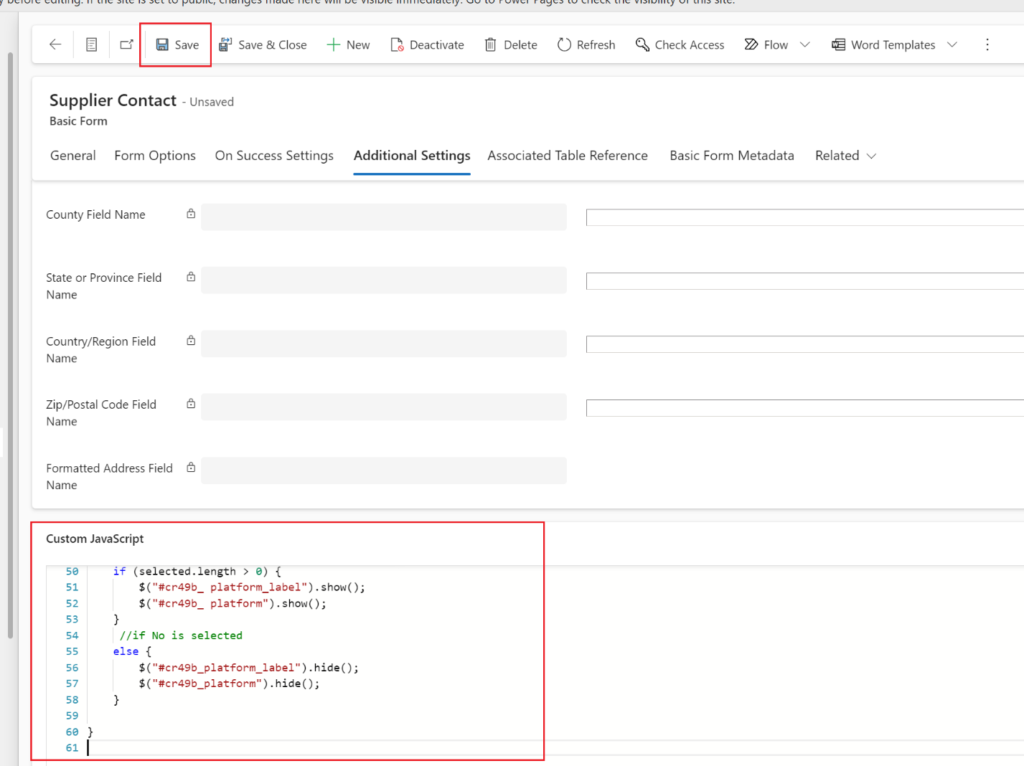
All set! Now just sync your Power Pages site configurations and run the site to see magic happen in your form!
Configuring visibility rules in Power Pages forms improves user experience and keeps data entry clean. With our PowerApps Consulting services, we help businesses design forms that adapt dynamically to user roles, ensuring the right data is collected without adding complexity.
Contact Power GI if you’d like to know how you can start using Power Pages for your business!
