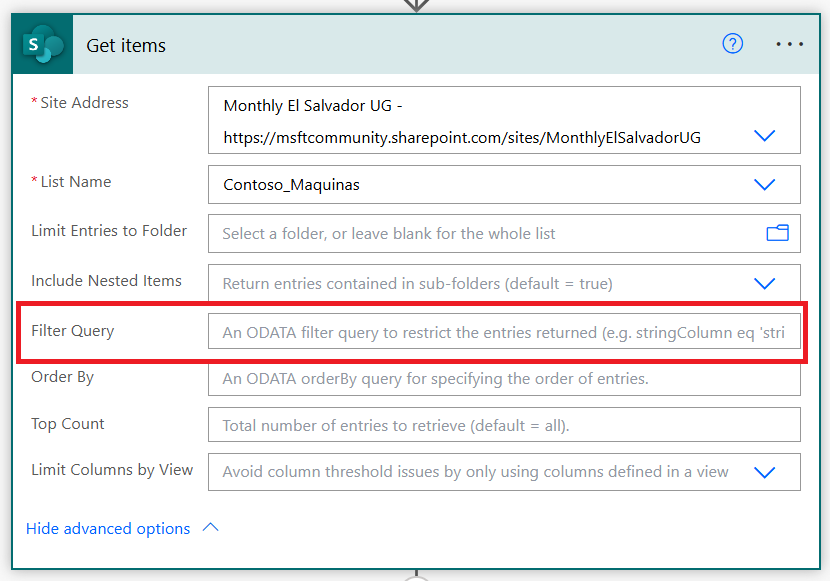
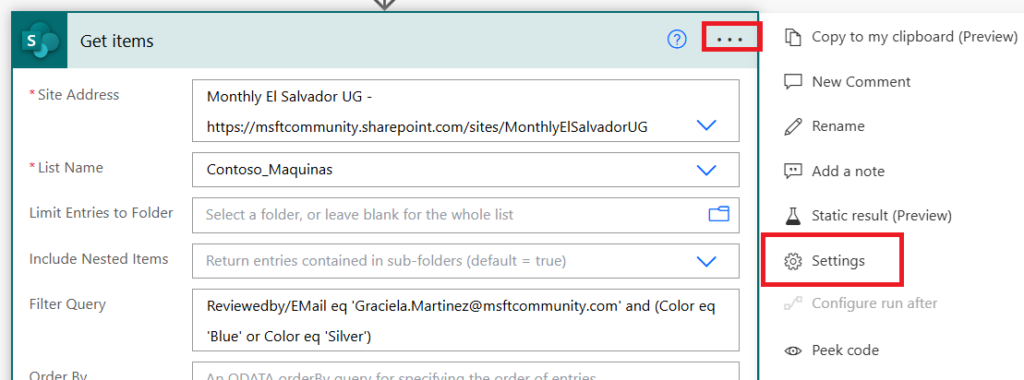
When working with Power Automate and SharePoint lists we usually are in need of extracting specific rows of data from lists, to do so, we need to use the “Query filter” field available in the SharePoint “Get Items” action.
OData queries are usually written in the following format:
{InternalColumnName} operator {value}
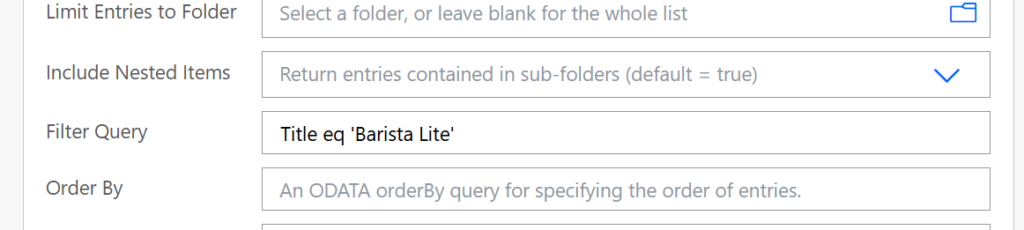
For example, if we want to search by the Title column in our SharePoint list to find all items with text “Barista Lite”, our odata query filter would look as follows:
InternalColumnName = Title
Operator = eq
Value = Barista Lite (text we are searching by)
There are some exceptions to this structure (like when we try to apply “contains” logic), but this is the rule we almost always follow.
What’s great about OData queries is that you can also use a similar filter logic for other data connectors in the Power Platform such Excel and Dataverse (with some differences depending on the data type).
For businesses looking to optimize their workflow automation, leveraging Microsoft PowerApps consulting services can be a strategic move to ensure seamless integration and efficiency.
Table of Contents
Column internal name
Every new column we add to SharePoint gets an internal name assigned, even if we later rename this column to something different, the internal name will not change. Also, if we use SharePoint’s option to import a table from Excel into a SharePoint list, the internal names that SharePoint assigns will be different from the column names it displays in our list. As a result, it’s always important to check which is our column’s internal name before using it for a OData filter query, because OData will always expect us to user the internal name and not the display name
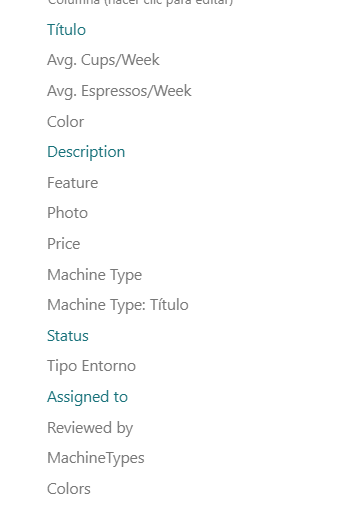
To find your columns’ internal name, just go to the List settings, and then you will see your columns listed:
Turn your ideas into digital solutions
Our team guides you step by step to build custom apps in Power Platform.
Click on the column you want to know the internal name of, and the URL in the web browser will tell you the internal name of your column.
Filter Text columns
Text columns are pretty straightforward and the most common queries we run against this type of column is “equals to” or “contains”.
Find the rows that exactly match a text:
{InternalColumnName} eq {text}
Find the rows that contains certain text:
Substringof({text},{InternalColumnName})
Make sure your search text has some single quotes for the filter to work properly.
Filter Number columns
For number columns there is a wider range of common conditions, such as “equals”, “greater than”, “between”.
The “equals” to logic works exactly as the text one, you just need to write
{InternalColumnName} eq {number}
For greater than or less than, just replace “eq” by “gt” or “lt”
For greater than or equals to and less than or equals to, just replace “eq” by “ge” or “le”
To find rows between two values (inclusive), use the following structure:
{InternalColumnName} ge {number} and {InternalColumnName} le {number}
Apply same logic of just replacing “ge” by “gt”, and “le” by “lt” if you want to exclude the numbers in the condition.
Filter Date columns
Logic for date columns is really similar to what we have seen so far, we can find rows with dates greater than today, or less than today, or in between ranges – and will use the same operators (gt, lt, ge, le, eq). The query structure will be the same, what will change is the value we send in the query: it’s a good idea to format your query dates in yyyy-MM-dd pattern, to make sure the filter is applied correctly.
If your filter will include a timestamp, the format yyyy-MM-ddThh:mm:ss is recommended.
Some examples below:
Make sure your search date has some single quotes for the filter to work properly.
Filter Choice columns
Even if choice columns are not text columns, they work the same way as text columns, we just need to indicate the column name, the operator and the text we’re looking for.
For example, to find rows where color = Silver:
Make sure your search text has some single quotes for the filter to work properly.
Filter Multiple Choice columns
Since multiple choice columns can contain multiple selections, but we can apply either the “equals” logic or the “contains” logic presented previously.
Below examples shows how to find records for which color “Silver” has been selected under the “Colors” column.
{InternalColumnName} eq {textChoice}
Substringof({textChoice},{InternalColumnName})
Filter Lookup columns
For lookup columns we need to apply “equals” logic (eq operator). The only difference is that we need to add some additional parts to our query, depending on if we will search by lookup value or by lookup id.
If we are searching by lookup value:
{InternalColumnName}/Title eq {text}
If we are searching by lookup id:
{InternalColumnName}/Id eq {id}
Filter Multiple Choice columns
When trying filtering by Multiple Choice columns, what worked for us was just using the Title/Lookup value or using the “substringof” operator.
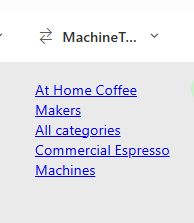
This is column looks:
In the two following examples we are trying to find records in SharePoint where the machine type “At Home Coffee Makers” was selected in a multiple lookup column
Filter User columns
For User type columns, a similar logic to what we have seen so far applies. We will need to use the “equals” operator and combine it with the email attribute contained in the user object.
Query structure will be like this:
{InternalColumnName}/EMail eq {useremail}
Please note that both the E and the M are upper case.
Filter Multiple user columns
Even if we are working with a multiple user selection column, the query filter will work exactly as the single selection user.
This is how our column looks:
Automate tasks that slow you down
Free up your team’s time and focus on strategic work with digital and robotic automation.
This is the filter to find any row where user is selected:
{InternalColumnName}/EMail eq {useremail}
Please note that both the E and the M are upper case.
Filter Calculated columns
You can’t apply OData query filters on calculated columns. The SharePoint action will throw an error.
Combining filters and different columns
You can use “and”, “or” and parenthesis in your queries to combine different conditions, just make sure you write the column name in all conditions.
Note: the Excel connector only allows one filter at a time (no and/or allowed).
Some examples of combined conditions:
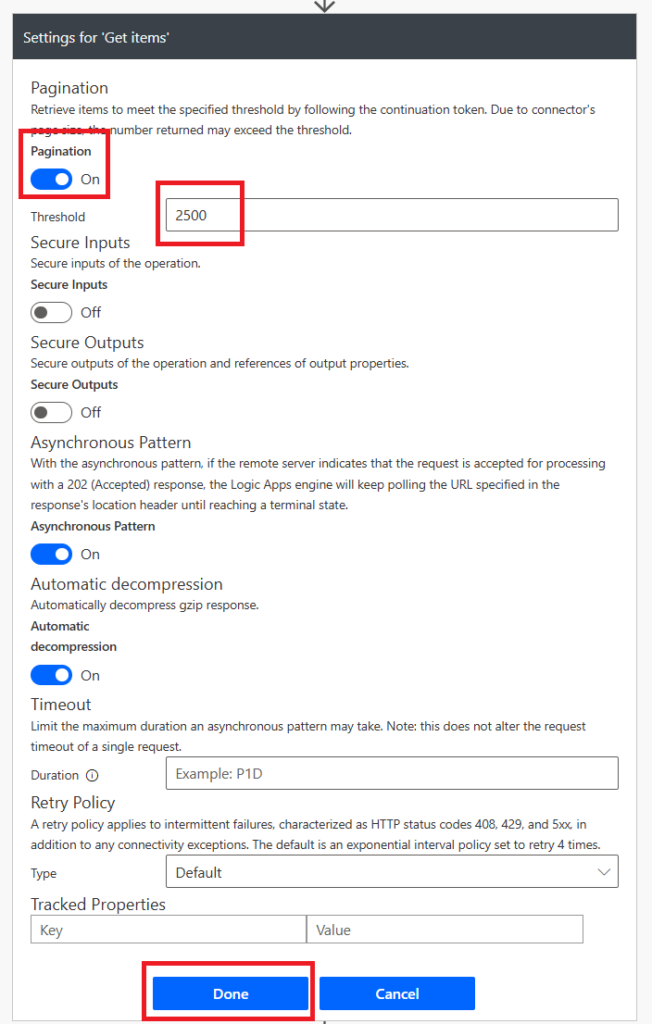
Pagination
It’s important to know that the SharePoint connector in Microsoft Power Automate by default will limit the number of rows it returns, it may be that the query results have 500 records but Power Automate will only list 100 records, because of the default limits.
To avoid this issue when retrieving rows from SharePoint, use the ellipsis in the top right corner of the “Get items” action and click on Settings.
In the next screen of, just turn on the pagination feature and set a maximum number of rows to retrieve (max value can be 10,000). And finally hit on Done.
For businesses aiming to elevate their automation efforts, turning to Microsoft Power Platform consulting services is crucial. With our expertise, we streamline workflows, ensuring optimal use of tools like Power Automate to connect and manage SharePoint data efficiently.
Understanding column types and the related query structures is important. Remember, internal column names are key, and combining filters allows you to perform detailed searches.