
Table of Contents
Generating documents in either Word or PDF format is a pretty common task for many teams (generating an invoice or a Purchase Order, creating contracts, creating service proposals and much more), and Power Automate has some pretty cool out-of-the-box features that can be leveraged to facilitate and automate this task. In this blog, we will talk about the basics to populate a Word template with Power Automate.
How Power Automate works with Word templates
Prerequisites to populate a Word template with Power Automate
- Power Automate License
Power Automate has different types of actions that can be used – Standard and Premium. Standard actions can be used as an extension of your existing Microsoft 365 subscription. Premium actions require additional licensing (around 15 USD / month – you can read more about licenses here: https://powergi.net/blog/power-automate-desktop-app-licensing-explained-updated-2024/).
Word template actions are Premium actions, so to use them, a Power Automate Premium license is required. A 90-days trial can be used at first, with the possibility of extension but at some point this license will for sure be needed.
There is a workaround to not use this license – but it uses SharePoint as medium instead of the Word action in Power Automate. More about this later in this blog.
2. Enable Developer tab in Word Desktop
3. Create a Word template
Define the template format in Microsoft Word – this is usually done in the desktop app. There are also many templates available online to start with.
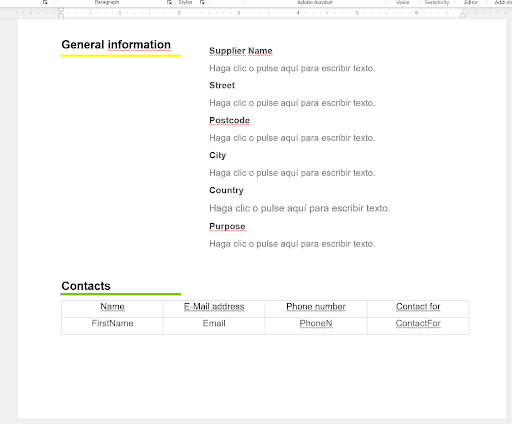
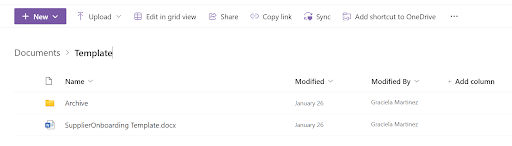
Below is an example of how our template looks, the format and the fields we want to fill out
4. Identify data types for each field
Content controls are used in Microsoft Word to fill out data in templates, the available types are:
- Plain Text – regular text that can be written in the document
- Images
- Repeating control – add “n” number of rows to a table
For our example, we’re using plain text controls to fill out Supplier Name, Address and Purpose and repeating controls for the list of contacts (because supplier can have one or many contacts)
Step-by-step guide: How to populate a Word template in Power Automate
You can also watch our step-by-step video on how to populate Word templates here:
Step 1: Create a Word template with content controls
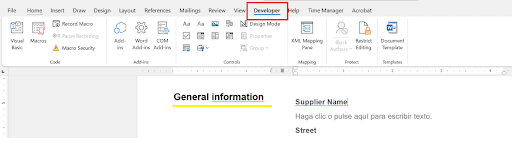
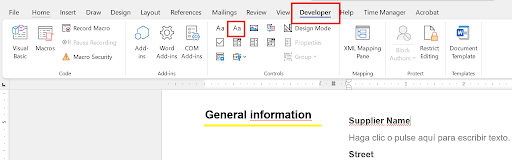
Once the base format of the template is ready, it’s time to start adding the controls and fields in it. Go to the Developer tab and pick the control.
This will add the control in the Word document, click on it and then go to “Properties” and add rename it using the Title and Tag fields.

Repeat these steps for as many fields as the template requires.
If a table is required (like the contacts table shown above), the repeating control has to be added:

Step 2: Upload the template to SharePoint
The template can be added to either OneDrive or SharePoint, but SharePoint is usually a better choice:
Step 3: Set up a Power Automate flow
(Choosing the Right Trigger for Automation, Adding the “Populate Word Template” Action, Mapping Dynamic Data to Template Fields)
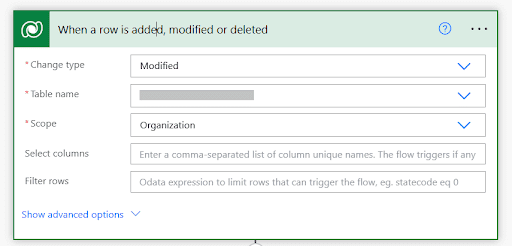
- Start with a trigger. For our use case, we’re using a Dataverse table, but it can be an Outlook email or a SharePoint list
2. Add the “Populate Word Template” action. Power Automate will ask to select the SharePoint site and the template location.
Once the template is selected, all the fields that were set up will show up. This will allow you to map the different controls with the values from Dataverse, SharePoint or email (depending on the trigger selected on step #1)

Step 4: Save or distribute the final document
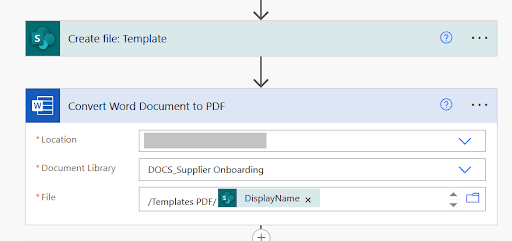
Once the template is filled out, it needs to be saved. For our use case we’re storing it in SharePoint and we will also convert it to PDF. When converting to PDF, note that path location of the file needs to be sent to the Word action.
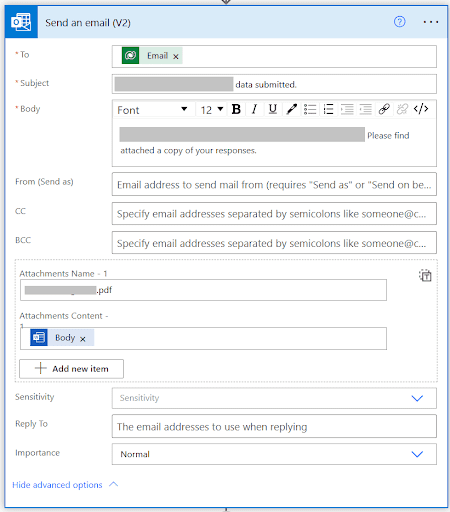
Finally, the document can be sent via email:
Automating document creation without premium connectors
Workarounds for free or standard users
There are some alternatives to Word templates for users who don’t want to or can’t buy a premium license:
- Use HTML templates with OneDrive: an HTML file can be created in OneDrive to later convert it to PDF using OneDrive’s PDF converter.
A website can be used to convert formatted text in word into HTML to make this process easier: https://wordhtml.com/.

2. Create a Word template using SharePoint Columns types
Open the SharePoint library where the template is stored, make sure this template doesn’t have any Developer controls.
Add a column for each of the fields that need to be filled out:
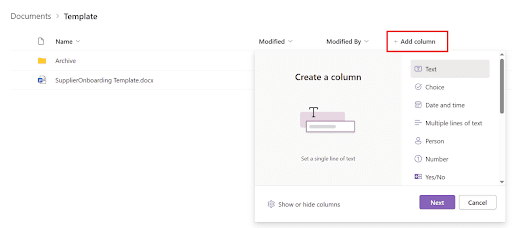
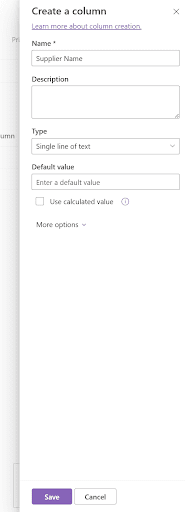
Connect the columns created with the parts of the document that need to be filled out:

Replace the “Fill out Word template” action by “Update properties in SharePoint” action. A step-by-step explanation of this workaround can be found here: https://www.sharepointeurope.com/fill-word-templates-without-premium-connectors-in-power-automate-guide-%F0%9F%A4%96/.
Comparing premium vs. non-premium power automate features
The Word template connector is pretty straight-forward and simple to use, but standard actions such as OneDrive HTML files and SharePoint columns require some additional work and more steps to complete what could be a simple automation, but they are definitely very useful if the premium license requirement is a blocker.
Power Platform consulting: Maximizing efficiency with automated document generation
Customizing Power Automate workflows for document automation
Filling out a template is a very common use case for Power Automate but there could be many other steps around this task such as manual data input or approvals. The advantage of Power Automate is that it can be adjusted to either be used for simpler tasks or more complex ones. If additional data needs to be pulled from other systems to dump into the template, Power Automate can connect to other platforms to extract it and pass it to Word so it can be shown to the end user.
For organizations aiming to enhance their operational efficiency, our Power Platform Consulting Services offer tailored solutions in automating document generation. This collaboration empowers businesses to optimize their processes, ensuring seamless integration with existing systems while reducing manual input.
Advanced automations with AI and Power Apps
Apart from customizing workflows, automations can be taken to the next level by combining the different Power Platform tools. For example, a Power Apps application can be created to allow end users to perform data input of the information that needs to be filled out in the template. Or AI Builder (Power Platform’s Artificial Intelligence tool) can be used to generate a summary of an email or extract keywords from it and put this outcome in the template.
Power Platform: Better together use case
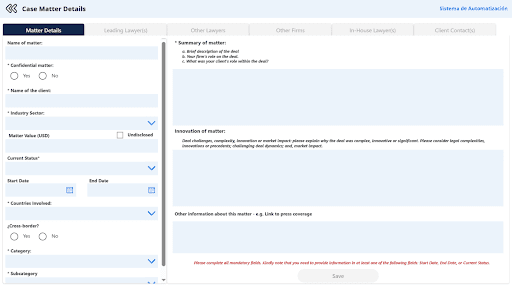
Template generation processes can be of varying natures and complexity. Using our Power Platform Consulting services, we worked with a legal firm that has to submit a summary of their most important cases to different world-wide ranking systems (example: https://www.legal500.com/the-legal-500-submission-information/latin-america-submissions/). These summaries are usually pre-defined templates set by each of the different organizations in charge of the ranking. We worked together with the legal firm in Latin America to create an end-to-end process to track all matters for each of the countries they have presence in and to later automatically generate a template with all the information they need to submit to each of the ranking organizations.
A standard form was created in Power Apps where users input all relevant case information:
Once matters are in, the Marketing team can come to the download screen to select which cases should be included in the summary template and generate the final document:
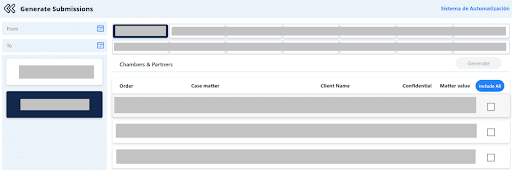
Using Power Automate, a document with the selected ranking system and the selected matters will be generated and sent to the user:

This use case is an amazing example of how to use Power Apps and Power Automate together to create a streamlined process – reducing the need to input the same data in multiple files and keeping track of all historic cases.
Ready to streamline your document automation? Contact us if you have any template or document in mind that you might require help with!
