Table of Contents
Business Process Flows are a great tool to manage standard processes, they don’t have an out-of-the-box feature to prevent users from moving to previous stages, but some custom code can be added to the Dataverse form to incorporate additional functionality to model-driven apps in power apps.
In this blog, we will show the code required to add this functionality to Business Process Flows in model-driven apps and we will also cover the steps to upload this code and have it fully working!
Business process flows are critical for keeping users on the right path. With our Power Automate consulting services, you can design approval steps and stage transitions that are fully aligned with compliance requirements, reducing errors and improving user adoption.
Step 1. Write JavaScript code
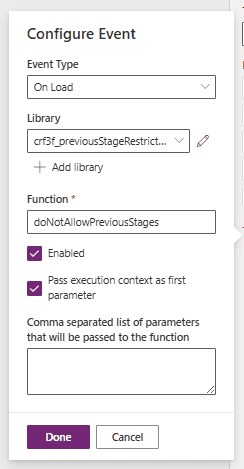
					function doNotAllowPreviousStages(executionContext) {

    var formContext = executionContext.getFormContext();


    // Call function

    formContext.data.process.addOnPreStageChange(onPreStageChangeHandler);

}


function onPreStageChangeHandler(executionContext) {

    var process = executionContext.getEventArgs();


    // Get the stage change direction

    var direction = process.getDirection();


    // Block stage transitions if moving to Previous

    if (direction === "Previous") {

        process.preventDefault(); // Do not allow moving to previous stage

        // Show confirmation dialog for user to confirm

        var alertStrings = {

            confirmButtonLabel: "OK",

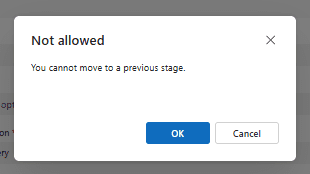
            text: "You cannot move to a previous stage.",

            title: "Not allowed"

        };

        var alertOptions = {

            height: 120,

            width: 260

        };

        Xrm.Navigation.openConfirmDialog(alertStrings, alertOptions).then(function (response) {

            /*if (response.confirmed) {

                // No action needed, just display the alert

                console.log("Staged not transitioned.");

            }*/

        });

    }

}
Step 2. Add the code as form Library
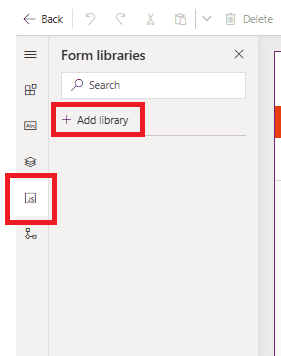
Let’s open the Dataverse form where the Business Process Flow restriction will be needed on. Then, we need to go to the JavaScript Libraries, and finally, let’s click on “Add Library”
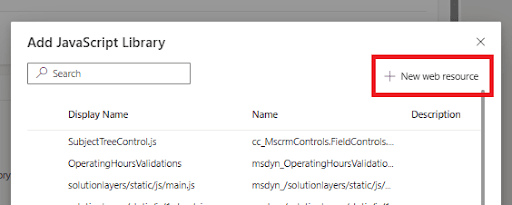
Click on “New web resource”
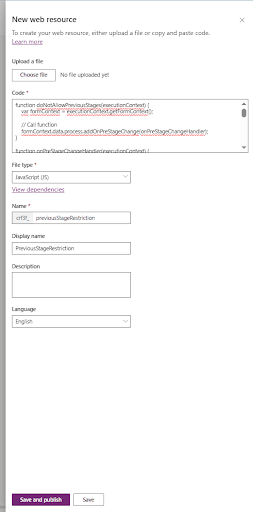
In the next pop-up, we can either upload a .JS file or just paste the code directly in the code box. Let’s fill out the remaining fields and finally save and publish
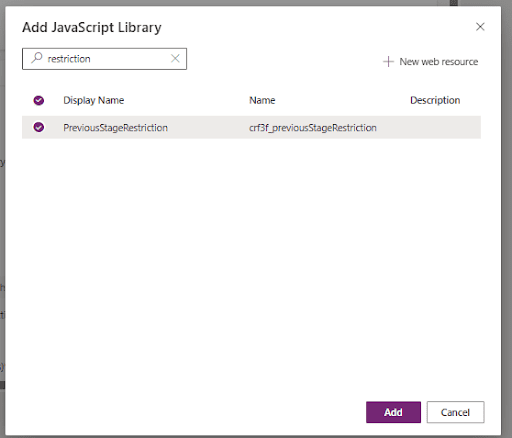
After saving, we will be prompted to select the JavaScript resource we just created. Let’s select and add
Step 3. Add event handler
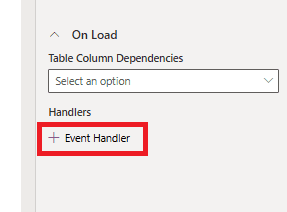
Click anywhere on the form editing gray area, this will enable the “Events” section.
Let’s click on “Event Handler”
Step 4. Test the model-driven app
Open the app and try moving to a previous stage. The pop-up should prevent users setting previous stages as active.
Conclusion
There is not an out-of-the-box feature in the Business Process Flow editor to restrict users from selecting previous stages as active, but model-driven apps can be highly customized using JavaScript libraries with just a few steps! Contact us if you’d like to implement some custom code or functionality in Business Process Flows or Model-driven apps!


