Power Automate has some cool out-of-the-box features to read data from Excel files. But if you want to read this data using these actions, the data needs to be formatted as an actual table in the file and not a flat range – but don’t you worry, Office Scripts got you covered!
With Office scripts you can run many automations on your Excel files and they function as if they were “VBA macros” but with the ability to run online! This means that many of the limitations that the regular Excel connector has in Power Automate can be worked around using Office scripts. This is especially beneficial when working with PowerApps consulting services to optimize workflows.
For today’s blog, we will show how to read unformatted (flat range) data from an Excel file and insert this data into a SharePoint list.
By integrating Microsoft Power Platform into your operations, you streamline data management effectively. Leveraging Power Platform Consulting Services can transform your workflows, ensuring seamless automation and data integration tailored to your needs.
Table of Contents
Use case description
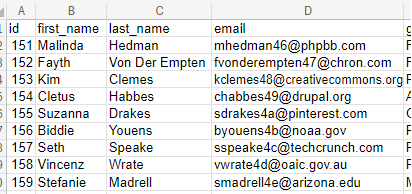
The trigger for our automation is an Excel file that is received through email from an automated system that sends us the list of new subscribers to our newsletter. File format is xlsx.
Excel file looks like this:
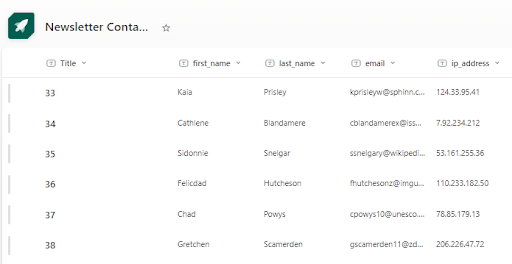
We need to extract all these rows present in the file and push them into our list of subscribers in SharePoint:
Step 1. Create Office Script
Open Excel online or your desktop app and find the “Automate” tab. Then, just click on “New script”
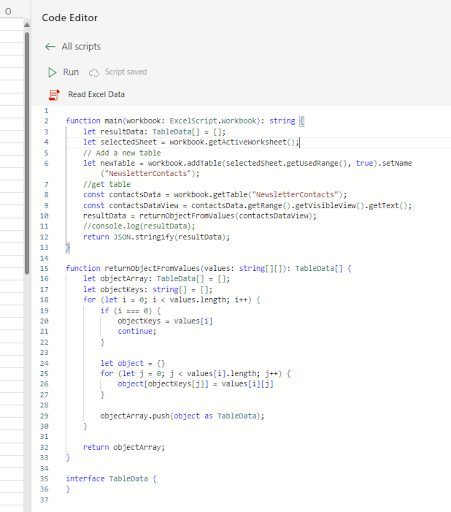
					function main(workbook: ExcelScript.Workbook): string {
let resultData: TableData[] = [];
let selectedSheet = workbook.getActiveWorksheet();
// Add a new table
let newTable = workbook.addTable(selectedSheet.getUsedRange(), true).setName("NewsletterContacts");
//get table
const contactsData = workbook.getTable("NewsletterContacts");
const contactsDataView = contactsData.getRange().getVisibleView().getText();
resultData = returnObjectFromValues(contactsDataView);
//console.log(resultData);
return JSON.stringify(resultData);
}

function returnObjectFromValues(values: string[][]): TableData[] {
let objectArray: TableData[] = [];
let objectKeys: string[] = [];
for (let i = 0; i < values.length; i++) {
if (i === 0) {
objectKeys = values[i]
continue;
}

let object = {}
for (let j = 0; j < values[i].length; j++) {
object[objectKeys[j]] = values[i][j]
}

objectArray.push(object as TableData);
}

return objectArray;
}

interface TableData {
}
And rename the Script.
It should look like this:
You can always go back to edit the script if needed.
This office script will be saved in our OneDrive account (the OneDrive user that created the script), under the “Documents” folder. We can leave it there or download the script and save it to SharePoint, we can run the script from any of these services.
Step 2. Create Power Automate flow
2.1 Set up trigger
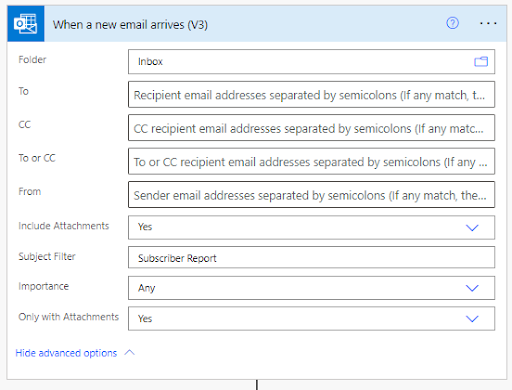
For our use case, we will receive the Excel file from an automated email with the words “Subscriber Report” in the subject:
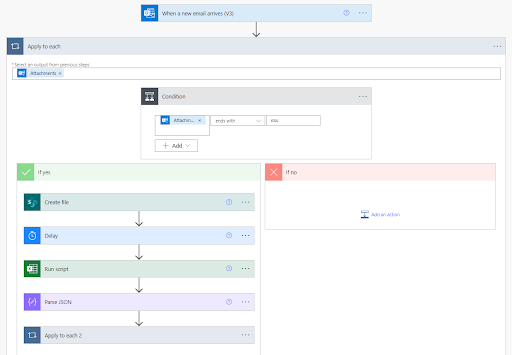
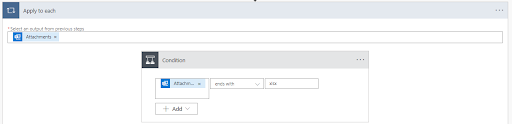
2.2 Add a condition to check file extension
Let’s make sure the script will only run for .xlsx files, so let’s add a condition on the attachment name. Once this is added to our flow, an “apply to each” action will automatically show up. It should look like this:
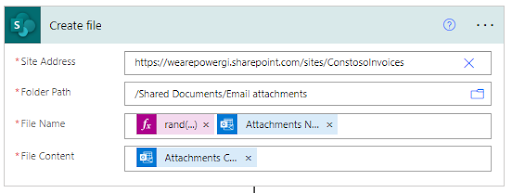
2.3 Create the file in SharePoint
Now we need to save a copy of the attached file into SharePoint, because Office Scripts can only run on files saved on OneDrive or SharePoint.
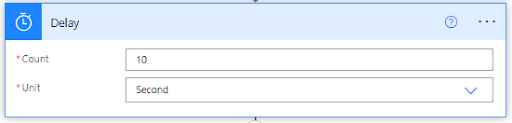
2.4 Delay for some seconds
It happens sometimes that the Excel connector gets a bit slow so it’s good to add a delay between when file is created and when the script runs
2.5 Run script
Now, let’s add the “Run script” action, select SharePoint site and library.
In the “File” field, pass the “Id” that’s coming from the “Create file” action. Finally, select the script you just created.
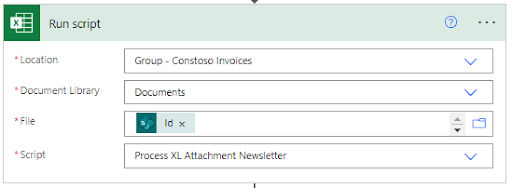
You can also upload the script in a SharePoint site and use “Run Script from SharePoint library” action.
2.6 Parse output to JSON
The Excel script will return the table in the file in JSON format, so we just need to convert this into a format that can be easily consumed by Power Automate.
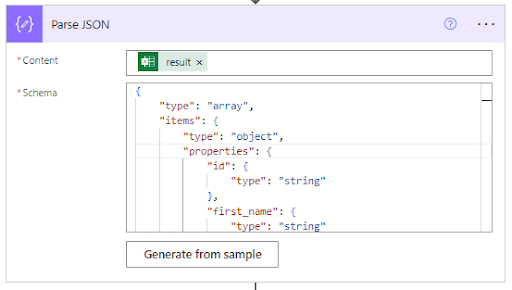
Below is the JSON schema for the table shown above. Notice how we just have column names in the properties and the data type.
					{
    "type": "array",
    "items": {
        "type": "object",
        "properties": {
            "id": {
                "type": "string"
            },
            "first_name": {
                "type": "string"
            },
            "last_name": {
                "type": "string"
            },
            "email": {
                "type": "string"
            },
            "gender": {
                "type": "string"
            },
            "ip_address": {
                "type": "string"
            }
        },
        "required": [
            "id",
            "first_name",
            "last_name",
            "email",
            "gender",
            "ip_address"
        ]
    }
}
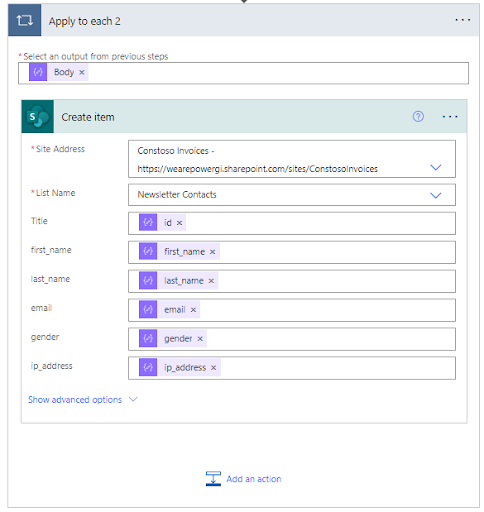
2.7 Create item in SharePoint
Find the “Create item” action in Power Automate and fill out SharePoint site, list and fields from the JSON content, it should look like this:
Step 3. Test
Now we’re ready to test the automation!