Table of Contents
Calculating the number of business days between two dates is a common requirement in the world of automation, sometimes we want to send reminders every 3 or 5 business days, and not calendar days. In this blog, we’ll show you how to use Power Automate to calculate the difference in business days.
If your team is looking to streamline these types of processes, leveraging professional Power Apps Consulting Services can help ensure your flows are optimized, reliable, and aligned with your organization’s automation strategy.
Step 1. Create an instant flow with two date inputs
Select “Add an input”
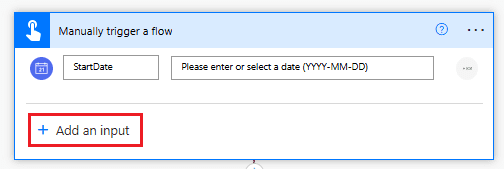
Select “Date”

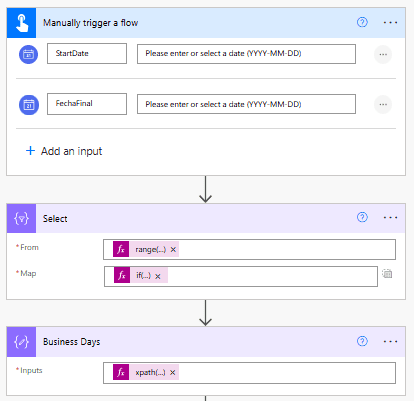
End result should look like this:
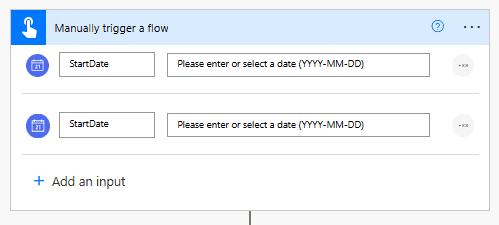
Step 2. Write the Power Fx function to calculate the difference in calendar days between the two dates.
int(split(dateDifference(formatDateTime(triggerBody()['date'],'yyyy-MM-dd'),formatDateTime(triggerBody()['date_1'],'yyyy-MM-dd')),':')?[0])
Step 3. Use the Range Power Fx function
Next, we can use the Range function in Power Automate to generate a list that covers every single day in between each date.
range(0,int(split(dateDifference(formatDateTime(triggerBody()['date'],'yyyy-MM-dd'),formatDateTime(triggerBody()['date_1'],'yyyy-MM-dd')),':')?[0]))
The result of above function will look like below – the number of items in the result will depend on the number of days in between each day:
[0,1,2,3,4,5]
Step 4. Add a Select action
Add a new step in the flow and find the “Select” action. Once selected, in the “From” field, write the complete formula we created on step #3
It should look like this:
range(0,int(split(dateDifference(formatDateTime(triggerBody()['date'],'yyyy-MM-dd'),formatDateTime(triggerBody()['date_1'],'yyyy-MM-dd')),':')?[0]))
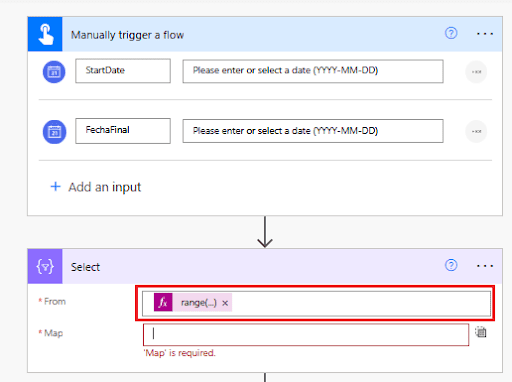
In the Map field, add the following formula:
if(or(equals(dayOfWeek(addDays(formatDateTime(triggerBody()[‘date’],’yyyy/MM/dd’),add(item(),1))),0),
equals(
dayOfWeek(addDays(formatDateTime(triggerBody()[‘date’],’yyyy/MM/dd’),add(item(),1))),6)),0,1)
With above formula, we’re checking if each date in between the two dates we are comparing falls on a Saturday or Sunday. If Sunday or Saturday it will return 0, if something different from those two, it will return a 1.

If we run the automation as it is right now, we should get this result:
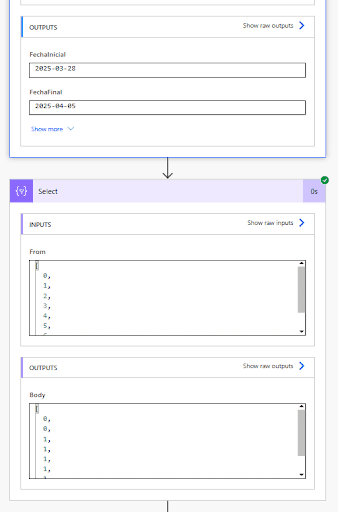
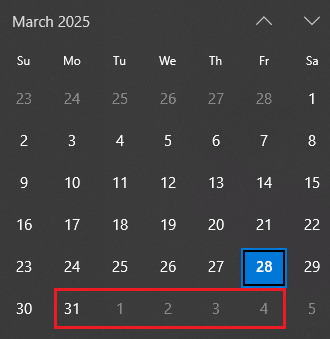
We’re comparing March 28th of 2025 and April 25th exclusively.
When we check the calendar, there are 5 working days and 3 non-work days.
In the results we can notice the first two values are 0 – because they are non-working days. When the date falls on a work day, it returns zero.
Step 5. Sum working days
Since all dates that relate to working days return a “1”, we can just sum all the values in the result to obtain the number of working days.
For that, let’s just add a compose action and use the following Power Fx function
xpath(xml(json(concat(‘{ “root”: { “Numbers”: ‘,body(‘Select’),’ }}’))), ‘sum(/root/Numbers)’)
This will take the results from the Select action, convert them to XLM and finally sum them using the xpath function.
Action should like this:

Step 6. Test the automation
When testing, the result will be 5:
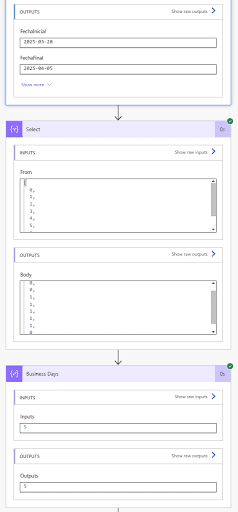
This is how the final flow should look:
Bonus: Add this flow as a child flow
If you want to be able to call this flow from different other flows or from Power Apps, we can add the “Respond to a Power App or flow” action, and add the xpath formula there instead.
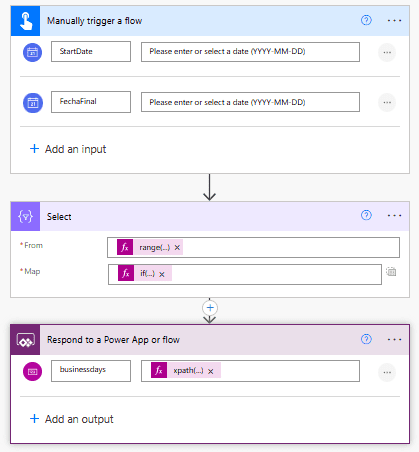
You should be able to call this flow from multiple places now:
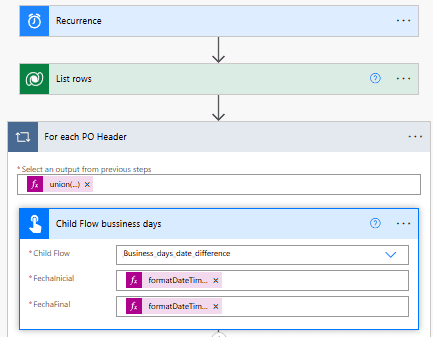
Power Automate doesn’t have a built-in feature for calculating business days, but we can achieve this calculation by combining Power Fx functions with out-of-the-box actions. We can also create a “child flow” that can perform this calculation “on-demand” and can be called from other flows or even from Power Apps.
Contact us if you have any questions or if you’d like some help on Power Automate or PowerFx!


