Table of Contents
When we save data in SharePoint or Dataverse from Power Apps, datetimes are stored in the universal time zone (UTC) and whenever we show date time columns in the apps, Power Apps will always recognize the user’s setting and will show date time based on this.
There are some scenarios in which we need to standardize which time zone we show dates and times in. In this blog, we will show you the options available to ensure a consistent Power Apps EST Time Zone.
The DateAdd and TimeZoneOffset functions
We can use the DateAdd function in Power Apps to force time zones in UTC and to add or remove X number of hours from a date time:
					DateAdd(
        {your-datetime-column},
        {number-of-minutes-or-hrs},
        {minutes-or-hours}
    )
Above function can be combined with TimeZoneOffset, to force a datetime value to be shown in UTC time zone.
					DateAdd(
        {your-datetime-column},
        TimeZoneOffset(),
        TimeUnit.Minutes
    )
The TimeZoneOffset function will calculate the difference in minutes between the user’s time zone and UTC, so when used as the second parameter of the DateAdd function, this will return the date time value in UTC.
Now, we need to convert UTC into the final time zone we need to display in the app. We can just add another DateAdd function wrapping the code above and then just add or remove the number of hours we want to adjust UTC:
					DateAdd(
    DateAdd(
        {your-datetime-column},
        TimeZoneOffset(),
        TimeUnit.Minutes
    ),
    -4,
    TimeUnit.Hours
)
In the above function, we’re calculating the UTC-4 time zone.
This approach works perfectly for time zones that do not have daylight saving. If the time zone you want to display on has daylight saving, you will have to remember to come to the app and update the new number of hours against UTC for your app to keep displaying the right values.
But don’t you worry! There is a workaround to automatically change the number hours based on daylight saving using Power Automate.
Workaround 1: use a Power Automate workflow
Step 1. Add a workflow in your app
Go to flows and then create a new power automate workflow. You don’t need to add any triggers.
Find the “Convert time zone” action, and set up two of these actions as follows:
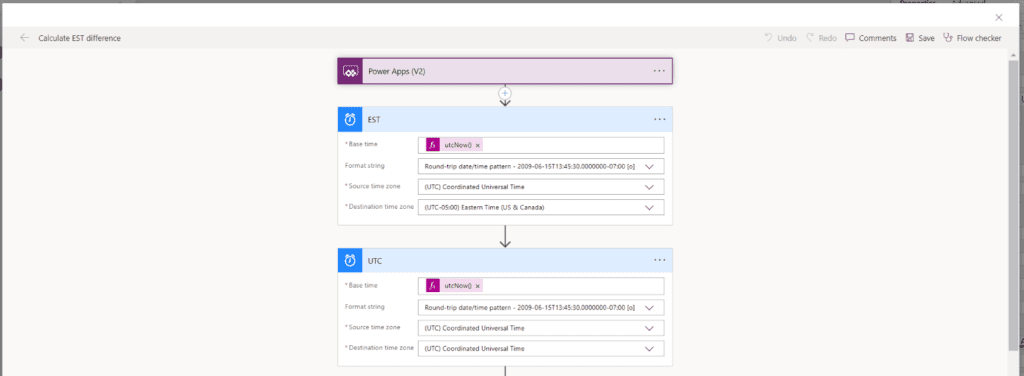
Important: make sure to rename your actions. For the EST action, we selected EST time zone in the destination field, but you can select the time zone you want to work with in this step.
After that, let’s just add a compose action with the following PowerFX code:
@{int(first(split(dateDifference(body('UTC'),body('EST')),':')))}
What this function is doing is taking the time in EST and also in UTC and just calculating the difference in hours between these two.
This process is a great example of how Power platform consulting services can help organizations automate their workflows efficiently.

Finally, just add the “Respond to a Power App or flow” action and add an output to it. We will call out output variable “offsetval” and just add the compose action into the value field:

For this scenario, we added the output as a string and not a number because Power Apps was not liking the number format.
This is how end result should look:
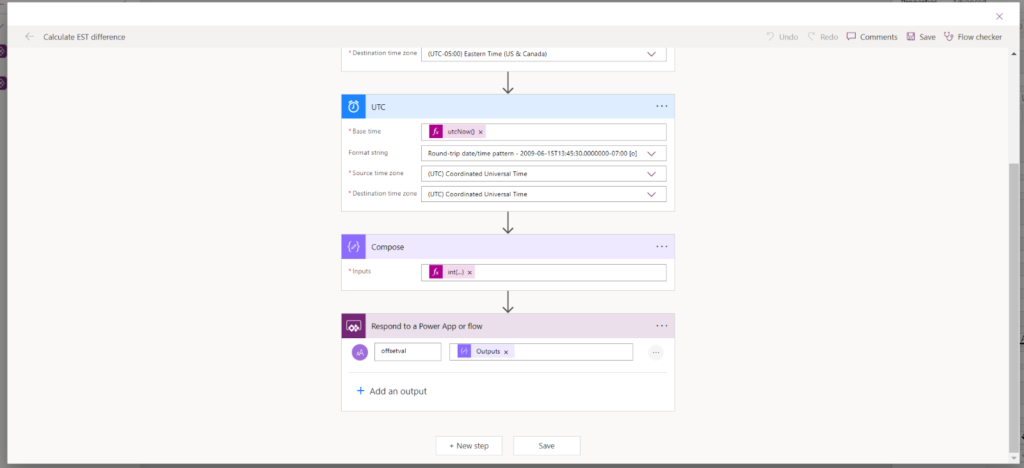
Save and close.
Step 2. Run the flow OnStart
Find the OnStart attribute of your app and paste the following code:
					Set(
    varTimeOffset,
    CalculateESTdifference.Run().offsetval
);
If(
    IsBlank(varTimeOffset),
    Set(
        varTimeOffset,
        "-4"
    )
);
It should look like this:
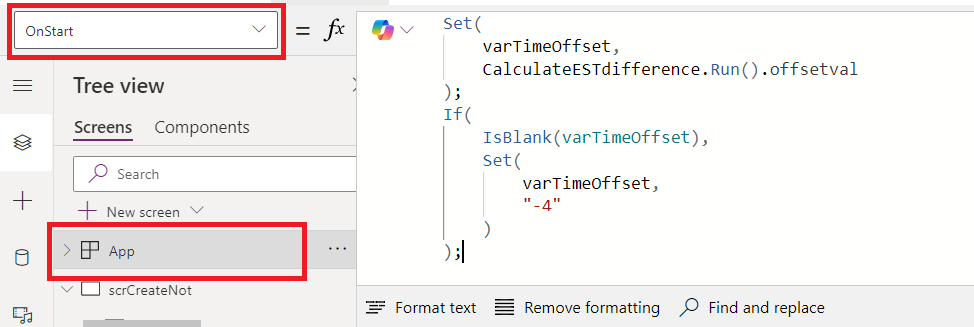
With these lines of codes, we’re running the flow everytime the app starts and saving the value of the offsetval output (the one that gives us back the difference in hours between EST and UTC) from the flow into the varTimeOffset variable in Power Apps.
We also added some additional logic to assign -4 in case something goes wrong with the flow.
Step 3. Use the varTimeOffset variable in your date time calculations
Now, it’s just about using the variable that stores the EST vs UTC difference in the different controls we want to display EST time zone.
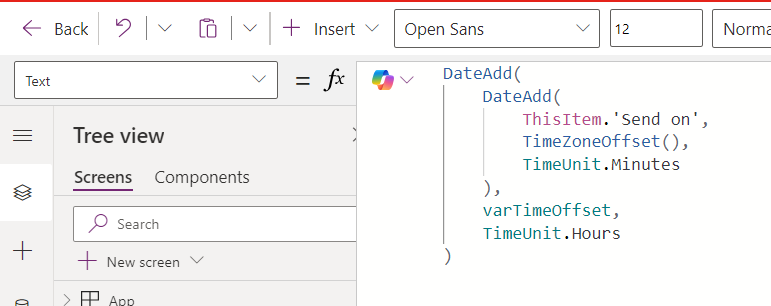
We will use the same function we reviewed in the previous section, but this time instead of hardcoding the -4, we will use this dynamic variable that will calculate automatically the number of hours difference, regardless of daylight saving.
					DateAdd(
    DateAdd(
        ThisItem.'Send on',
        TimeZoneOffset(),
        TimeUnit.Minutes
    ),
    varTimeOffset,
    TimeUnit.Hours
)
It should look like this:
Step 4. Make sure to share the flow with all the users that have access to the app
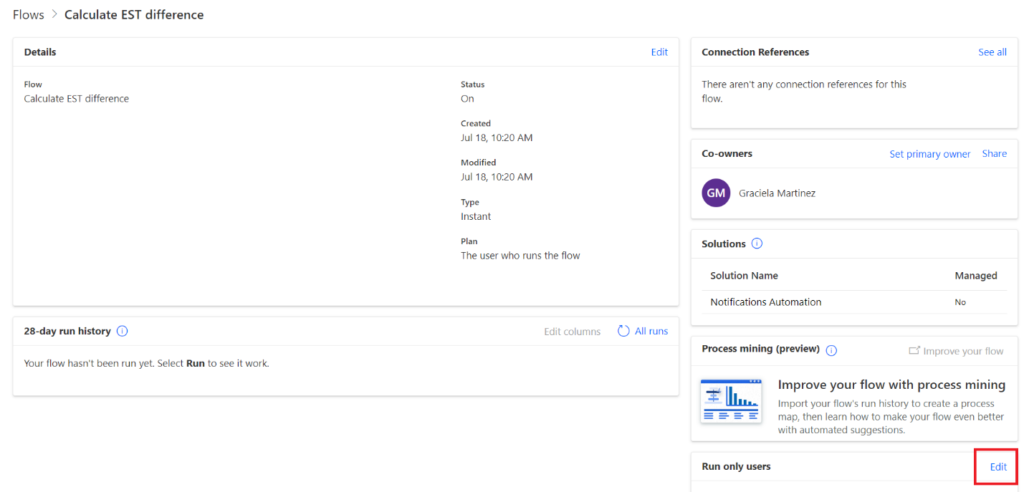
Open the Power Automate portal and locate the flow.
Find the “Run only users” section and click on Edit
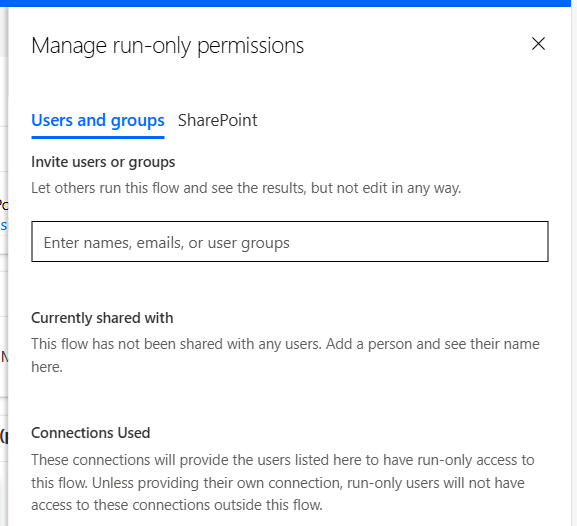
In the next panel, select users, security groups or SharePoint lists you want to share this flow with:
Empower your business with Power Platform consulting services, which streamline processes and remove inefficiencies. We help you tap into the full potential of automation, ensuring seamless and effective integration with your existing systems.
Workaround 2: store difference in a SharePoint list or a Dataverse table
The caveat to the workaround #1 approach is that this flow will run every single time users open the app, because timezone difference needs to be calculated every time. If this is an issue for your use case, you can store the timezone difference in a SharePoint list or a Dataverse table with a single row, and have a Power Automate workflow that checks daily the difference and updates your datasource with the time difference.

