Table of Contents
Let’s suppose we receive inventory files from our provider, and we need to upload these stock counts in our ERP system every time we get these files. The file format our ERP system requires is a CSV document but the file from the provider is in XLSX format.
In this blog we will show how to use Power Automate in combination with Office Scripts to take the XLSX format file and convert it into the CSV format that is friendly with our ERP system.
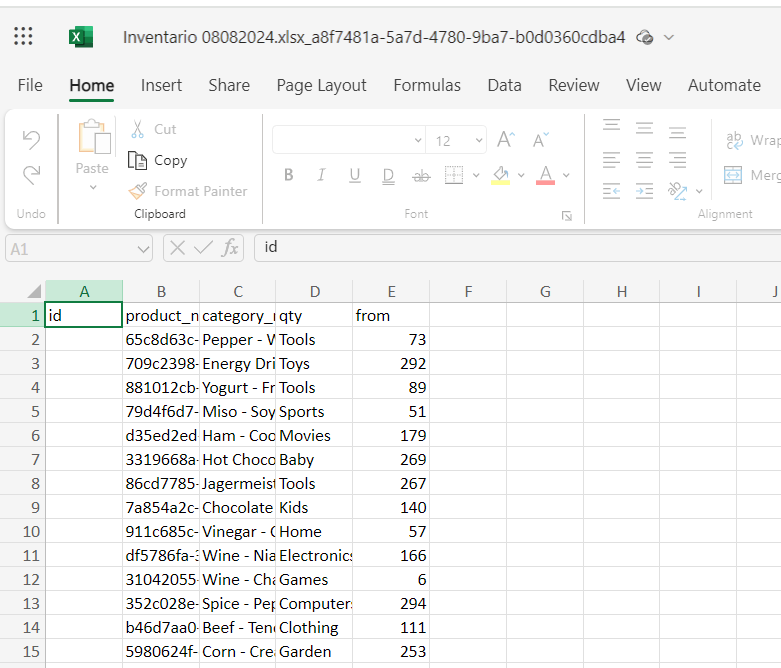
The provider email can have one or more Excel files that can look like this:
Step 1. Create Office Script
We need to create an small automation in the cloud that will take the content of the file and make it a table instead of a flat range, we will use the amazing Office Scripts for that. If you need help implementing this kind of automation, our consulting on Power Platform solutions can guide you through best practices.
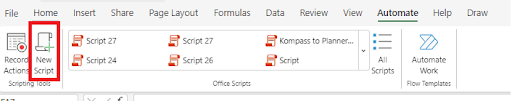
Open Excel online or Excel desktop and find the “Automate” tab. Then, just click on “New script”
					function main(workbook: ExcelScript.Workbook) {

    let selectedSheet = workbook.getActiveWorksheet();
    // set headers name
    selectedSheet.getRange("A1:D1").setValues([["product_name", "category_name", "qty", "from"]]);
    // Add a new table at range on selectedSheet
    let newTable = workbook.addTable(selectedSheet.getRange("A1").getSurroundingRegion(), true);
    // Add a new table at range A1:D769 on selectedSheet
    newTable.setName("Inventario");

}
Use code above and rename the Script.
It should look like this:
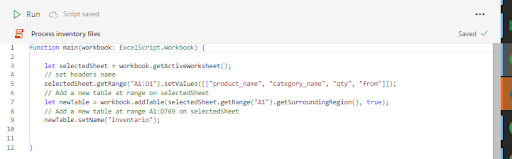
What this code is doing is just renaming the columns in our excel file and then converting the content of the excel document into a table called “Inventario”.
What’s really cool about Office Scripts is that you can do much more – add calculations, columns, remove rows, create pivot tables. If there are any additional step you need to apply to your CSV file you can just add it here by recording the transformations steps using the actions recorder.

You can always go back to edit the script if needed.
This office script will be saved in our OneDrive account (the OneDrive user that created the script), under the “Documents” folder. We can leave it there or download the script and save it to SharePoint, we can run the script from any of these services.
Important: Office Scripts can’t process high volumes of data, if your file has more than 1000 rows make sure to find a way to split your file in batches for the Office Script to not time out.
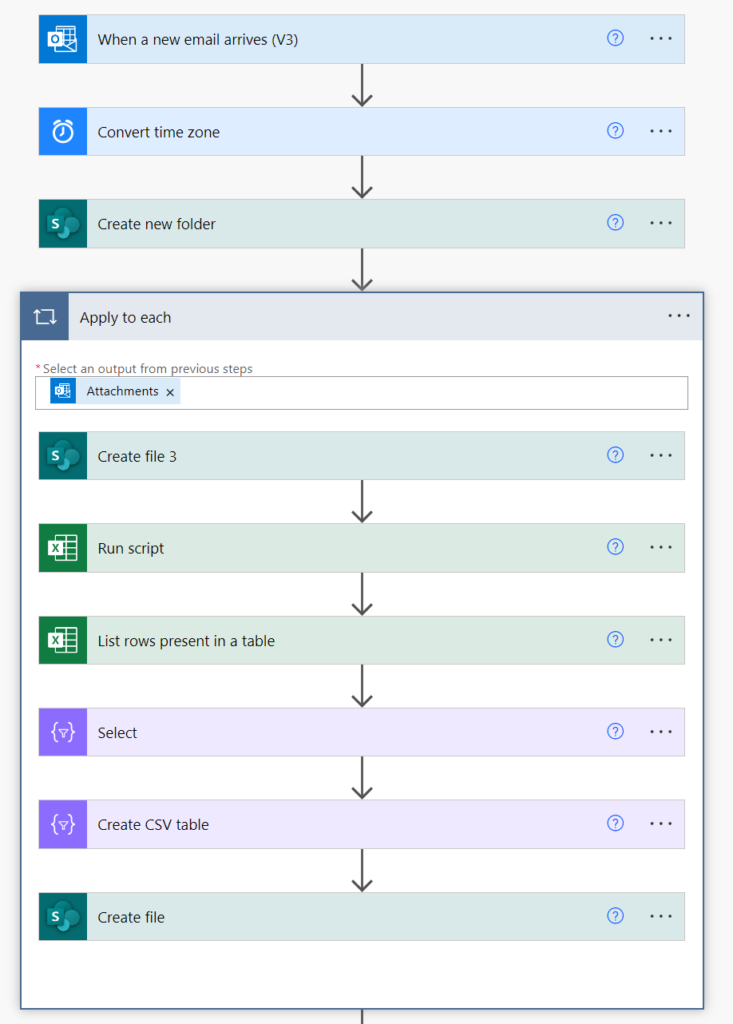
Step 2. Create a Power Automate Workflow
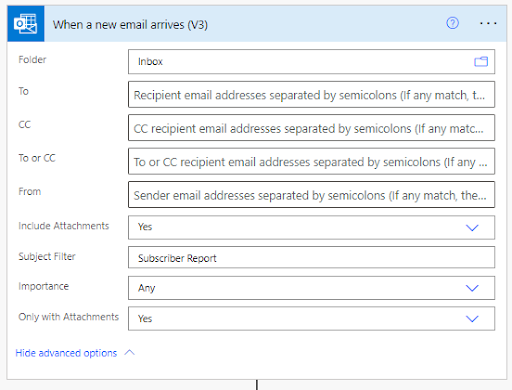
2.1 Add email trigger
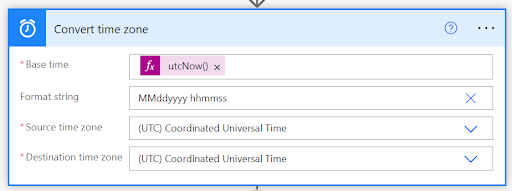
2.2 Add a convert time zone action
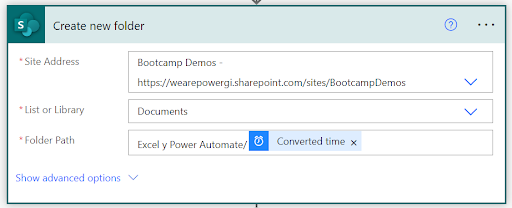
2.3 Add a create new SharePoint folder action
The email can contain one or more document attached and we want to group all files in a single folder, so we need to create a folder to locate the files related to each email.
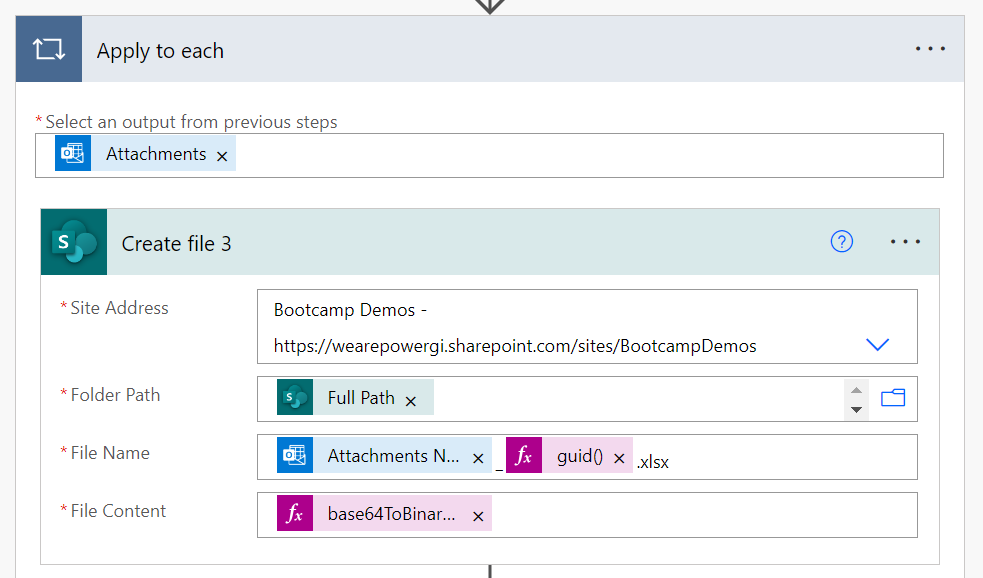
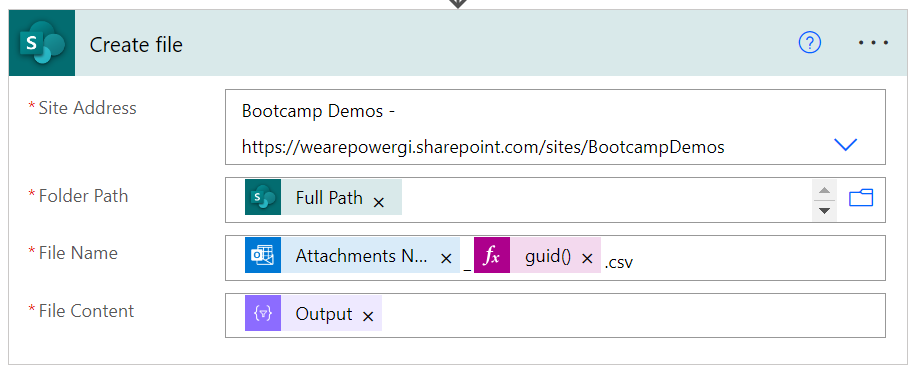
2.4 Add a Create file action
Now it’s time to get the file content from attachments and save it in the folder we just created.
Find the create file action from SharePoint connection and set up like this:

Folder path (select full path from the Create folder action):
@{outputs('Create_new_folder')?['body/{FullPath}']}
File name (select file name from the attachments list in your trigger):
@{items('Apply_to_each')?['name']}_@{guid()}.xlsx
File content (select file content from the attachments list in your trigger, and use the base64ToBinary formula):
@{base64ToBinary(items('Apply_to_each')?['contentBytes'])}
Once you select either file name or content, you will notice Power Automate will add an apply to each action, this means everything you add inside this action will execute for each of the files contained in your email.
If you’re struggling to integrate Power Automate with SharePoint, our Power Platform consulting services can provide tailored guidance
2.5 Run Script
Now that we have our file saved in SharePoint, we can execute the automation we just created with Office Scripts, where we take the values from the Excel file and convert them into a table.
Find the “run script” action from the Excel connector, select the office script we just selected and pass the file Id from the Create file action from above
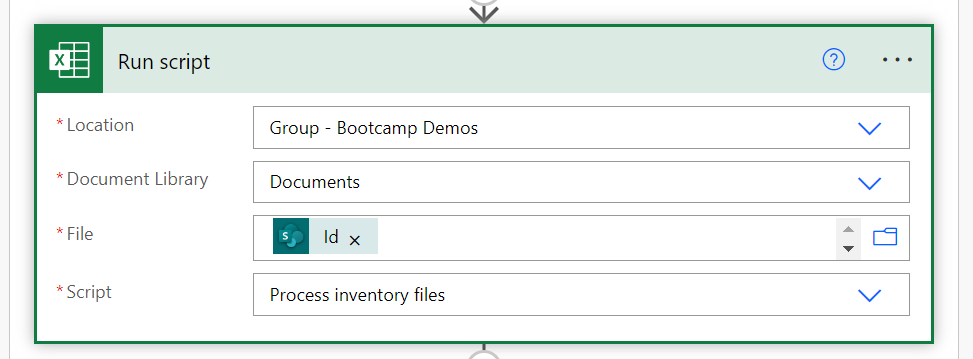
File:
@{outputs('Create_file_3')?['body/Id']}
2.6 Get table content
Now that the script has ran, the table name “Inventario” will exist in the file we just created, so we can use the “List rows present in a table” action from the Excel connector.
File:
@{outputs('Create_file_3')?['body/Id']}
Table:
@{string('Inventario')}
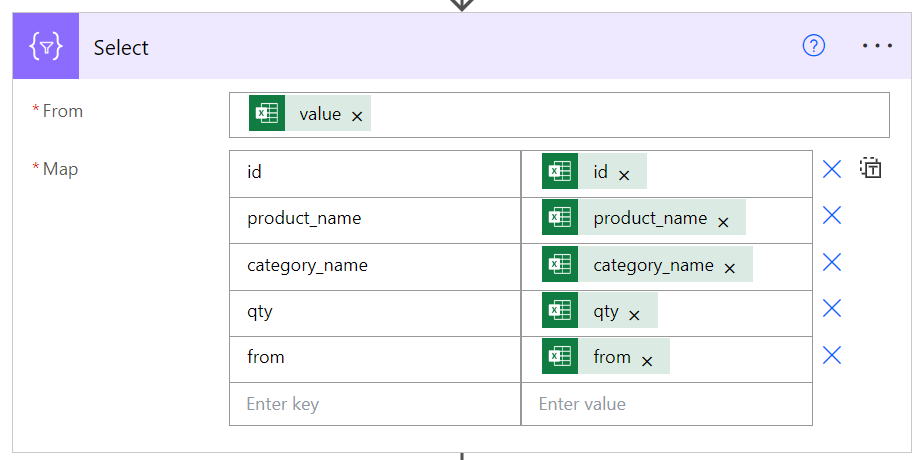
2.7 Select the columns you need in your file
Find the “Select” action from the “Data operation” connector.
In the From field, select the “value” result from previous action.
@{outputs('List_rows_present_in_a_table')?['body/value']}
In the “Map” section, add the columns you need the final CSV document to have and on the right, indicate the corresponding column from the Excel file
					@{item()?['column-name-in-excel-file']}
@{item()?['product_name']}
2.8 Create CSV
Find the “Create CSV Table” action from the “Data operation” connector. In the From field, just select the result from the “Select” operation.
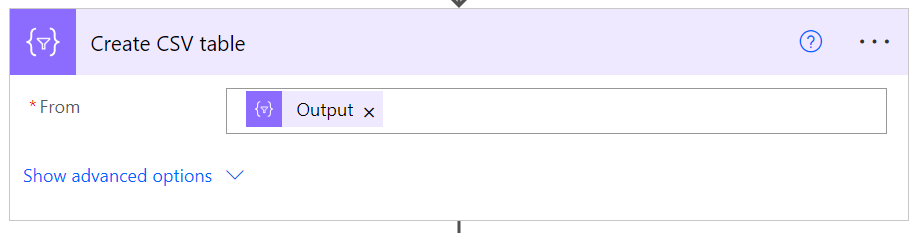
From:
@{body('Select')}
2.9 Save file in SharePoint
Folder path (select full path from the Create folder action):
@{outputs('Create_new_folder')?['body/{FullPath}']}
File name (select file name from the attachments list in your trigger and add CSV extension at the end):
@{items('Apply_to_each')?['name']}_@{guid()}.csv
File content (select the result from the “Create CSV table” operation.):
@{body('Create_CSV_table')}
Step 3. Test Automation
We’re ready to test what we just built! This is how the final workflow should look:
Send an email with the file(s) sample(s) and wait for execution to happen:
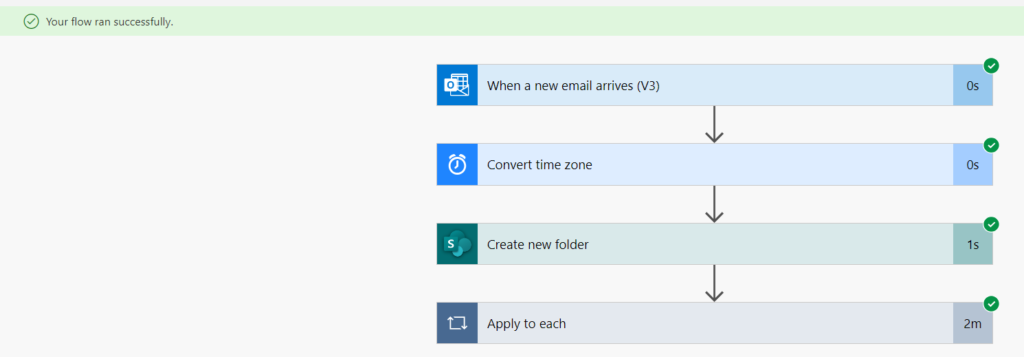
When you go to SharePoint you will notice files will be created!
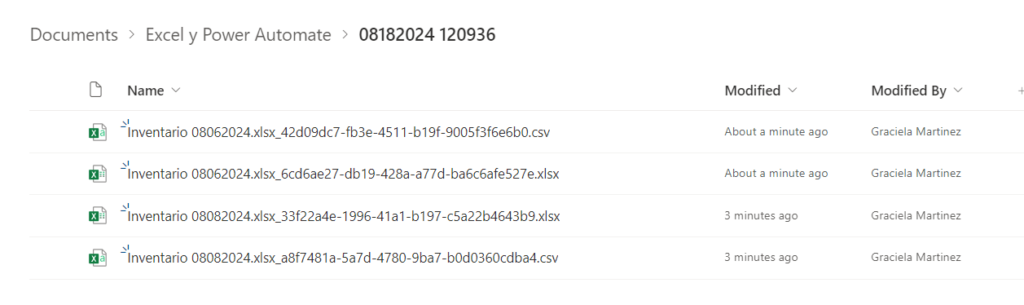
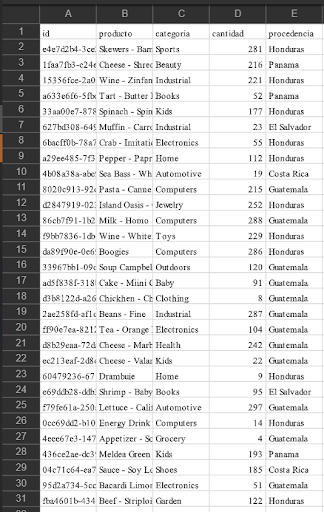
The email we used as example had 2 Excel files, so two CSV documents were created by our automation.