Table of Contents
Code Apps
To start building Power Apps Code Apps, you need two things ready: an environment that allows code apps, and a computer with a few developer tools installed.
Over the last few months, Microsoft has added new options for building business apps. Alongside canvas apps and model-driven apps, Power Apps now offers Code Apps. These are apps you build in a development tool such as Visual Studio Code, using a programming language, and usually with help from AI.
Canvas apps only need a browser. Code Apps are different: you install some tools on your machine and change one setting in the environment. This post is a step-by-step guide to everything you need, from enabling the feature to publishing your first app.
Step 1: Enable Code Apps in your Power Platform environment
The first and most important step is to turn on Code Apps in the environment where you will build or deploy them. Without it, you cannot push code apps to that environment.
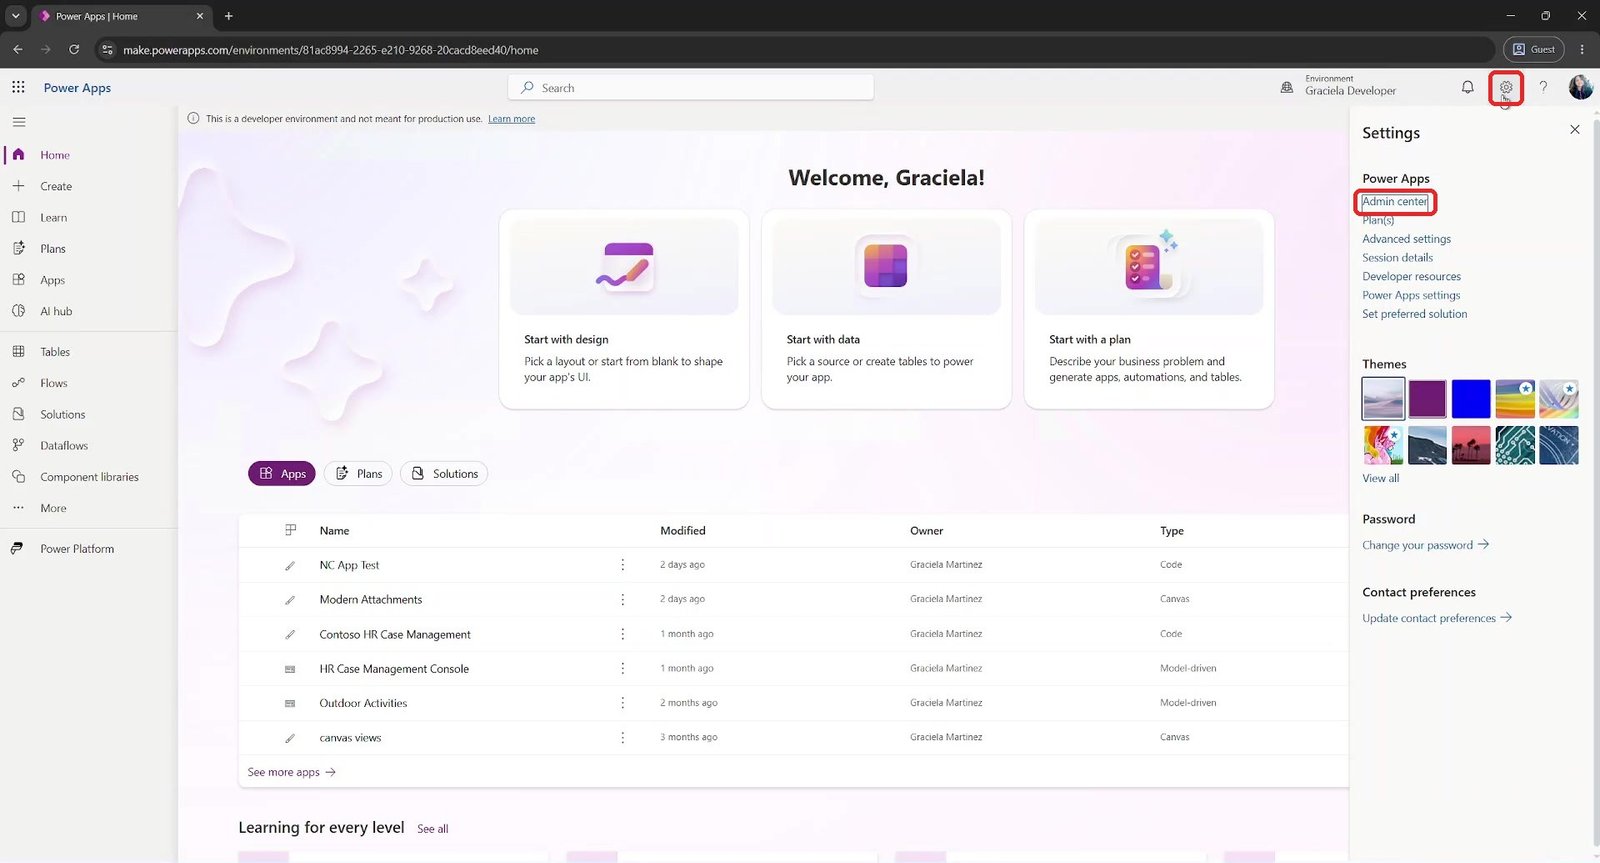
- In the Power Apps portal, select the gear icon (Settings) at the top right, then select Admin center.
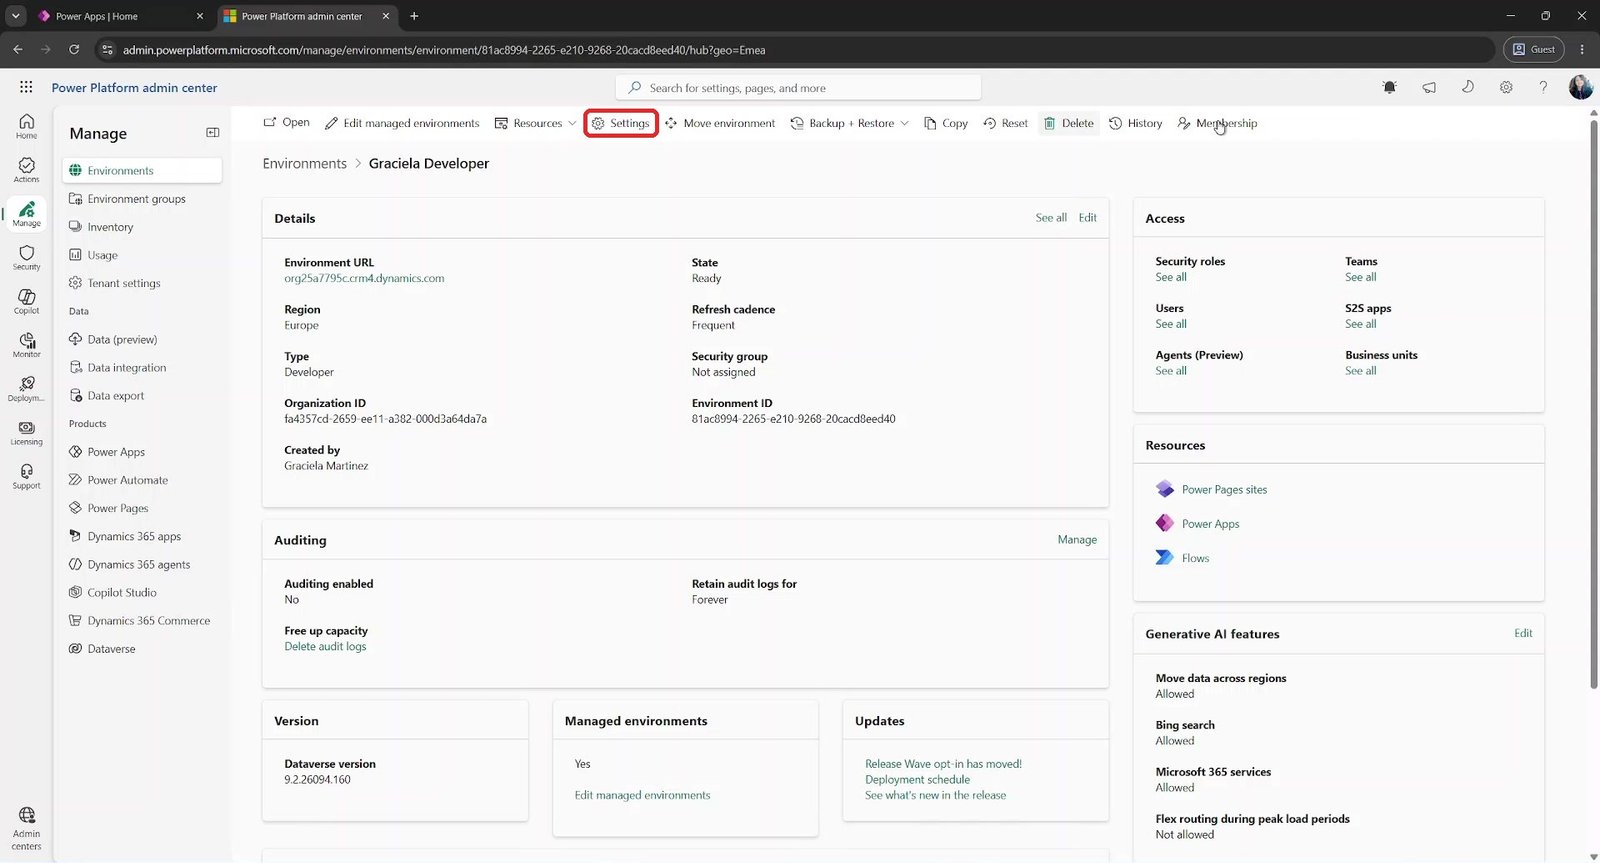
- In the Power Platform admin center, go to Manage > Environments and open the environment you want to use. Then select Settings in the command bar at the top.
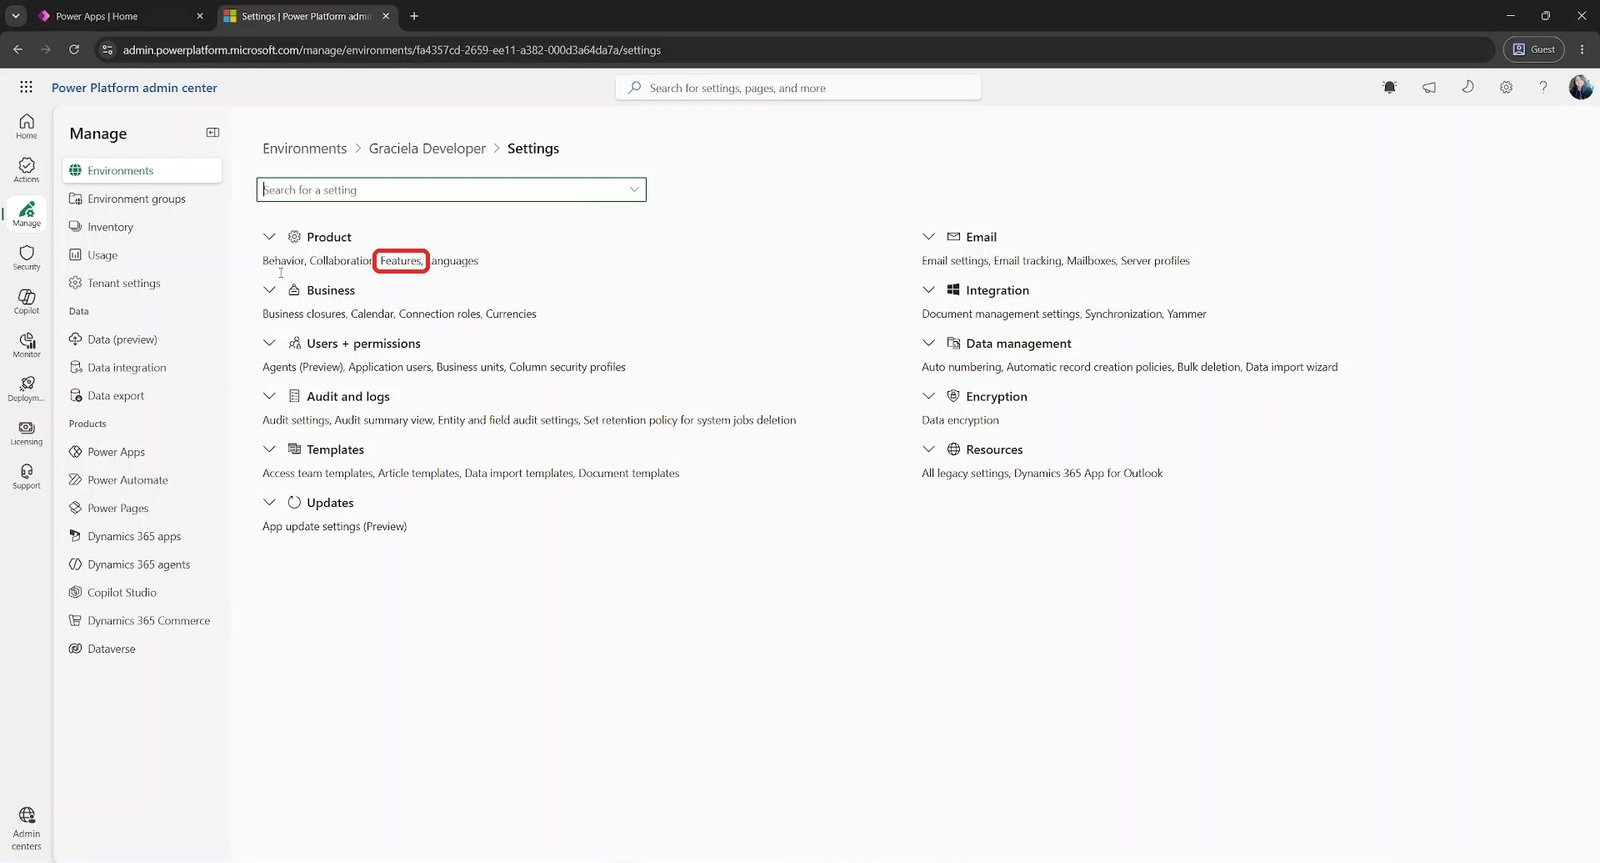
- Under Product, select Features.
- Once the page loads, press Ctrl+F and search for “code” to find the Power Apps Code Apps section. Turn Enable code apps to On, then select Save.
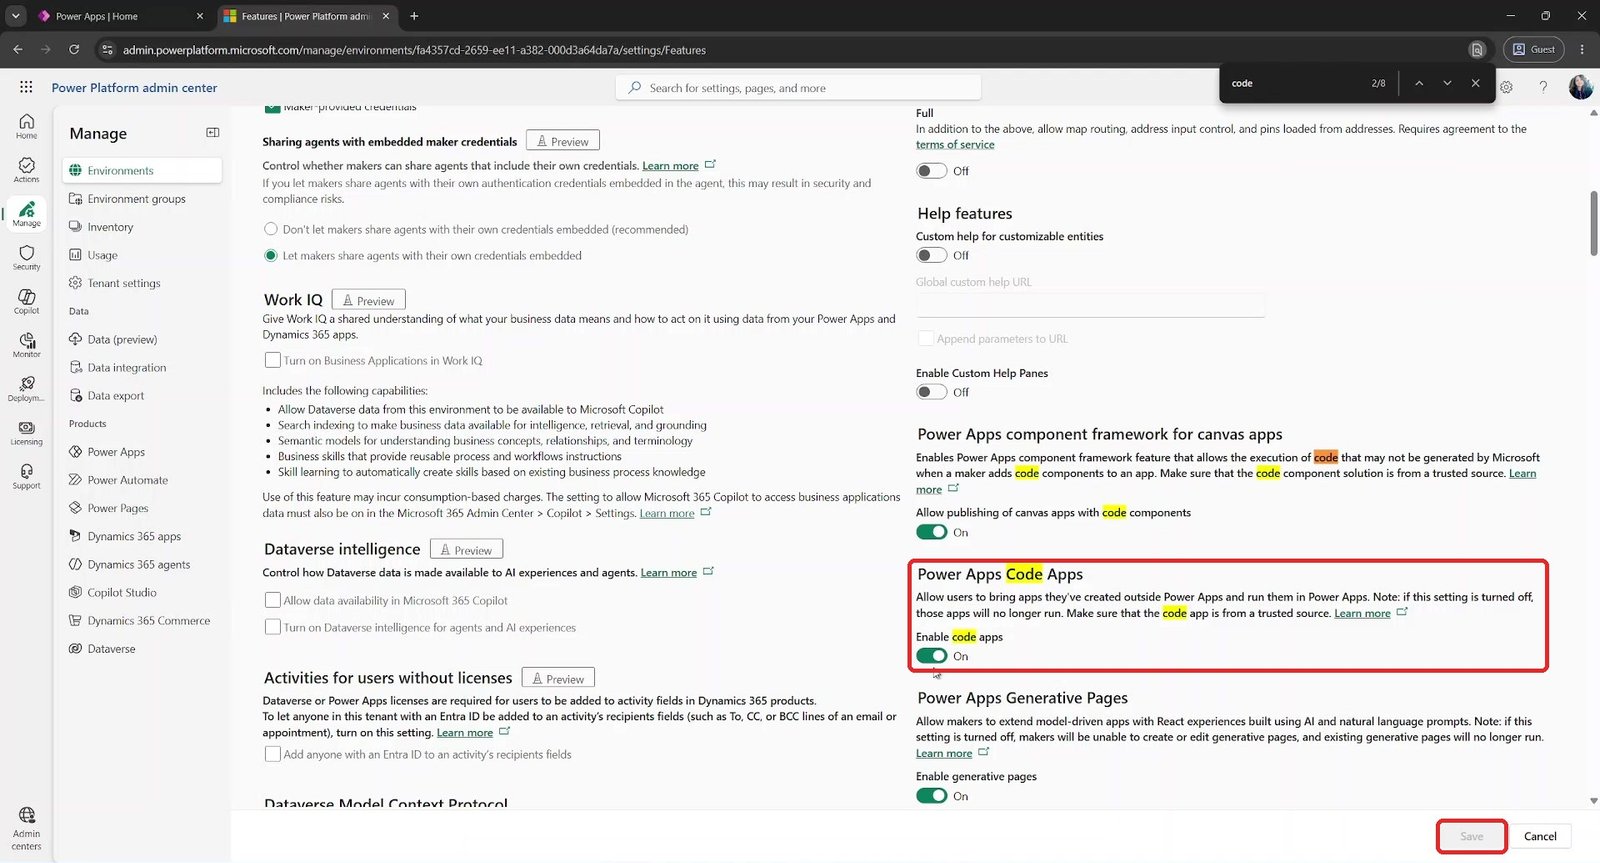
This setting lets users bring apps they built outside Power Apps and run them in Power Apps. If it is turned off later, those apps will no longer run.
If the setting is already on, Save stays greyed out. Save only becomes available after you change the value.
Step 2: Install the local tools
Your computer needs three tools: Visual Studio Code, Node.js and Git. Code Apps are built the traditional way, with code, using TypeScript and React. That work happens in a development environment, not in the browser with visual controls and formulas as in a canvas app.
Visual Studio Code
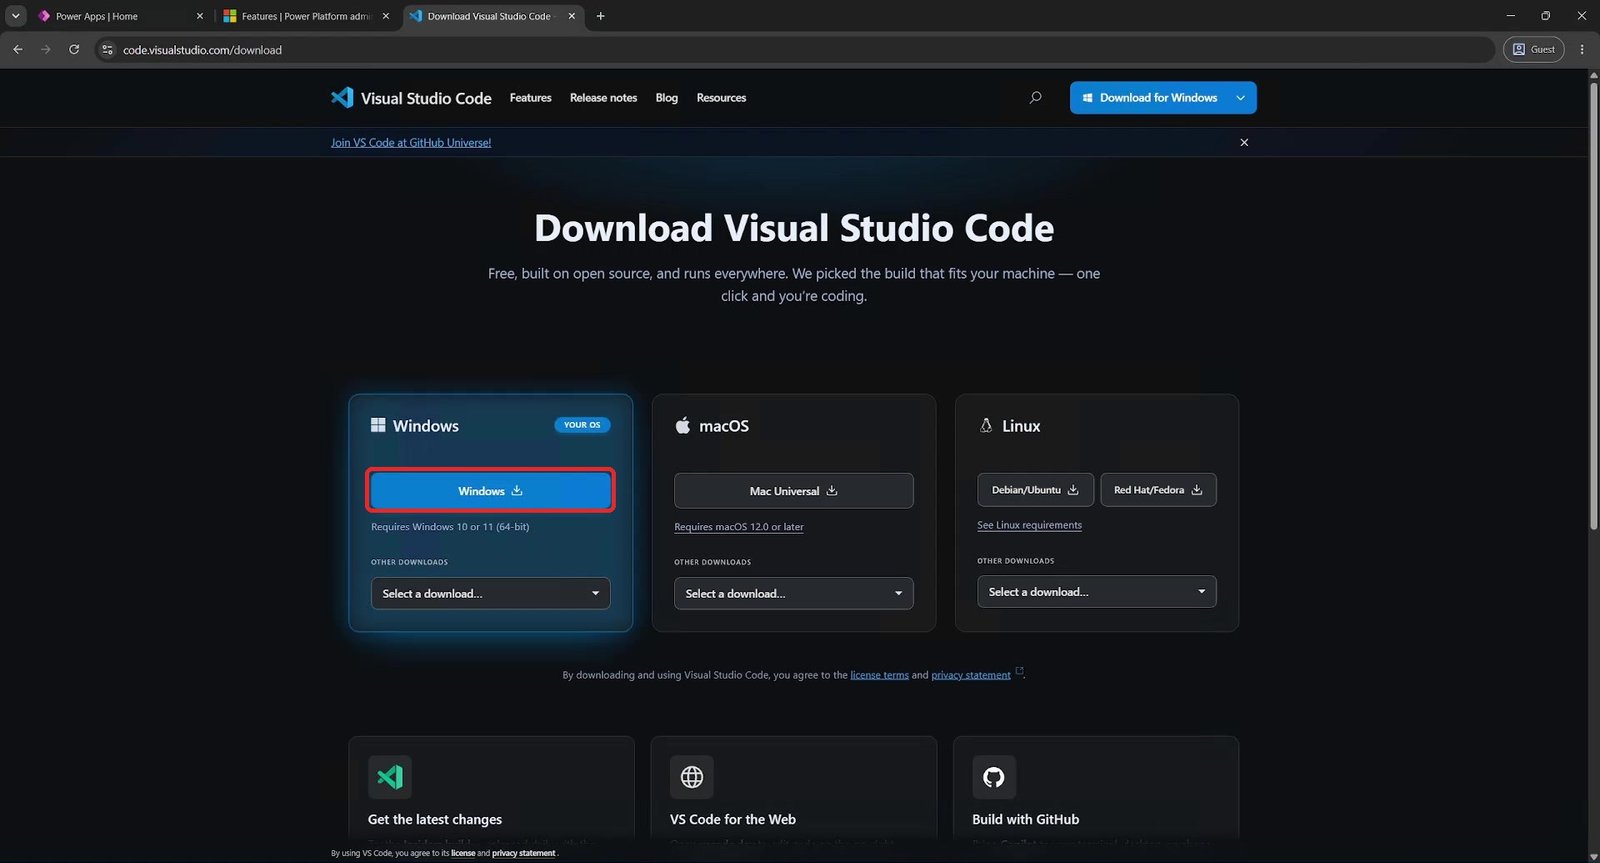
Run the installer, accept the terms and select Next through the screens. Creating a desktop icon is optional but handy for quick access.
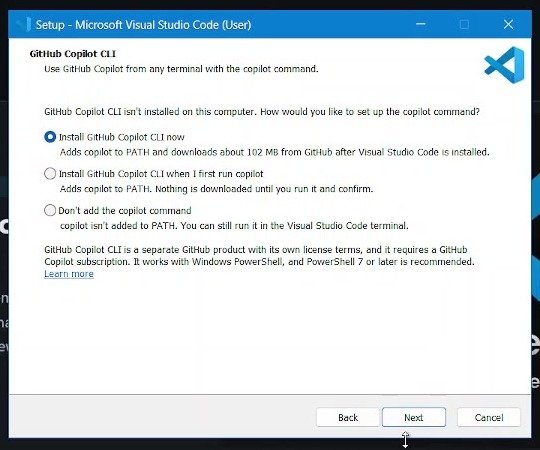
The installer also offers to set up the GitHub Copilot CLI. Installing it is a good idea, because AI coding agents are useful for Power Platform development. You can work with different agents, such as Codex, Claude Code or GitHub Copilot, so this choice comes down to personal preference. Select Install and wait a few minutes for it to finish.
Node.js
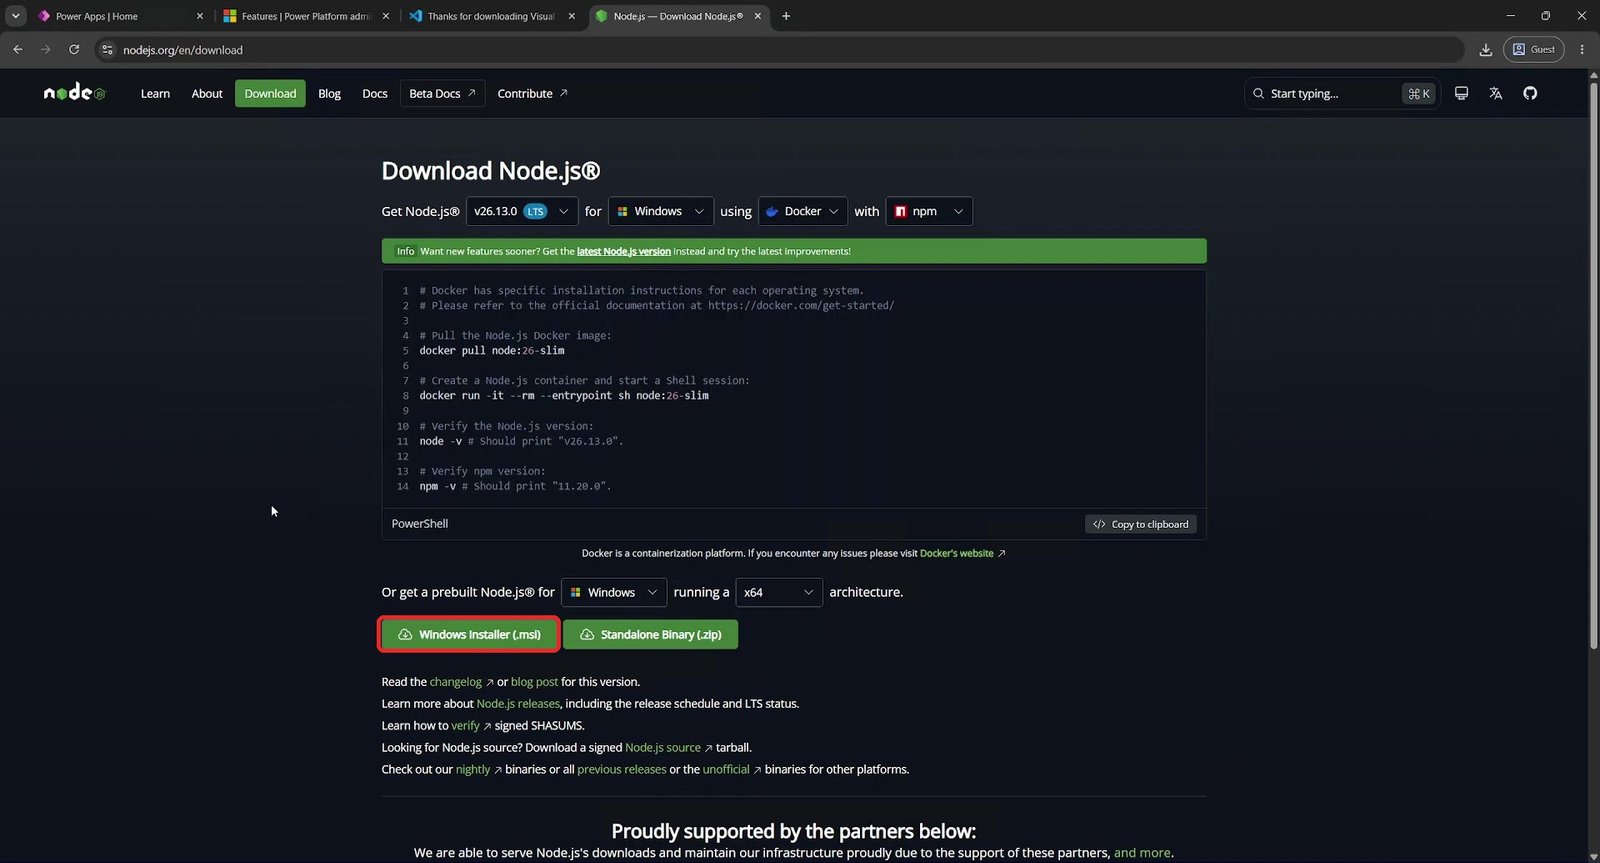
While Visual Studio Code installs, search for “Node.js download” and download the Windows Installer (.msi). Run it, select Next, accept the terms and select Install. Windows may ask for permission. This install is very quick.
Git
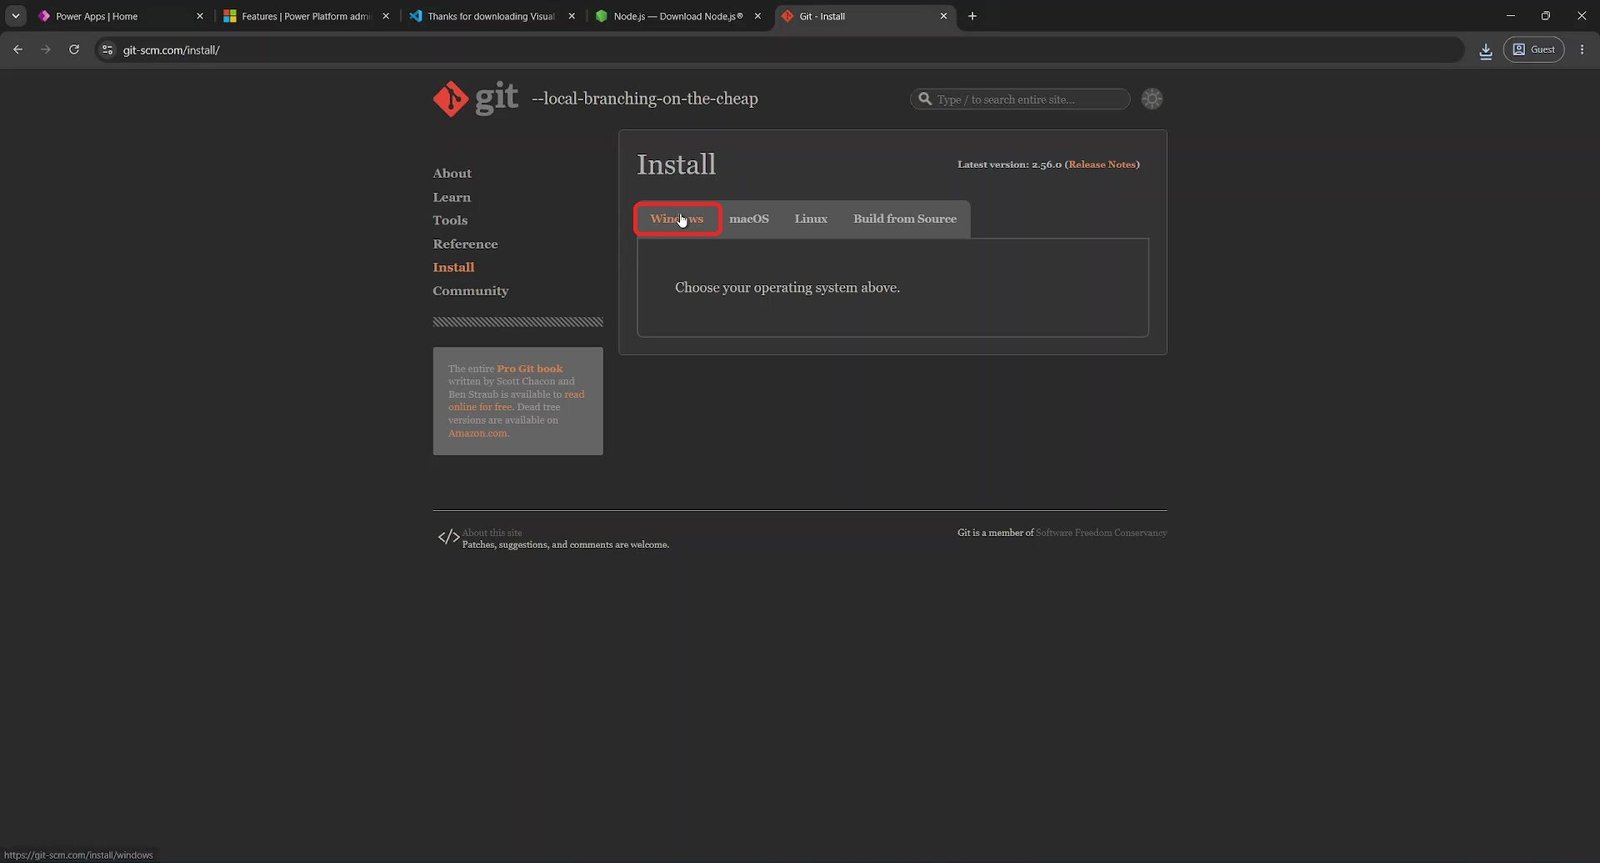
The last tool is Git. Search for “git download”, open the first result, select Windows and download the installer. Run it and select Next on each screen until it installs.
Check Node.js and npm
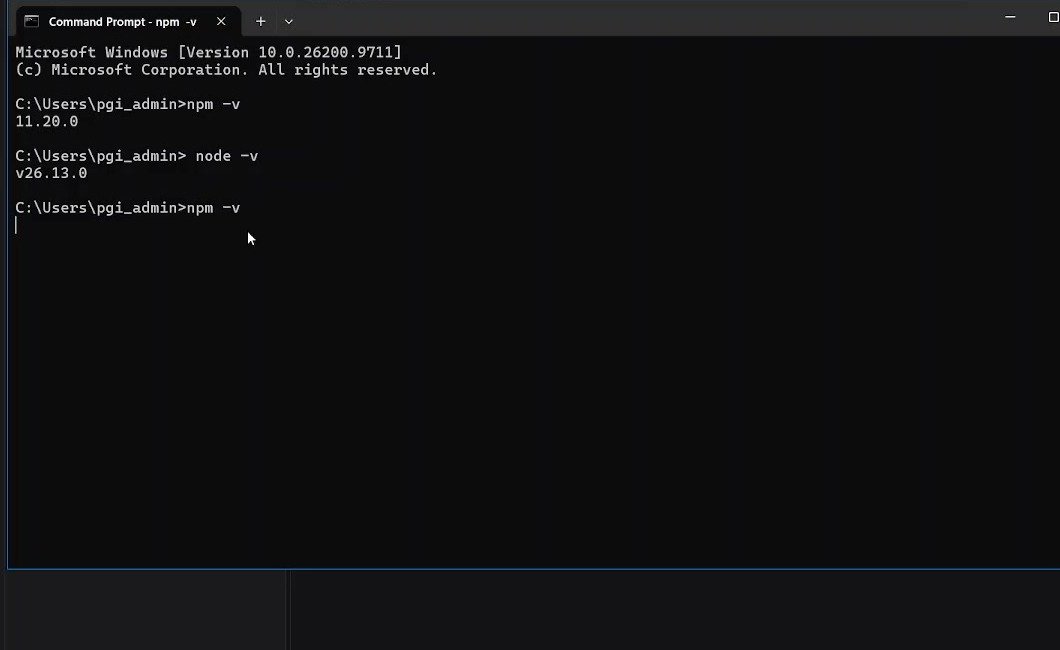
Open the Command Prompt (type cmd in the Windows search bar) and confirm that Node.js and npm are installed correctly:
					node -v
npm -v
Each command should print a version number, such as Node.js v26.13.0 and npm 11.20.0.
With these installed, your machine has everything it needs. Two more things remain: copying the Power Apps template and installing the Power Apps CLI.
Step 3: Copy the Power Apps Code Apps template
Microsoft provides a template with everything you need to start a code app, so always begin from a copy of it.
- Create a folder for your project. It can live anywhere on your computer. In this example, it is C:\PrimeraCodeApp (“First Code App”).
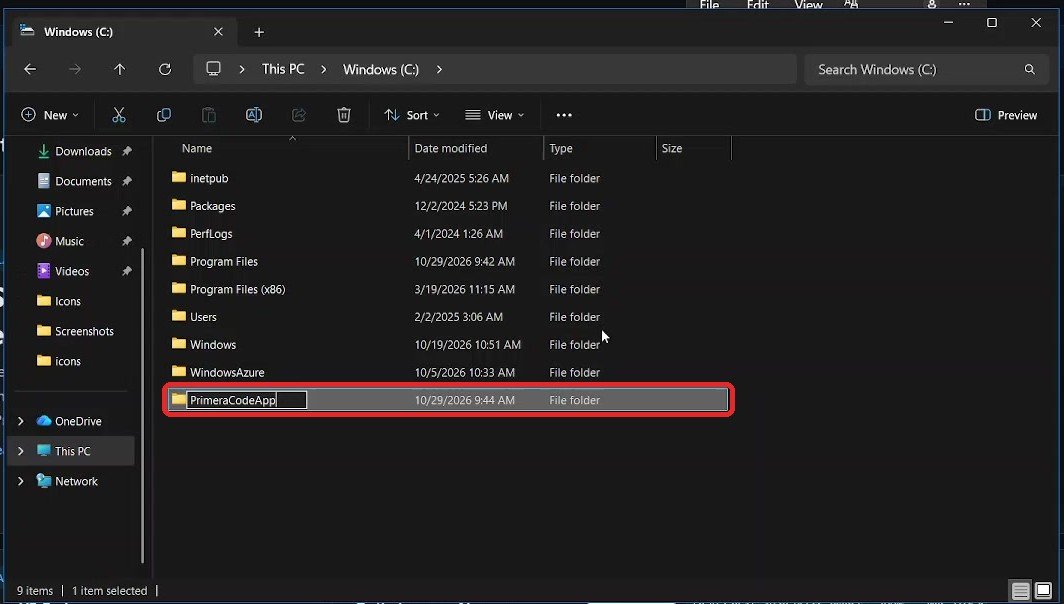
- In Visual Studio Code, select File > Open Folder and choose the folder you just created.
- Select Terminal > New Terminal and confirm that you trust the folder. The terminal usually opens in your project folder already. If it opens somewhere else, use cd (change directory) followed by the folder path to move there.
- Run this command to copy the template from Microsoft’s GitHub repository:
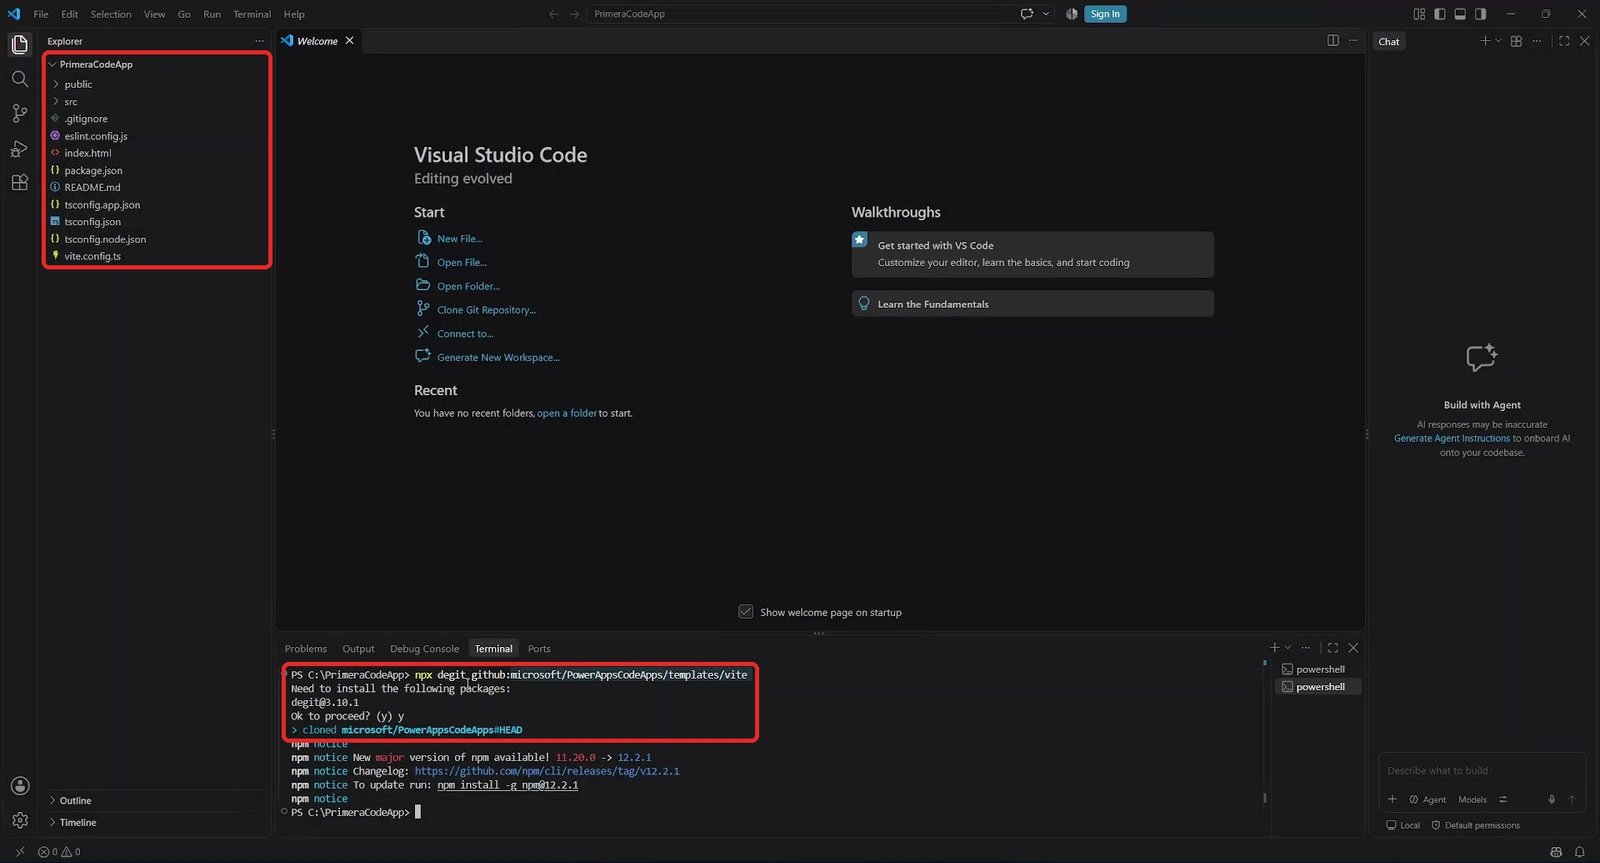
The command brings in the whole project: folders, CSS, a main page and configuration files. You get a preconfigured React and TypeScript project that is already connected to the Power Apps SDK, with no manual setup.
Tip: If the command is not recognized, Visual Studio Code was probably open before you installed Node.js and Git, so it doesn't see them yet. Close Visual Studio Code, open it again, open a new terminal and run the command again.
Step 4: Install the Power Apps CLI and dependencies
The last piece of the local setup is the Power Apps CLI. Run these three commands in the Visual Studio Code terminal, from your project folder, one after the other:
					npm install --global @microsoft/power-apps-cli
npm install --global @microsoft/power-apps
npm install
- The first command installs the Power Apps CLI.
- The second installs the Power Apps package.
- The third installs the project’s own dependencies. When you copied the template, npm already suggested running npm install so the project is up to date.
Wait for each command to finish before running the next one. When the last one completes, all the modules and configuration the project needs are in place.

Step 5: Connect the app to your environment
With the tools installed, connect the project to the Power Apps environment where you enabled Code Apps. The command takes two values: the display name of your app and the ID of the environment.
pa app init --display-name "App name" --environment-id <environment-id> </environment-id>
Replace App name with the name you want. This example uses “Primera Code App”.
Find your environment ID
The easiest way to get the environment ID is from the Power Apps portal. Select the gear icon, then Session details, and copy the Environment ID.
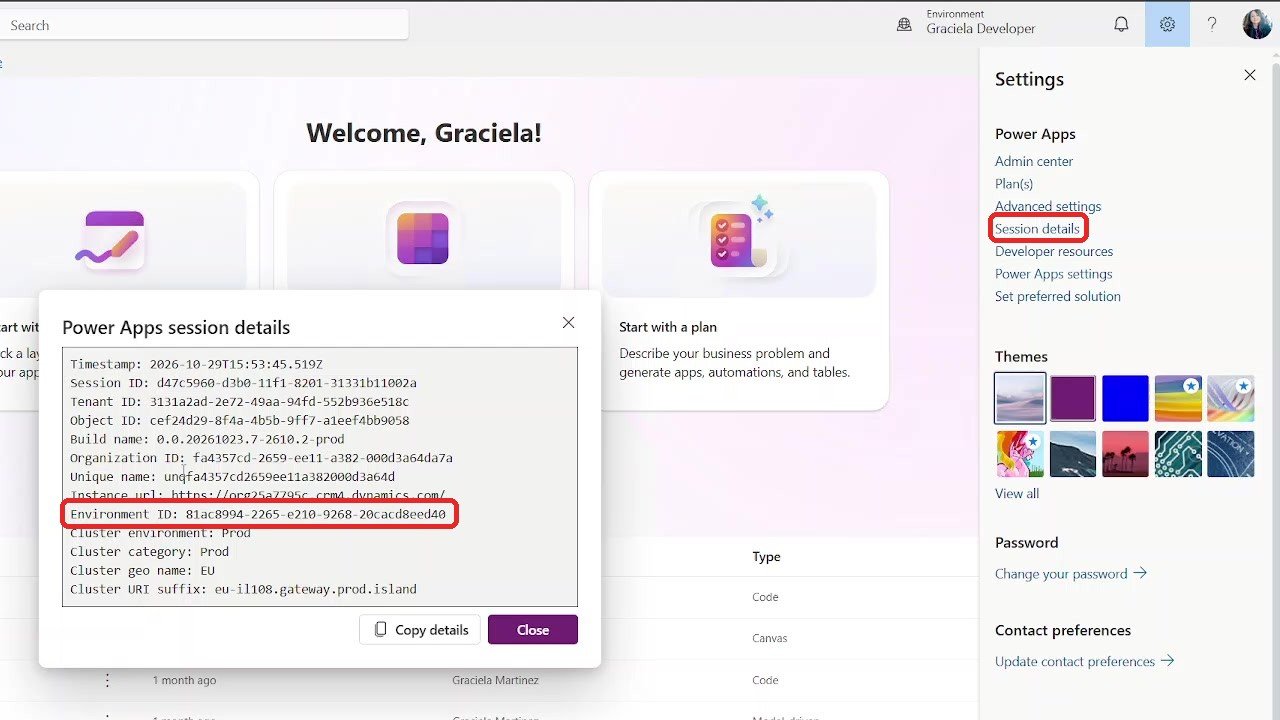
Paste the ID into the command and run it. The first time you connect a project to an environment, the CLI asks you to sign in and opens the browser to do it. If your browser is already signed in with the right account, it connects automatically and shows a message saying you can close the window.
When it finishes, the CLI creates a power.config.json file for your app.

Test the app locally
To see what your app looks like, run pa app run. The command prints two links: a Local Play link on Power Apps and a localhost link. You can use either one.

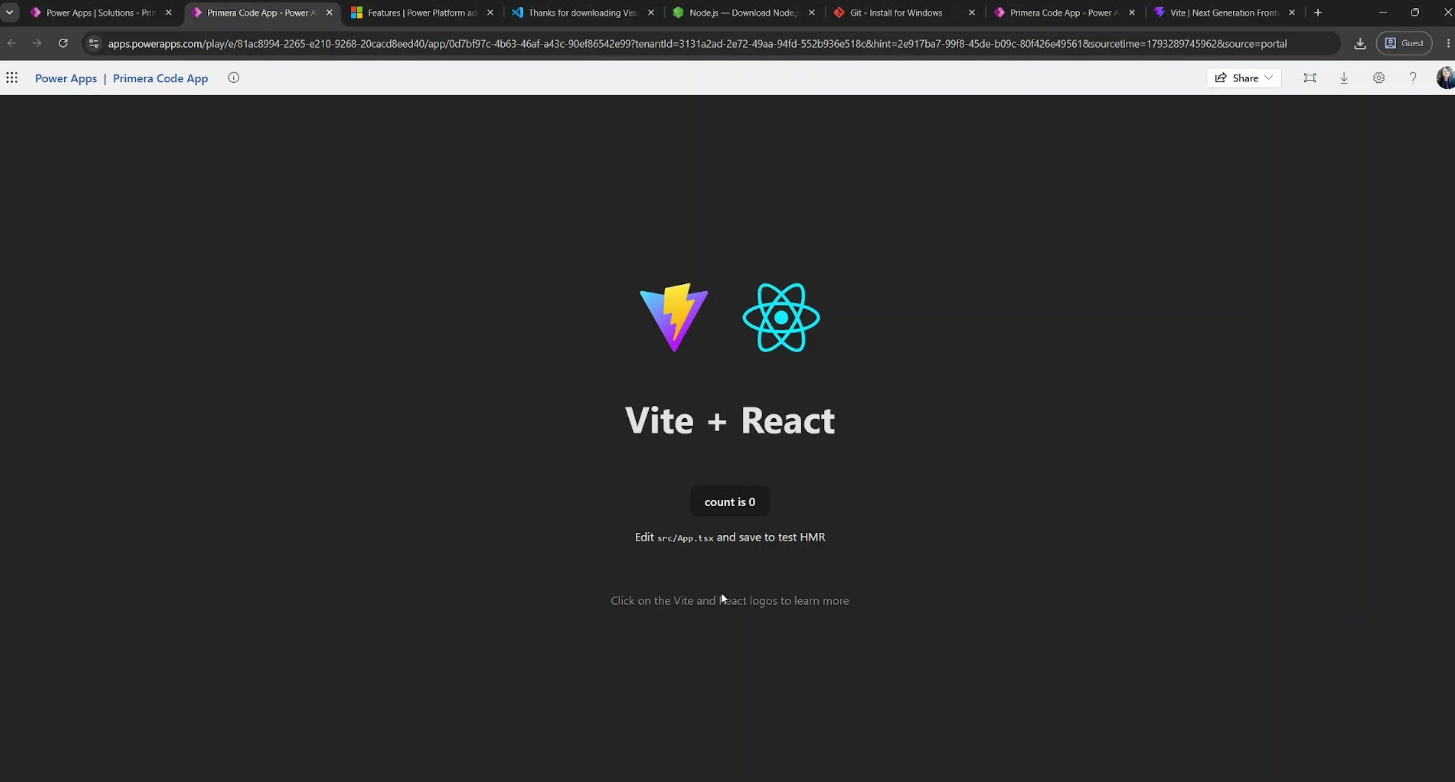
Opening the Local Play link loads the app much like a canvas app. A banner says your app is running in local mode. What you see is Microsoft’s starter template.
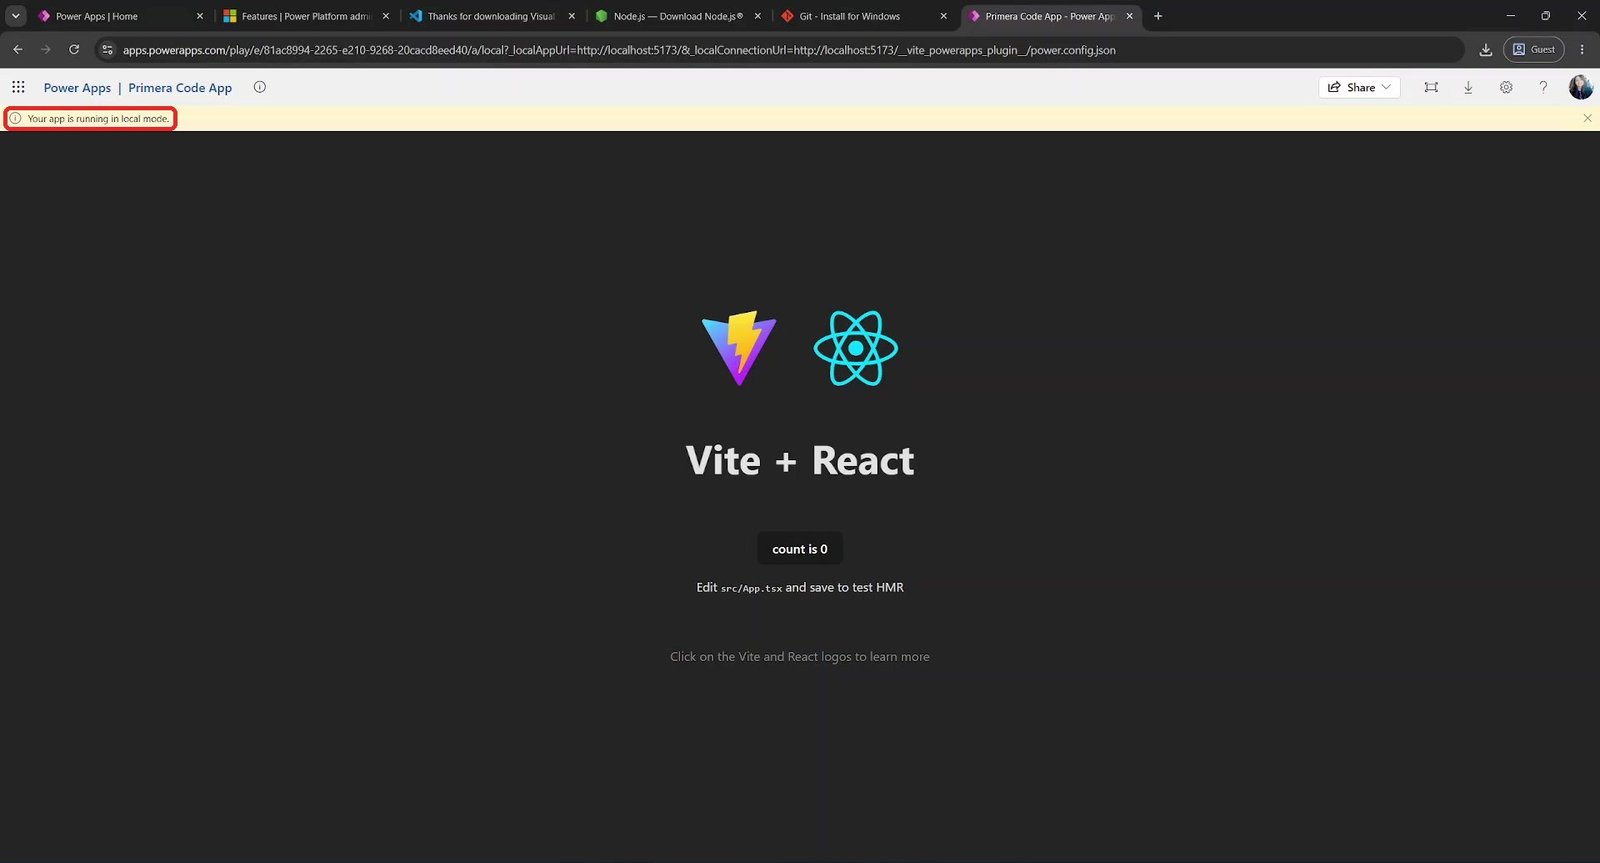
Your environment is now fully set up. From here you can change the code, use an AI agent for assisted development and connect data sources.
Step 6: Build and publish the app to a solution
Once your app is ready, you publish it to the environment where you enabled Code Apps. The app goes into a solution, so you create one first.
Create a solution
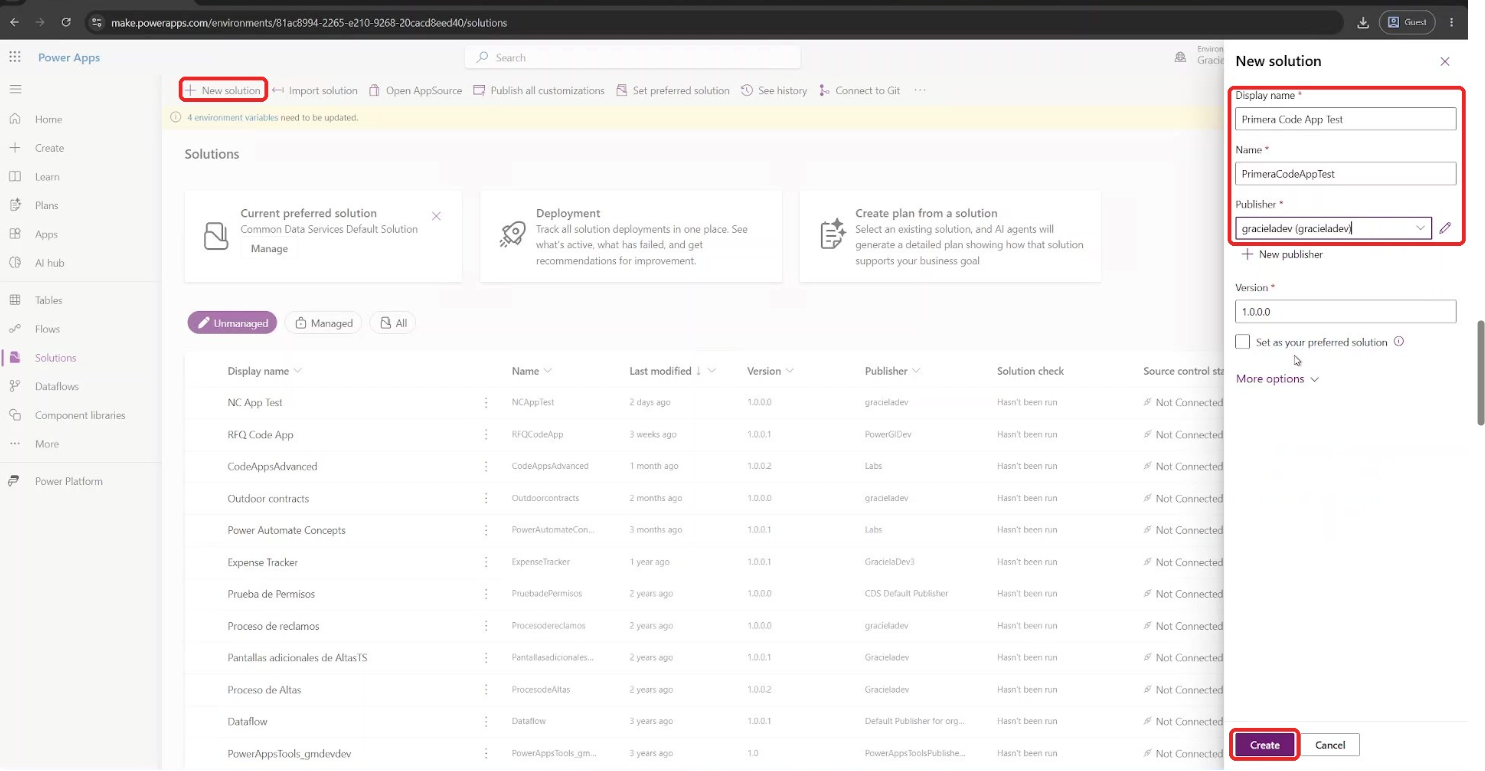
- In the Power Apps portal, go to Solutions and select New solution.
- Enter a display name (this example uses “Primera Code App Test”), select your publisher and select Create.
- Open the new solution and copy its ID from the address bar. It is the value after /solutions/ in the URL.

Build and push
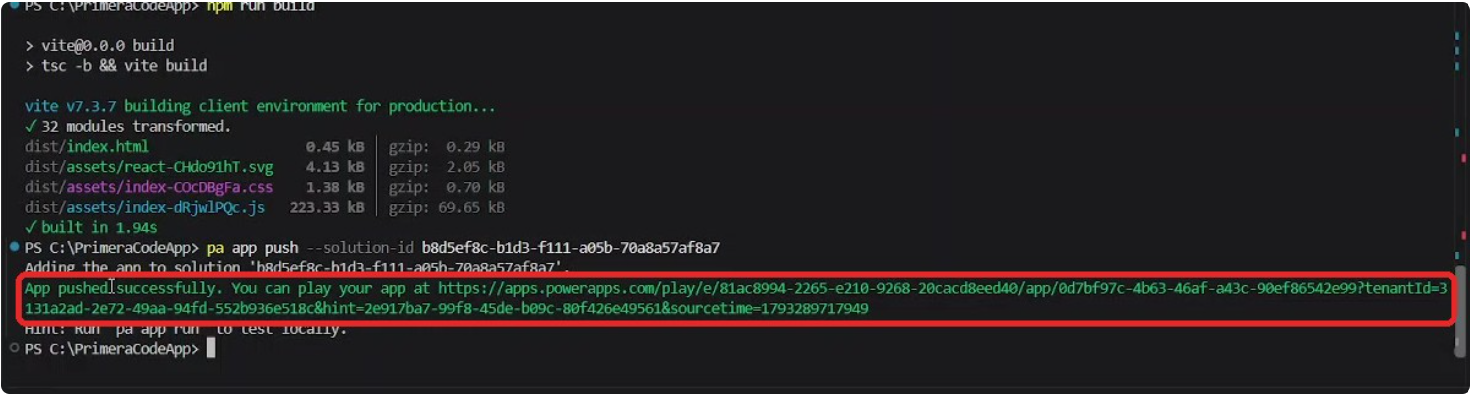
If pa app run is still running in the terminal, press Ctrl+C to stop it so you can type new commands. Then build the app for production and push it to your solution, replacing <solutionid> with the ID you copied:
					npm run build
pa app push --solution-id <solutionid> </solutionid>
When the push succeeds, the CLI adds the app to the solution, says it was pushed successfully and prints a link to play it.

Check the app in Power Apps
Go back to your solution and open Apps. The app appears with the type Code App.
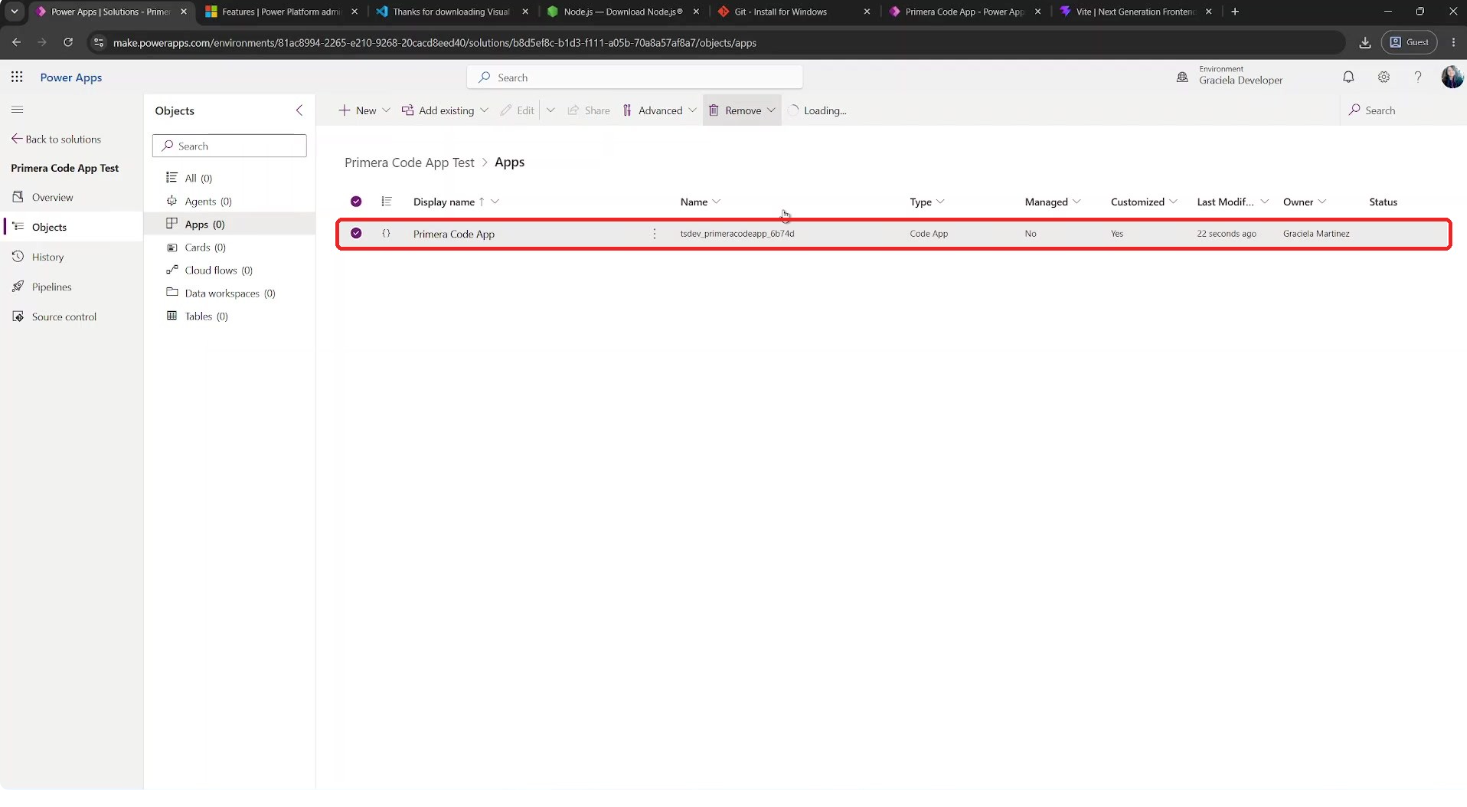
When you play it, the app no longer runs locally. It runs directly in the cloud, from Power Apps.
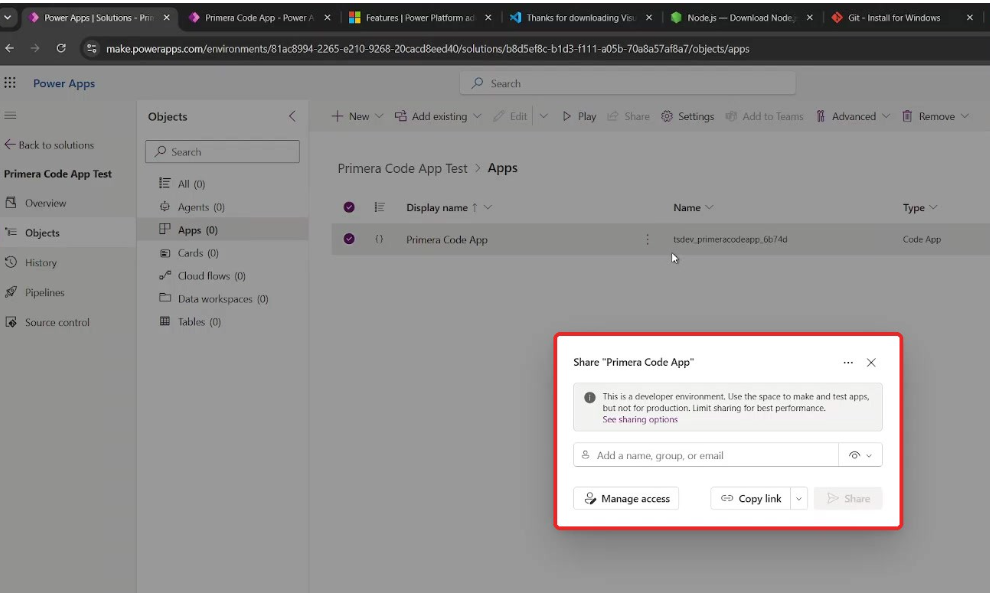
From here you can share it with users so they can review it and test its features.
This starter app has no data connections or business logic yet. If your app works with Dataverse, for example, make sure users have access to the tables. It is the same as with a canvas app: users need access to both the data and the app.
Wrap-up and command cheat sheet
That’s the full setup: Code Apps enabled in the environment, the local tools installed, the template copied and connected, and a first app published to the cloud for users to run.
Here are all the commands in the order you run them:
					# Check Node.js and npm
node -v
npm -v

# Copy the Power Apps Code Apps template
npx degit github:microsoft/PowerAppsCodeApps/templates/vite

# Install the Power Apps CLI and dependencies
npm install --global @microsoft/power-apps-cli
npm install --global @microsoft/power-apps
npm install

# Connect the app to your environment
pa app init --display-name "App name" --environment-id <environment-id>

# Optional: test the app locally
pa app run

# Build and publish to a solution
npm run build
pa app push --solution-id <solutionid> </solutionid></environment-id>
Need a hand with your apps?
If you need help building Code Apps Apps or if you’re not sure which type of app (Canvas, Model-driven or Code) is the best fit for your use case, we’re here to help.
Contact us today and let’s talk about your project.