Table of Contents
Some apps require to let users upload several files at once into Dataverse (each with its own record), but the process to bulk upload files from Power Apps to Dataverse is not straight-forward.
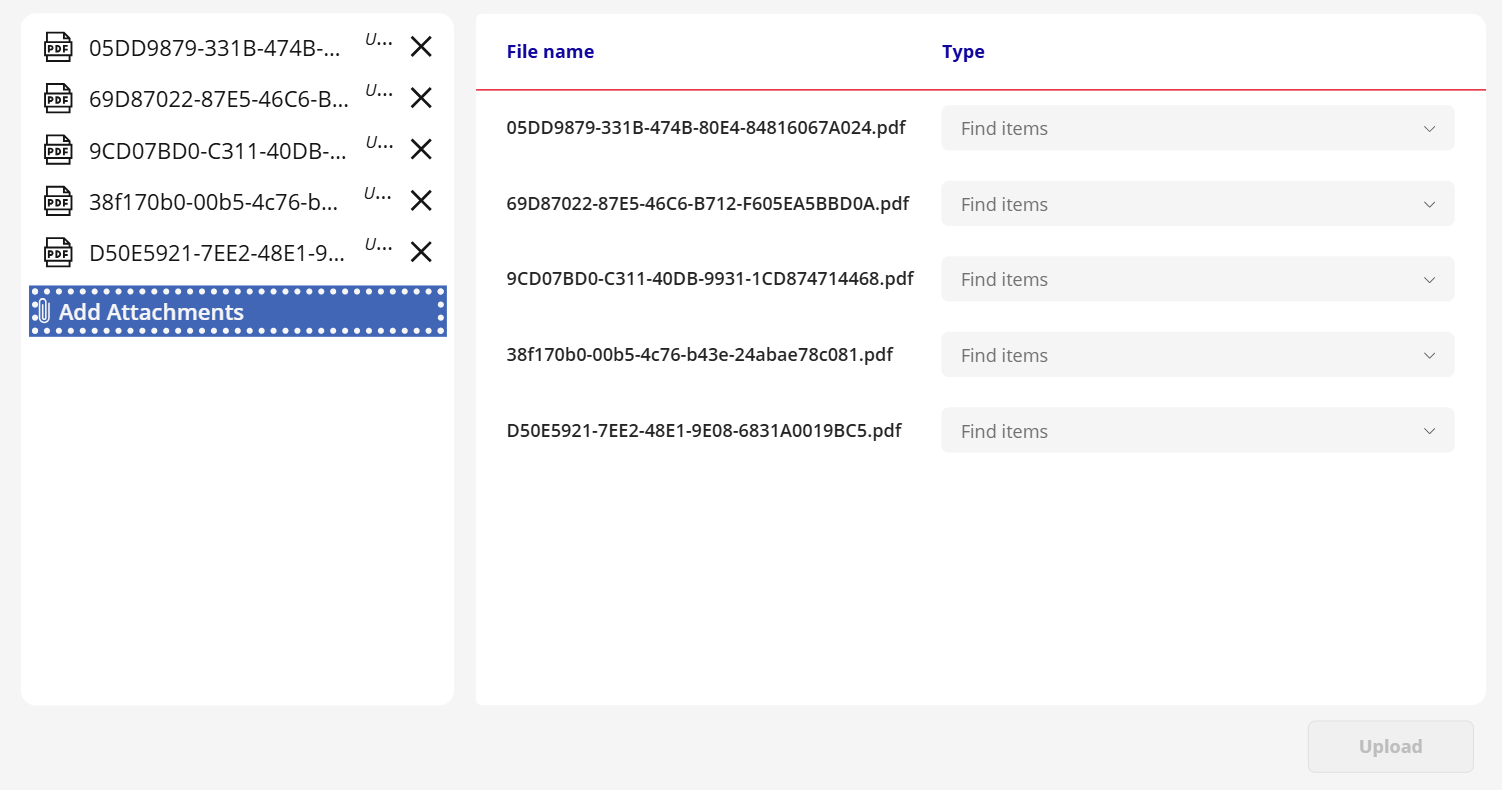
This blog will show how to build a screen where a user can select multiple files, add a comment to each one, and upload each file to its own record in a single click, with the file saved in a file column and the comment stored in a text column.
Why uploading multiple files to Dataverse requires a different setup
By default, a Power Apps form is designed to create or edit one record at a time, and Dataverse file-type columns only allow for a single file to be stored at a time (in SharePoint, the attachment column allows to upload multiple attachments to the same record).
Step-by-Step: upload multiple files from Power Apps to Dataverse
We also created a walkthrough of this in our YouTube channel, make sure to check it out!
1. Set up the screen layout
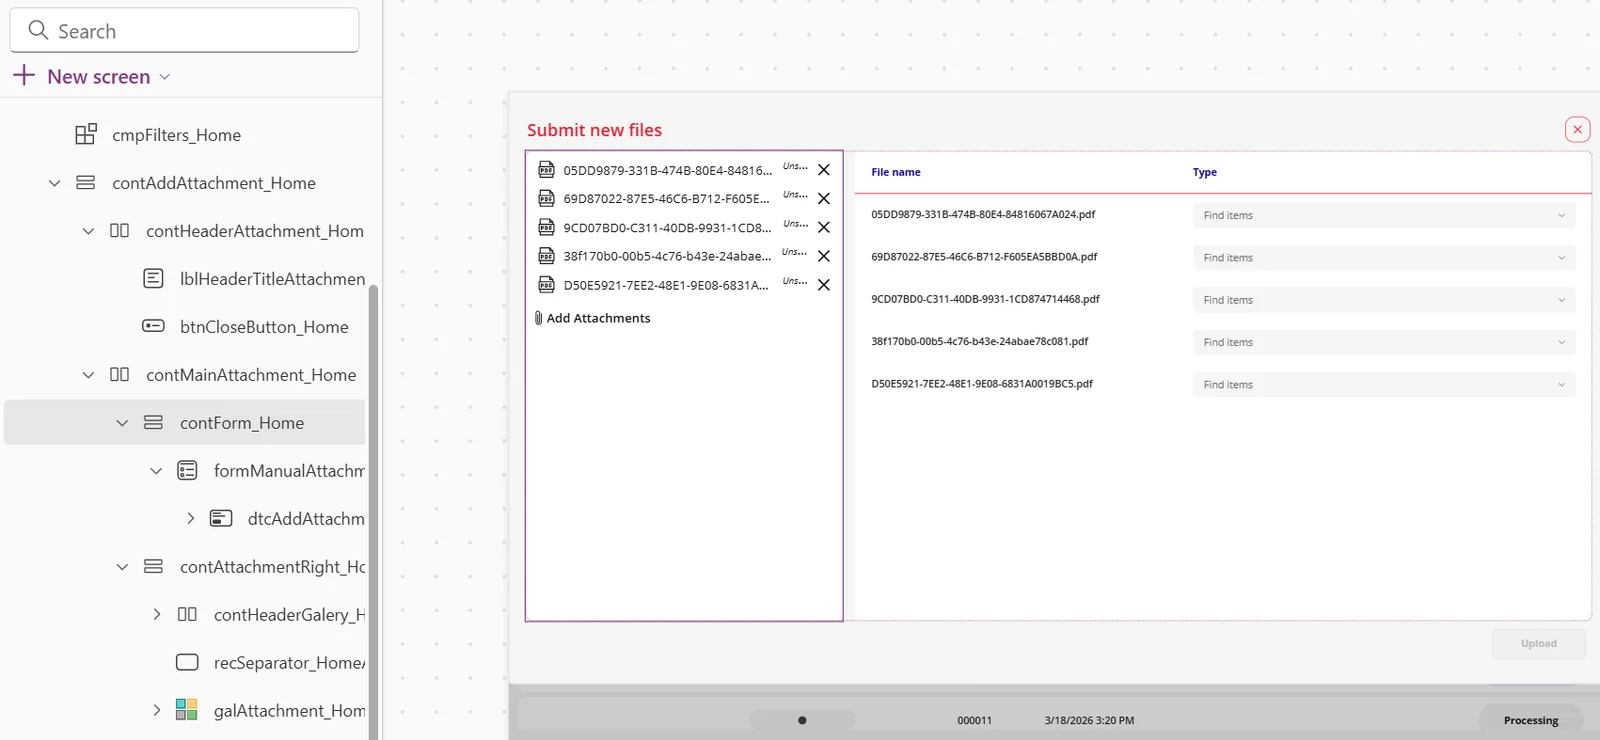
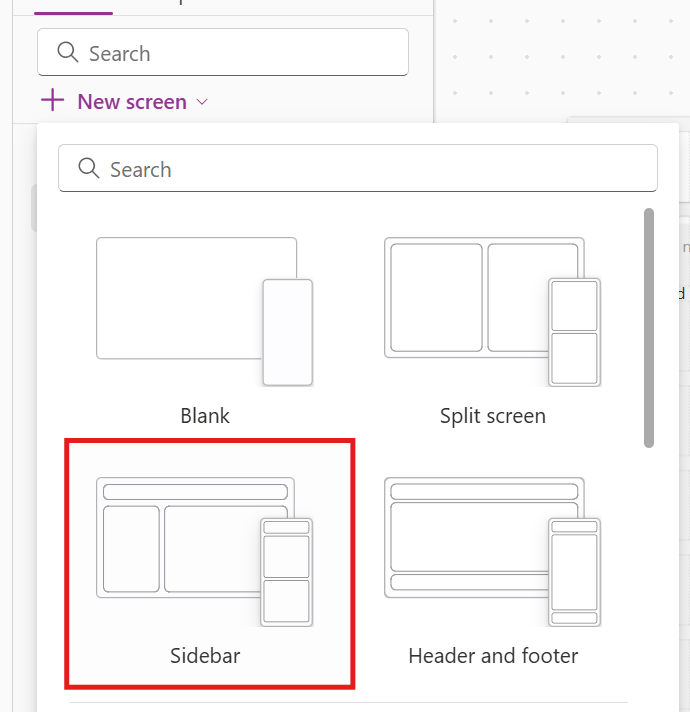
Let’s create a new screen and choose the sidebar layout, which gives us a section on the left for the file selector and a section on the right for a gallery listing the uploaded files.
2. Create a form and connect to the Dataverse table
Insert a form into the left section and connect it to your Dataverse table (in this blog it’s a table called table_attachments).
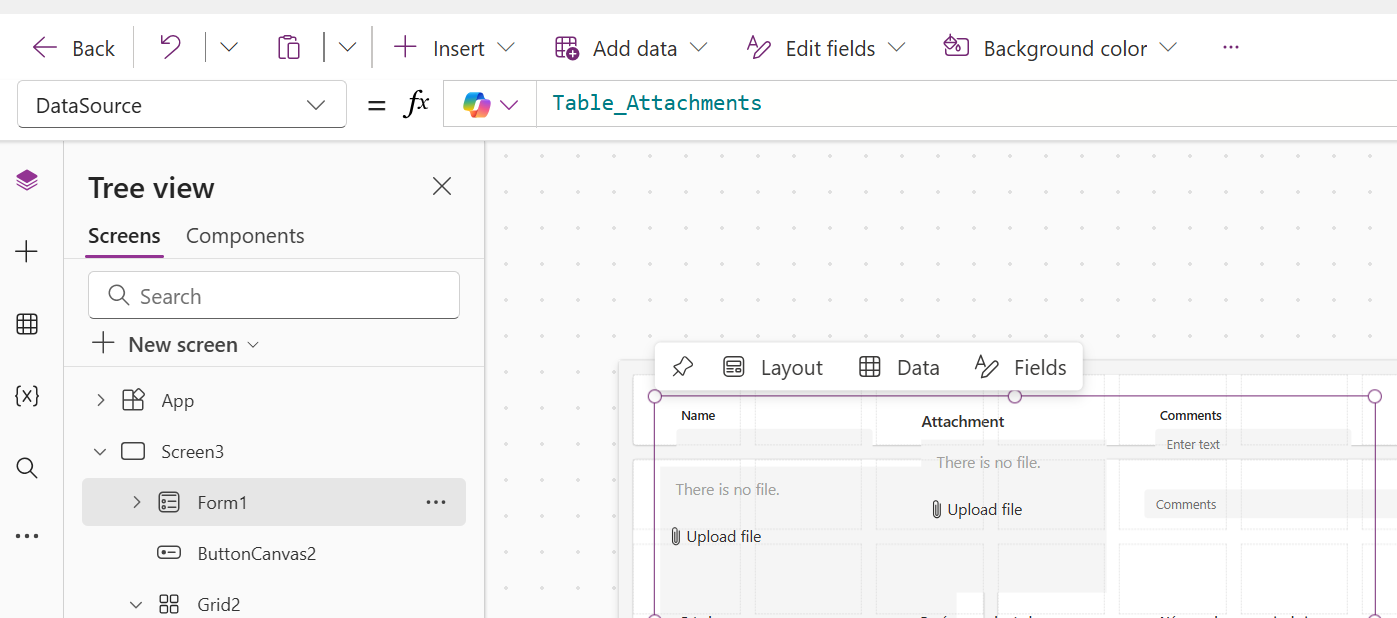
Once the form is connected, Power Apps automatically generates data cards for every column in the table, including several default Dataverse columns we won’t need.
3. Strip the form down to just the attachment card
From all the generated cards, the only one we need is the attachment card. Let’s copy that card and paste it inside the container that holds the form, then delete the rest of the form.
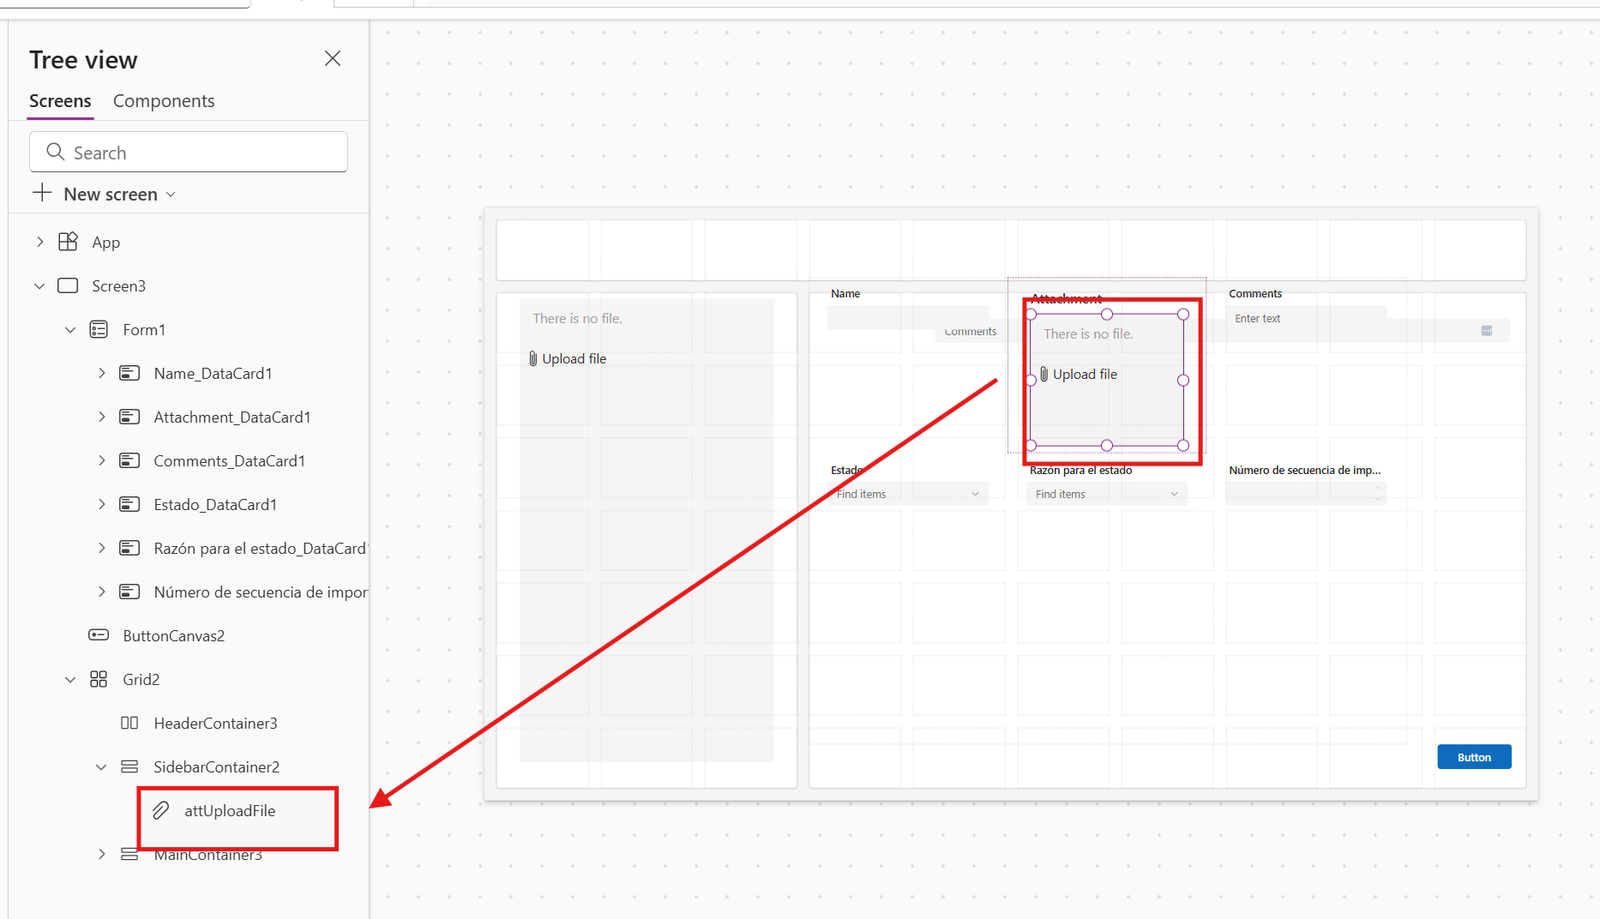
Some errors will pop-up. Just remove the code wherever there is an errot.
4. Configure the attachment control
Select the attachment card and:
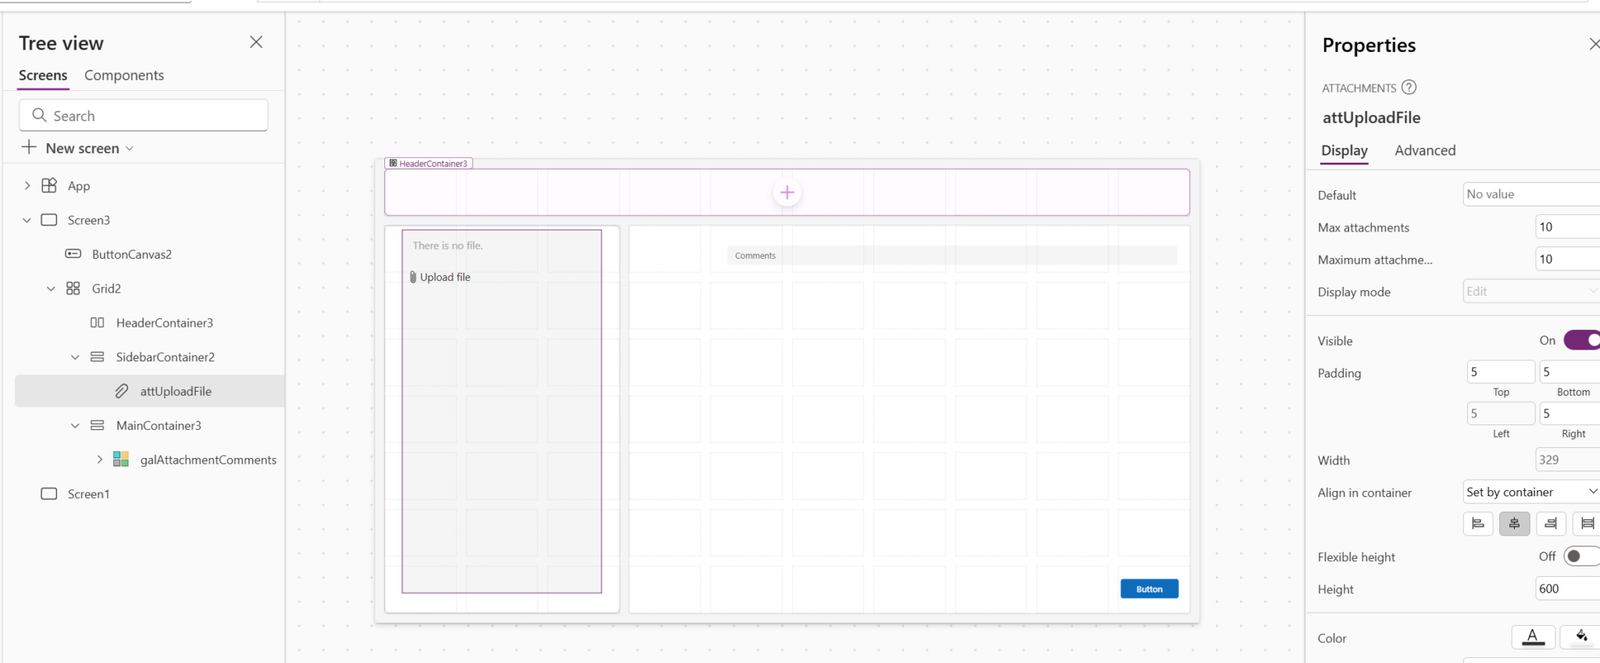
- Increase the maximum number of attachments allowed (e.g., set it to 10)
- Increase the height of the control so it uses more of the screen
Rename the control to something clear, like attachment_fileupload, so it’s easy to reference later.
5. Understand the structure Dataverse expects for attachments
If we were to create a single record, this is the structure that Dataverse would expect:
					Patch(
    table_attachments,
    Defaults(table_attachments),
    {
        attachment: {
            'FileName': "test.txt",
            Value: "..."
        },
        comments: "hi, this is a comment"
    }
)
Dataverse’s attachment column specifically expects a structure with two properties: FileName and Value (the actual file content).
6. Add a gallery so users can enter a comment per file
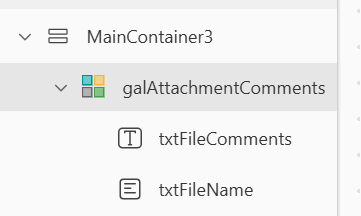
Insert a blank gallery in the right section and add two controls:
- Add a label showing the file name (rename it lbl_filename). Text: ThisItem.Name
- Add a text input where the user types a comment for that specific file (rename it txt_filecomments)
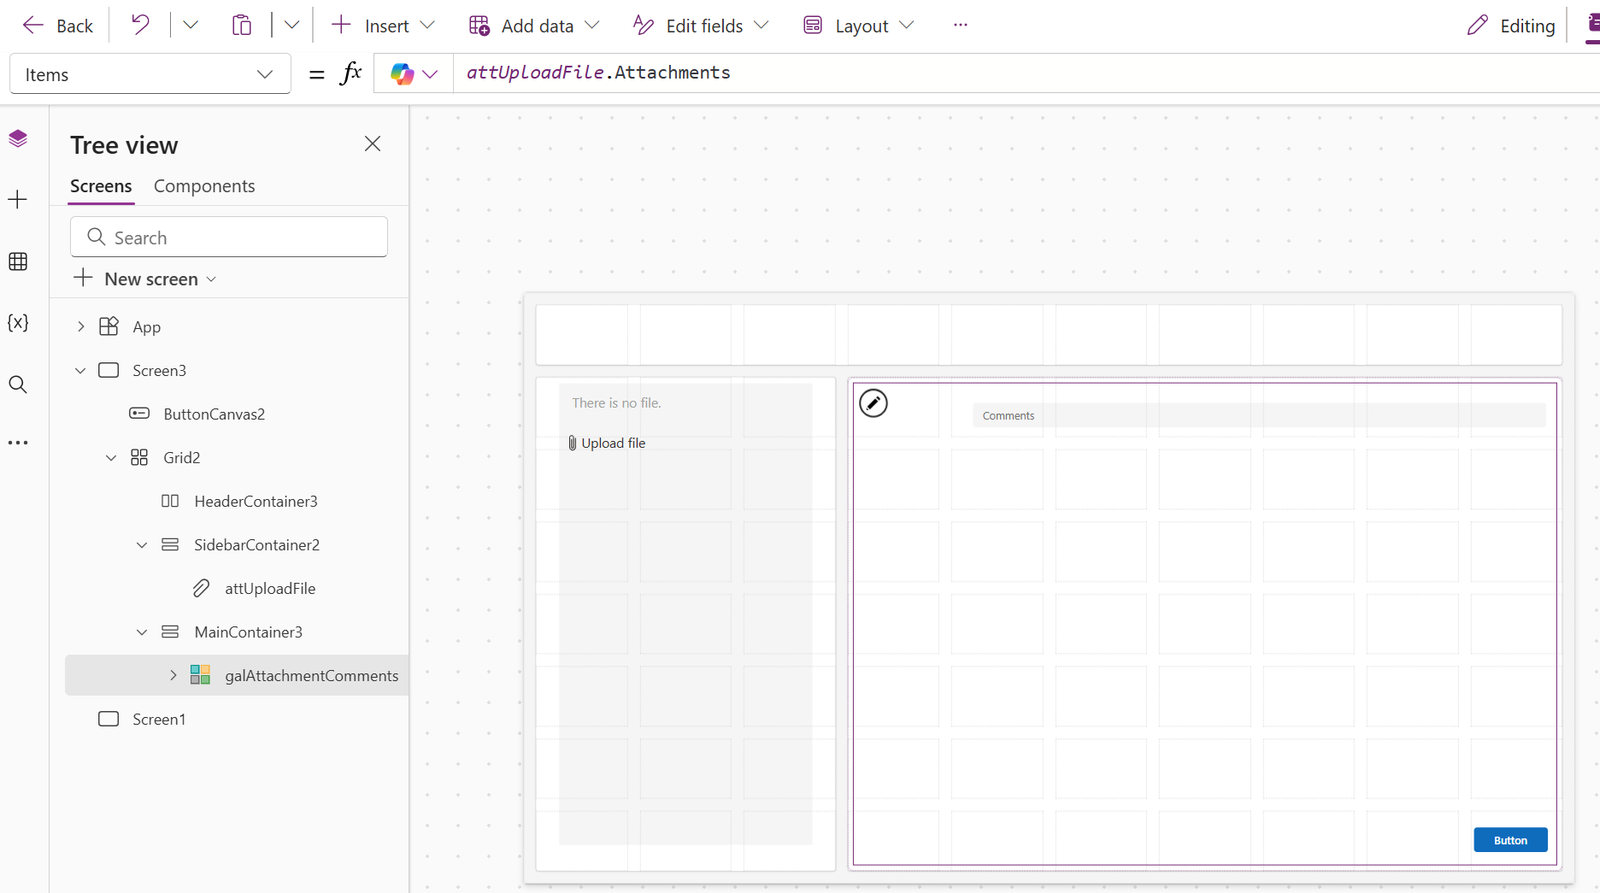
7. Connect the gallery items to the attachment control
To show the list of attachments that were added by the user in the gallery and allow them to add comments to each file, we need to connect the gallery to the list of files uploaded to the attachment control.
Just find the “items” attribute and use:
attUploadFile.Attachments
8. Loop through every uploaded file with ForAll
Using the code from point 5, we just need to run this for all the items inside the gallery using the ForAll function.
					ForAll(
    attachment_fileupload.Attachments As FileUploaded,
    Patch(
        table_attachments,
        Defaults(table_attachments),
        {
            attachment: {
                'FileName': FileUploaded.Name,
                Value: FileUploaded.Value
            },
            comments: "hi, this is a comment"
        }
    )
)
9. Match each file to its comment using a lookup
To upload the comment along with the file to the same record, use a LookUp function:
					ForAll(
    attachment_fileupload.Attachments As FileUploaded,
    Patch(
        table_attachments,
        Defaults(table_attachments),
        {
            attachment: {
                'FileName': FileUploaded.Name,
                Value: FileUploaded.Value
            },
            comments: LookUp(
                gal_attachmentcomments.AllItems,
                FileName.ext = FileUploaded.Name
            ).txt_filecomments.Text
        }
    )
)
10. Test the upload
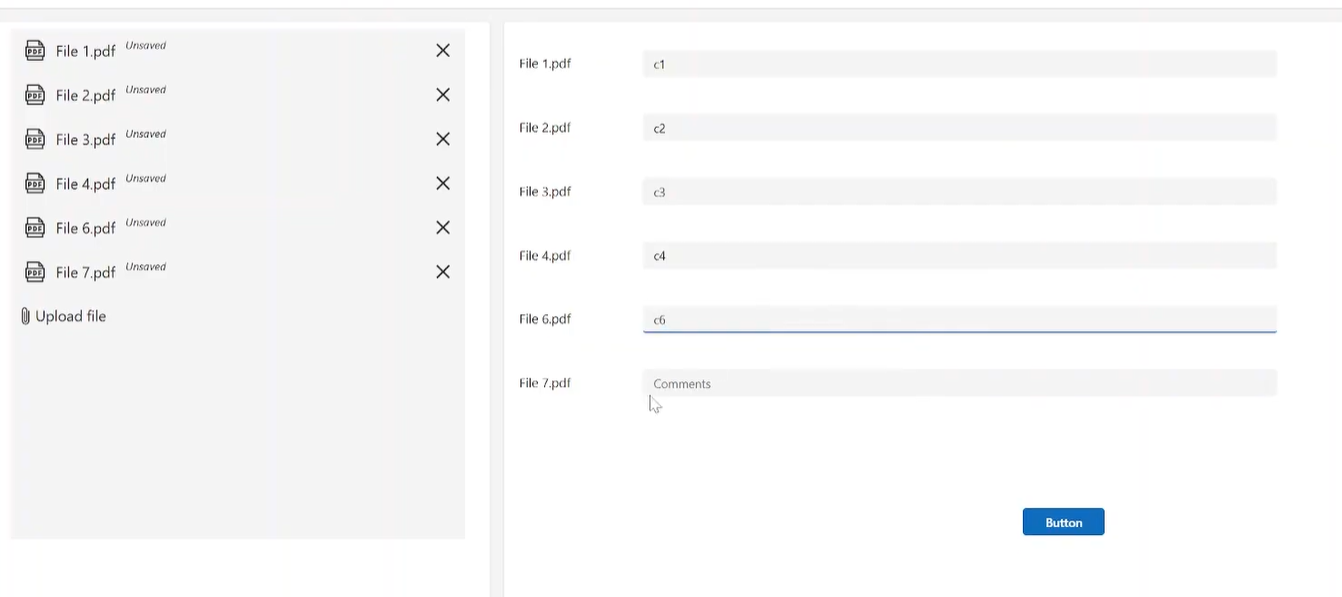
Each file should be created as its own record in Dataverse with attachment and comments:
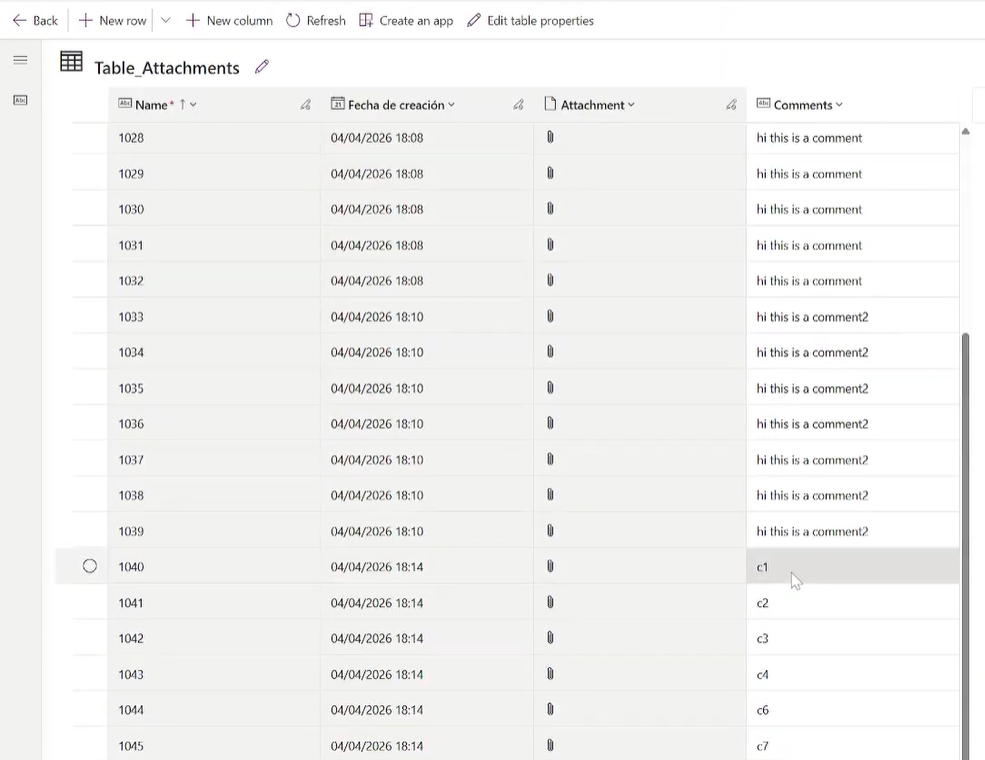
Dataverse Table Structure for Multiple File Uploads
Dataverse expects two attributes or columns when creating files from Power Apps: File Name and Value (content of the file).
					{
    'FileName': FileUploaded.Name,
     Value: FileUploaded.Value
}
Common issues when uploading files to Dataverse from Power Apps
A few sticking points come up when building this kind of flow:
- Attachment errors on Patch. If the object passed to the attachment column is missing either the FileName or Value property, the Patch call will fail. Dataverse specifically expects those two property names.
- Leftover errors after copying the attachment card. After copying the attachment data card out of the form and deleting the rest of the form, you may briefly see errors in the app — these clear once the unused/duplicate form is fully removed.
Best Practices for Power Apps and Dataverse File Uploads
- Name your ForAll loop variable. Using the “As” LoopVariable Name (or a similarly descriptive name) instead of the default ThisRecord makes formulas much easier to read and maintain.
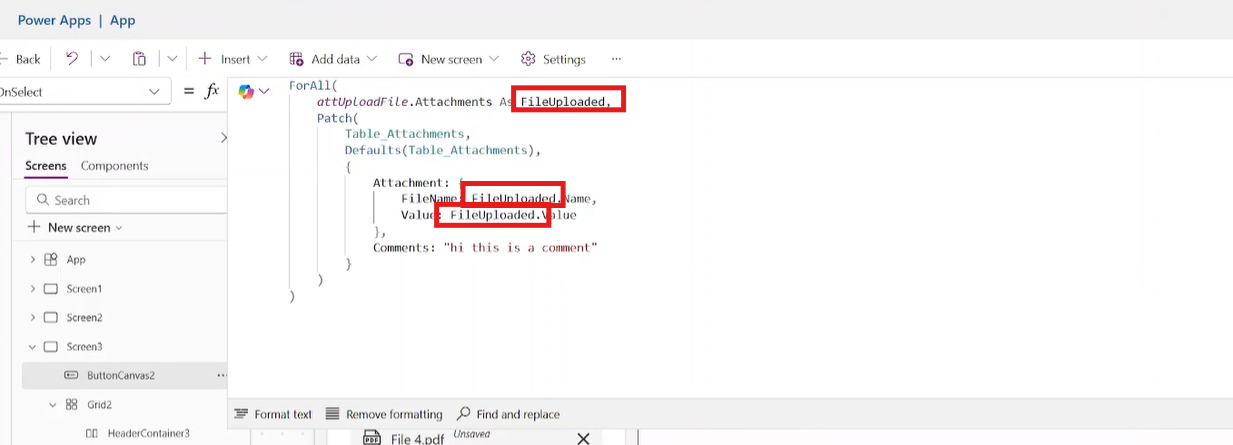
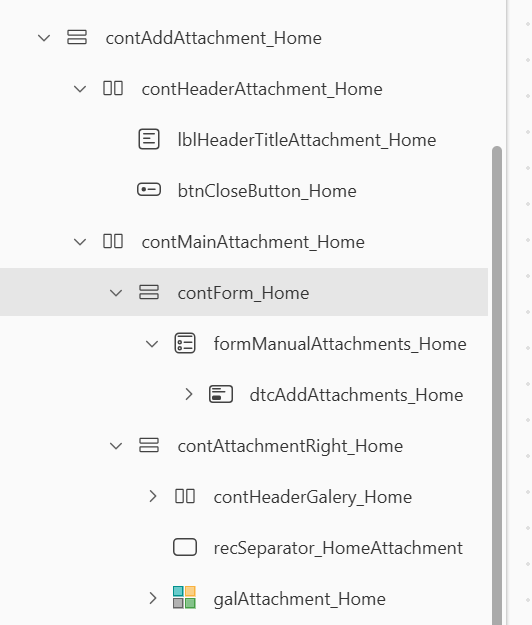
- Make sure to rename all the controls in the screen, it helps keep the code organized and tidy, and easier to read for your future yo
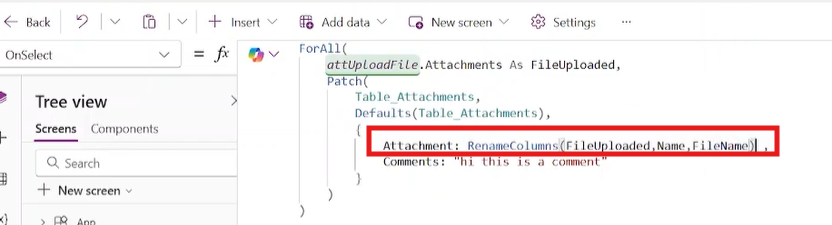
- Reuse the existing file object structure from the attachments controls if possible. Rather than manually building a {FileName, Value} object the RenameColumns function can be used to write less code:
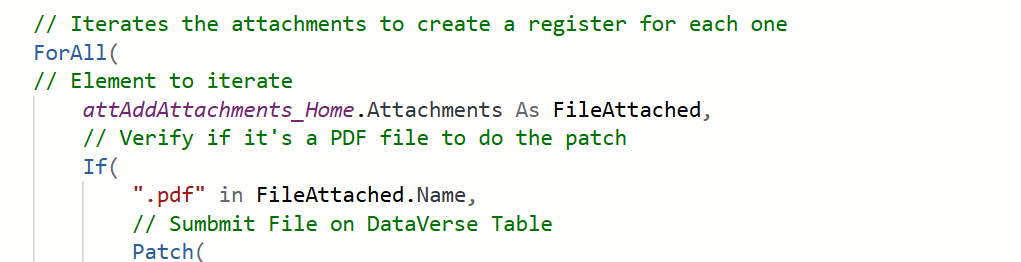
- Add comments to the code
Upload Files to Dataverse from Power Apps with PowerGI
At Power[GI] we can help you create forms and platforms that your team will enjoy using, incorporating useful features such as bulk uploads to Dataverse. Learn about our Power Apps services or contact us today.
Are you ready to discover the joy of automation?